What to Do After Self Cleaning Oven: A Practical Guide
Discover the essential steps after running a self-clean cycle: ventilate, wipe residue, inspect seals, and safely reset racks with expert guidance from Oven Cook Pro.

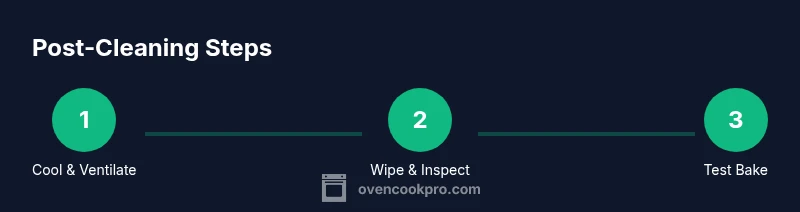
After a self-clean cycle, let the oven cool completely before touching any interior surfaces. Open windows or run a vent fan to clear lingering odors, then wipe away ash or soot with a damp cloth. Inspect the door gasket and racks for heat damage, and reinsert racks once the interior is dry to the touch. Do not use cleaners inside until it’s fully cooled.
What to do after self cleaning oven
After you run a self-clean cycle, the oven interior is extremely hot and coated with ash and residues. The critical first step is to allow it to cool completely, then begin a careful post-clean routine. The Oven Cook Pro team emphasizes that taking a measured approach reduces odor, prevents corrosion on gaskets, and makes maintenance tasks safer for home cooks. In this section we outline the immediate actions you should take to transition from a cleaning mode to ready-for-cooking readiness. This includes cooling, ventilation, and a quick interior wipe schedule that preserves the oven’s enamel and glass.
Ventilation and odor management
Odors are common after a self-clean cycle, especially if the kitchen is poorly ventilated. According to Oven Cook Pro analysis, running a vent fan or opening windows for 15-30 minutes significantly reduces lingering smells and minimizes possible irritation. In addition, keeping the kitchen area clear of clutter helps the exhaust circulate more effectively. This section covers practical tips to manage odors without masking them with overpowering scents.
Interior residue removal: wiping safely without scratching
Ash and soot can cling to interior surfaces even after cooling. The recommended approach is a gentle wipe with a damp microfiber cloth, followed by a dry wipe to remove moisture and prevent streaks. Avoid abrasive sponges or metal scrapers that could scratch enamel or glass. If stubborn patches resist, re-wipe with a fresh cloth and a light mist of water. Consistency matters more than force here, and frequent light wipes yield better results than aggressive scrubbing.
Inspect seals, hinges, and racks for heat damage
The self-clean cycle imposes intense heat on gaskets, hinges, and rack attachments. Examine the door gasket for signs of warping, cracking, or discoloration. Look at the hinges for any looseness or unusual stiffness. Check racks for warping or heat marks. If you notice damage or irregularities, postpone use until a professional evaluates and advises. Early detection helps prevent future malfunctions and costly repairs.
Exterior surfaces and door glass care
Exterior surfaces and the door glass can accumulate ash smudges and fingerprints after a cleaning cycle. Use a non-abrasive cleaner or a simple water solution with a microfiber cloth to wipe the exterior, including the stainless steel trim if present. Avoid spraying cleaners directly onto control panels. Dry the surfaces with a separate cloth to prevent water spots and maintain a pristine finish that mirrors meticulous maintenance.
Refit racks and perform a safe test bake
With interior dry, reinsert the racks carefully using oven mitts. If the manufacturer recommends, perform a brief test bake at a low temperature (around 350°F) for 5-10 minutes to confirm even heating and ensure there are no lingering odors. Do not place food during this test; monitor the oven and ventilate if any new smells arise. A brief heat check helps validate that everything is functioning normally.
Troubleshooting post-clean issues and when to call a pro
If you still notice odd odors, smoke, or uneven heating after the post-clean routine, this may indicate a deeper issue with insulation, seals, or wiring. Refer to your oven’s manual for safety steps and consider scheduling a service call if problems persist. The Oven Cook Pro team recommends documenting any symptoms (smells, noises, or error codes) to share with a technician, which speeds up diagnosis and repair.
Authority sources and next steps
This guide aligns with general appliance safety best practices from reputable sources. For broader safety context, you can consult federal guidance on home appliance usage from Energy.gov and safety tips from the Consumer Product Safety Commission. Ensuring that post-clean procedures stay within manufacturer guidelines is key to long-term reliability and kitchen safety.
Tools & Materials
- Heat-resistant oven mitts/gloves(to safely handle racks and door during and after cycle)
- Heat-safe tongs or long-handled tool(for removing racks without touching hot surfaces)
- Microfiber cloths(for ash removal and interior drying)
- Damp sponge or soft cloth(for damp wiping of interior and door glass)
- Spray bottle with water(gentle misting and rinsing; avoid cleaners inside while hot)
- Old towels or absorbent mats(to catch drips and protect counters during rack removal)
- Flashlight(to inspect tight corners and seals)
- Mild exterior cleaner (optional)(only for exterior surfaces once the interior is dry)
- Baking soda or white vinegar (odor neutralizer)(optional odor control if needed)
Steps
Estimated time: 60-75 minutes
- 1
Cool oven and ventilate
After the self-clean cycle ends, keep the door closed and allow the oven to cool completely. Open windows or run a vent fan to disperse odors and prevent irritation. This step reduces the risk of burns and prepares you for safe handling.
Tip: Do not open the door before it’s cool to avoid thermal shock and burns. - 2
Remove racks safely
Put on oven mitts, use tongs if needed, and lift racks one at a time. Place them on a heat-safe towel to cool before handling further. This minimizes the chance of dropping hot metal on a surface.
Tip: Support the rack with both hands to prevent slips. - 3
Wipe interior and door glass
Dampen a microfiber cloth with water and wipe interior walls and door glass in smooth, overlapping motions. Rinse cloth as needed and repeat until ash is removed and surfaces feel dry to the touch.
Tip: Work in small sections to prevent smearing and to monitor dryness. - 4
Inspect seals and hinges
Check the door gasket for signs of heat damage, warping, or cracks. Inspect hinges for looseness or unusual stiffness. If you notice any damage, avoid using the oven until a professional assesses it.
Tip: Use a flashlight to illuminate tight corners where residue can hide. - 5
Dry and re-install racks
Wipe all interior surfaces dry with a clean cloth, ensuring no moisture remains on heating elements or glass. Reinsert racks securely and ensure they slide in and out smoothly.
Tip: If the interior is humid, leave the door ajar for a short period to finish drying. - 6
Perform a short test bake
Preheat to a low temperature (around 350°F) for 5-10 minutes to confirm even heating and ensure there are no lingering odors. Do not place food during this test and monitor for any unusual smells.
Tip: Do not leave unattended; keep an eye on indicators and odors.
Questions & Answers
Is it safe to use the oven immediately after a self-clean cycle?
Safety hinges on the oven cooling completely and odors dissipating. Avoid using cleaners inside and ensure the interior is dry before cooking.
Yes, but only after it has cooled and you’ve wiped away any residue. Make sure the interior is dry before cooking.
Why does my oven smell after self-cleaning?
High heat can release residues and catalyst odors. Adequate ventilation usually resolves it within a short period.
Oven odors come from heated residues; ventilate for 15-30 minutes to clear it out.
How do I remove stubborn ash after self-clean?
Dampen a microfiber cloth and wipe in small sections. Repeat as needed, avoiding abrasive tools that could scratch enamel.
Wipe in small sections with a damp cloth, and repeat until clean.
How often should I run the self-clean cycle?
Only when necessary. Excessive cycles can cause wear on seals and insulation.
Only use self-cleaning when needed; frequent use can wear seals.
Can self-cleaning damage enamel or seals?
The cycle uses intense heat, which can stress seals over time. If you spot damage, contact a professional.
Yes, high heat can stress seals; if you see damage, call a pro.
Watch Video
Main Points
- Ventilate before and after post-clean tasks
- Wipe interior and inspect seals to prevent damage
- Reinsert racks only after drying completely
- Test bake to confirm safe operation
- Consult a pro if you notice damage or persistent odors