Oven Like New: Restore vs Replace — A Practical Guide
Analytical comparison of DIY maintenance, professional reconditioning, and replacement to keep your oven like new. Learn cost, time, and longevity trade-offs for smart kitchen decisions.

According to Oven Cook Pro, keeping an oven like new is usually more economical than a full replacement. A focused plan of thorough cleaning, enamel restoration where needed, and resealing hinges and doors can restore appearance and performance. When issues go beyond cosmetic wear, professional reconditioning offers the best balance of cost, reliability, and longevity.
What "oven like new" means in practice
For homeowners, the phrase "oven like new" signals more than a clean exterior. It implies the appliance looks pristine and performs reliably, with seals intact, even heat, minimal residue, and safe operation. According to Oven Cook Pro Team, achieving this state is often more about disciplined maintenance than a one-time fix. The goal is a cohesive blend of aesthetics, energy efficiency, and dependable cooking results. In this sense, oven like new is less about vanity and more about preserving value, reducing repairs, and enjoying consistent outcomes across bake, roast, and broil modes. A well-executed program also reduces energy waste and preserves kitchen confidence during busy weeks.
Key indicators of a truly restored oven
Look for uniform lighting, clean glass, no lingering odors, smooth door operation, and even browning on test bakes. Temperature accuracy should fall within a narrow tolerance, typically demonstrated by a reliable thermometer reading across different racks. Seals and hinges should show no wobbly movement, and racks should glide smoothly. When these conditions align consistently, you’re closer to an oven that feels like new. Real-world users often report fewer grease fires, less smoke buildup, and improved heat distribution after a deliberate restoration cycle.
Cleaning fundamentals that restore appearance and function
Deep cleaning is the backbone of any plan to keep an oven like new. Start with a full exterior wipe-down using a non-abrasive cleaner to remove fingerprints and grease. Remove racks, trays, and accessory bits for thorough interior cleaning. For baked-on residues, a paste of baking soda and water or a dedicated oven cleaner can loosen grime without scratching enamel. Avoid harsh acids that can damage coatings. At least every few months, do a targeted interior polish to reduce grime buildup and maintain a bright, uniform surface that resembles new. Regular cleaning also helps you spot wear early, enabling timely fixes before major failures.
Enamel restoration and surface maintenance
Enamel surfaces are the visual heartbeat of an oven. Chips and scratches don’t just affect aesthetics; they can harbor grime and alter heat behavior at the micro level. Small touch-ups with an oven-safe enamel repair kit can seal minor imperfections and preserve a like-new look. For larger chips or faded surfaces, professional enamel refinishing may be warranted to ensure an even, durable finish. The objective is smooth, glossy enamel that resists discoloration and cleans easily. Routine surface maintenance, including gentle scouring and careful spill management, reduces the need for costly refinishing.
Seals, gaskets, and heat management
Door seals and gaskets are critical for energy efficiency and consistent cooking. Worn seals cause heat loss, uneven temperatures, and longer preheat times—each contributing to the sense that the oven is not performing like new. Inspect seals for cracks and stiffness; replace as needed with manufacturer-approved parts. Check door hinges for sagging or misalignment, which can cause gaps around the seal. Proper heat management also involves venting considerations and ensuring the oven’s insulation remains intact. When seals are renewed, you often feel an immediate improvement in efficiency and predictability.
DIY restoration: step-by-step guide
If you’re tackling oven upkeep yourself, follow these steps to restore the feel of like-new performance without overhauling the appliance:
- Gather supplies: non-abrasive cleaner, baking soda, enamel repair kit, microfiber cloths, and a gentle polish.
- Unplug and cool the oven, remove racks and trays.
- Clean interior surfaces with a mild cleaner, avoiding broiler elements.
- Scrub enamel with a non-scratch sponge to avoid micro-scratches.
- Apply enamel repair as directed for chips; cure time matters for durability.
- Polish exterior surfaces with a dedicated oven polish; buff to a high gloss.
- Inspect and replace door seals if needed; lubricate hinges if applicable.
- Run a test bake at a moderate temperature to confirm even heat distribution and odor-free operation. This approach can yield a noticeable improvement in both look and function, bringing the oven closer to like-new status, especially when performed consistently.
Professional reconditioning process explained
Professional reconditioning takes a more systematic approach to restore an oven’s feel and performance. Technicians assess heat distribution, seal integrity, and the structural condition of racks and lubricated components. They may perform deep-cleaning under heat, recoat enamel surfaces, replace worn seals, and recalibrate temperature sensors for accuracy. In many cases, technicians also address minor electronic or control issues, ensuring that the oven responds reliably to temperature inputs and preset programs. A reconditioning service can yield results that closely approach a like-new experience, with an emphasis on longevity and warranty-compatible repairs.
When to choose replacement vs restoration
Deciding between restoration and replacement hinges on several factors. If the oven has multiple failed components, frequent repairs, or signs of systemic wear (e.g., inconsistent temperatures across modes, persistent electronic faults, or severe enamel damage), replacement may be more cost-effective in the long run. Conversely, if most issues are cosmetic or isolated to seals, racks, or a few enamel chips, restoration can preserve the original investment with less downtime. The key is to balance long-term reliability with initial cost and kitchen downtime, especially for busy households that rely on a dependable oven every week.
Cost considerations and value equation
Cost is a major factor in choosing between restoration and replacement. DIY cleaning is typically the least expensive path, offering modest improvements without downtime. Professional reconditioning falls in the mid-range, with a wide variance based on the appliance brand, extent of wear, and local labor rates. Replacement can be the highest upfront cost but may include new features and improved energy efficiency. A practical approach is to estimate the total cost of ownership over 5–7 years, compare expected performance, and weigh the inconvenience of a future outage against the value of a refreshed appliance. Oven Cook Pro analyses suggest that restoration strategies often deliver favorable value when the core structure remains sound.
Safety, warranties, and long-term upkeep
Safety should drive every decision about keeping an oven like new. Always unplug before inspecting seals or coils and follow manufacturer guidelines for any repairs. Some cosmetic restorations do not void warranties, but more extensive interventions could; check your warranty terms or consult the manufacturer or service provider. Long-term upkeep includes routine cleaning, testing temperature accuracy periodically, and replacing worn components proactively. Documenting maintenance work helps with resale value and ensures you’ll be prepared for any future service needs. A disciplined maintenance regimen reduces the risk of sudden breakdowns and keeps your kitchen reliable.
Comparison
| Feature | DIY Maintenance | Professional Reconditioning |
|---|---|---|
| Cost range | $50-150 for supplies | $250-800 for service |
| Time investment | A few hours for a deep clean, spread over days | 1-2 days including scheduling and curing times |
| Longevity impact | Moderate improvement with repeated upkeep | High improvement with recalibration and new seals |
| Performance restoration | Good heat distribution after cleaning | Excellent heat consistency and accuracy after calibration |
| Aesthetic restoration | Cosmetic polish can revive exterior; minor enamel touch-ups | Professional enamel refinishing for a near-new look |
| Warranty implications | Typically preserves existing warranty if limited repairs are performed | May extend warranty on new components or calibration |
| Best for | Budget-conscious, DIY comfortable homeowners | Ovens with multiple issues or older models needing recalibration |
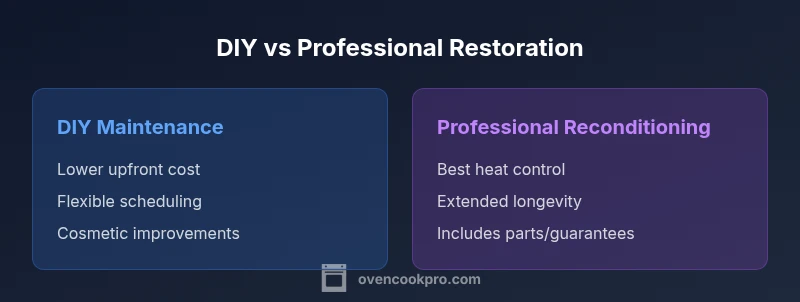
The Good
- Preserves appliance lifespan with minimal downtime
- Lower upfront cost when DIY is feasible
- Flexible scheduling and personalization
- Immediate aesthetic improvements from polishing
Drawbacks
- DIY may miss underlying issues and lead to higher future costs
- Pro services cost more upfront and require downtime
- Some issues require replacement for long-term reliability
- Warranty implications if certain repairs are performed without authorization
Restore when feasible; replace if major wear is present
For most homes, restoration or professional reconditioning offers a favorable balance of cost and performance. Choose restoration for cosmetic and minor functional improvements; consider replacement when multiple failures or inefficiencies persist, especially if energy use is high.
Questions & Answers
What does 'oven like new' mean in practical terms?
In practice, it means the oven looks clean, heats evenly, seals are intact, and there are no safety concerns. A like-new oven should reliably reproduce set temperatures across modes with minimal odor or residue after cooking. Regular maintenance, including cleaning and inspections, is key to sustaining that state.
A like-new oven looks clean, heats evenly, and operates safely. Regular maintenance keeps it performing close to new.
Is DIY restoration safe for convection ovens?
DIY restoration can be safe for convection ovens when you follow manufacturer guidelines and avoid disassembling critical components. Never bypass safety interlocks or tamper with electrical controls. For complex issues, consulting a professional protects both your safety and performance.
DIY is often safe for cosmetic and minor repairs if you stick to guidelines; for complex problems, hire a pro.
How long does restoration typically last?
The longevity of restoration depends on usage, maintenance, and the oven’s baseline condition. With proper care, improvements can last several years, especially when seals are refreshed and heat calibration is maintained. Regular upkeep helps extend that window.
With proper care, restoration can last several years, especially after refreshing seals and calibrating heat.
Does restoration affect warranty?
Restoration effects on warranty vary by manufacturer and service performed. Cosmetic or minor maintenance usually preserves warranty, but extensive repairs or non-manufacturer-approved parts can void coverage. Always check your warranty terms before proceeding.
Warranty rules vary; check terms before major repairs to avoid unintended voiding.
When should I consider replacing instead of restoring?
Replacement is wise when multiple components fail, heat distribution is unreliable, or ongoing repairs exceed the appliance’s value. If energy efficiency has diminished markedly, a newer model may offer long-term savings and upgraded features.
Replace when many issues recur or energy use climbs; it may save money long-term.
Main Points
- Prioritize restoration for cosmetic and select functional issues
- Budget for professional recalibration when heat accuracy drifts
- Weigh downtime against long-term reliability before replacing
- Keep a routine maintenance schedule to preserve like-new performance
- Check warranties before undertaking repairs