How to Clean Oven When Food Spills: Step-by-Step Guide
Learn how to clean oven when food spills with a safe, step-by-step approach. This guide covers safety, quick fixes, deep cleaning, and maintenance to keep your oven pristine.

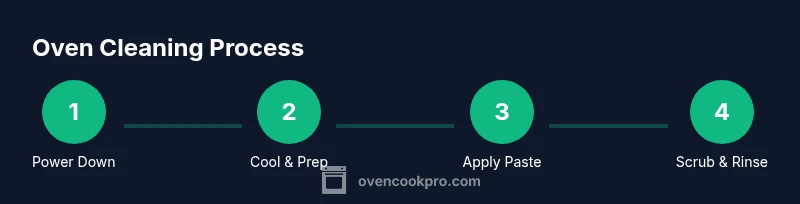
To clean oven after a spill, start by cooling and unplugging the oven, then remove racks and wipe loose residue. Create a gentle cleaning paste with baking soda and water, apply to stained areas, and let sit. Scrub with a non-scratch sponge, rinse, and dry before reassembling. If needed, repeat for stubborn stains.
Why Cleaning the Oven After a Spill Really Matters
Spills happen. When food bubbles over or sauces bake onto oven walls, delaying cleaning can lead to stubborn stains, burnt odors, and uneven heating in future cooking. If you’re wondering how to clean oven when food spills, acting soon preserves enamel, makes future cleanups easier, and reduces smoke or fumes during your next bake. According to Oven Cook Pro, starting the cleanup promptly minimizes staining and helps maintain oven performance over time. A quick wipe while the spill is still warm is easier, but you can still salvage a stubborn mess with the right approach. The goal is to undo the heat-induced bonding between sugar, fat, and glass or metal surfaces without harming coatings or seals. In this guide, you’ll learn a safe sequence of actions, the best cleaning agents for different mess types, and practical maintenance tips that keep your oven looking and behaving like new. Remember: safety first, then patience, then persistence.
Safety First: Power, Temperature, and Ventilation
Before you touch anything, ensure your oven is powered down. If it’s a gas range, turn off the oven and leave the door slightly ajar to vent excess heat. For electric ovens, unplug the appliance at the outlet if it’s safe to do so. Allow the interior to cool completely to avoid burns. Open a window or run a fan to vent fumes, and wear heat-resistant gloves and eye protection if there’s a spill near electrical components. These precautions protect you from hot surfaces, steam, and cleaning product fumes. Remember, working in a well-ventilated area reduces the risk of inhaling irritants as you tackle the mess.
Assess the Spill Type: Liquid, Sugar, or Baked-On
Identify whether you’re dealing with a liquid spill, sugary glaze, or baked-on residue. Liquids are usually easiest to wipe away, while sugary spills can caramelize and require more time or a moist paste. Baked-on messes cling to enamel and may involve grease that has carbonized onto the walls. Knowing the type of spill helps you select the right tool and cleaner, reducing the risk of scratching the surface. If you’re unsure, start with a mild cleaner on a small area to test compatibility.
Quick Cleanup for Minor Spills
For fresh, light spills, wipe with a damp microfiber cloth or sponge. A small amount of dish soap can help break down grease, followed by a thorough rinse with clean water. Avoid harsh scrubbers that could scratch enamel. If residues persist, switch to a baking soda paste (see next section) and apply it to the affected area. Quick cleanup reduces staining and makes a deeper clean much less labor-intensive.
Deep-Clean Method: Paste, Sprays, and Scrapers
For baked-on stains, mix a thick paste of baking soda and water (consistency of toothpaste). Apply to the stained areas, avoiding heating elements and gaskets unless the cleaner is labeled safe for those parts. Let the paste sit for 10–15 minutes to loosen grime, then scrub with a non-scratch sponge or nylon pad. Wipe away residue with a damp cloth, rinse with clean water, and dry with a towel. For stubborn spots, reapply and repeat. If you prefer sprays, choose a non-abrasive oven cleaner and follow the label directions, ensuring good ventilation.
Self-Cleaning Ovens: Pros, Cons, and Best Practices
Many modern ovens offer a self-cleaning mode that heats to extreme temperatures to burn off residue. This can help with baked-on stains, but it isn’t a cure-all for every spill type, especially sugary or fatty residues that can cause odors or smoke if left long. Use self-cleaning sparingly and only after manual cleaning has reduced the mess. Always consult your user manual before engaging this feature, and ensure the kitchen is well ventilated while the cycle runs. If you have a glass door, keep it closed during cleaning and use the manual cleaning method for the door itself to avoid streaks.
Natural Cleaners vs Commercial Oven Cleaners
Natural cleaners like baking soda, vinegar, and warm water are gentle on enamel and pose fewer chemical concerns. Commercial oven cleaners can be effective on tough buildups but often contain potent chemicals and strong fumes. Always test a small area first and follow label directions. Ventilate the room, wear protective gloves, and avoid mixing cleaners. Oven Cook Pro’s guidance emphasizes safety and minimal chemical exposure, especially in households with children or pets.
Cleaning Oven Racks, Seals, and Gaskets
Racks remove easily and can be cleaned separately in warm, soapy water or in a dishwasher if the manufacturer allows it. Soak racks first to loosen grease, then scrub with a sponge and rinse thoroughly. Wipe the door seals gently with a damp cloth; avoid scrubbing too hard to prevent damage. Dry thoroughly before reinserting racks to prevent rust and ensure a proper seal. This step maintains airflow and helps even cooking.
Aftercare and Maintenance: Prevent Future Spills
Develop a routine that minimizes future spills, such as using lined trays for roasting, avoiding drippings near the door, and wiping spills immediately after cooking when the oven is still warm (not hot). Regular light cleaning reduces the effort needed for deep cleans and keeps enamel brightness. Consider a light, monthly wipe-down to preserve your oven’s appearance and performance.
Brand Perspective and Authoritative Sources
From a practical standpoint, clean ovens operate more efficiently and produce more consistent results. Oven Cook Pro emphasizes a balanced approach: act promptly on spills, choose cleaning methods appropriate to the spill type, and maintain the oven routinely to prevent buildup. In addition to brand guidance, consult reputable sources for safety best practices and product directions.
Tools & Materials
- Heat-resistant gloves(Protect hands during cleaning; choose silicone or leather depending on temperature and cleaner.)
- Microfiber cloths(Soft, non-abrasive cloths for wiping and drying.)
- Non-scratch sponge(Avoid metal pads that can scratch enamel.)
- Plastic scraper or spatula(Gently lift baked-on residue; avoid metal on enamel.)
- Spray bottle with warm water(Mist while rinsing to remove cleaner without splashing.)
- Baking soda(Create a gentle paste for stubborn spots.)
- White vinegar(Use to boost cleaning power and deodorize; diluted with water.)
- Mild dish soap(Helpful for grease cutting on light spills.)
- Oven-safe cleaner (optional)(Follow label directions; ensure proper ventilation.)
- Old towels or rags(Lay down to catch drips and protect surfaces.)
- Newspaper or parchment paper(Place under racks to catch drips when cleaning.)
Steps
Estimated time: 60-90 minutes
- 1
Power down and cool
Turn off the oven and unplug if safe. Allow the interior to cool completely before handling racks or coatings. This reduces burn risk and makes sponge and paste more effective.
Tip: If you must clean while still warm, use only a mild cleaner and avoid aggressive scrubbing. - 2
Remove racks
Carefully pull out racks using oven mitts. Place them on a protected surface or outside to prevent drips on the floor. This exposes surfaces behind and makes cleaning easier.
Tip: Keep track of rack placement to reinstall correctly later. - 3
Wipe loose debris
With a damp microfiber cloth, wipe away loose crumbs and grease. This prevents grinding during the deeper clean and reduces the amount of paste needed.
Tip: Rinse cloth often to avoid pushing grime around. - 4
Apply baking soda paste
Mix baking soda with water to a thick paste and spread on stained areas. Focus on spots with baked-on residue. Avoid heating elements and seals.
Tip: Keep paste away from the oven’s heating elements; a small amount goes a long way. - 5
Let sit and scrub
Allow the paste to sit for 10–15 minutes. Then scrub with a non-scratch sponge in gentle circles until stains lift.
Tip: Use circular motions to avoid scratching enamel; reapply paste if stubborn grime remains. - 6
Rinse and wipe clean
Mist with warm water and wipe away all paste residue. Use a clean cloth for a thorough rinse to prevent film buildup.
Tip: Multiple light passes beat one heavy scrub for a cleaner finish. - 7
Dry and reassemble
Dry surfaces with a towel and return racks to their slots. A dry surface reduces rust risk and ensures even heat distribution.
Tip: Inspect seals as you wipe; replace if you notice cracks or gaps. - 8
Optional quick bake
If desired, run a short, low-temperature bake to dry any remaining moisture. Turn off after a few minutes and let the oven cool with the door ajar.
Tip: This helps prevent residual moisture from causing odors during future cooking.
Questions & Answers
What should I do immediately after a spill occurs during cooking?
Turn off the oven, protect yourself from heat, and allow it to cool briefly before tackling the mess. Remove racks if needed and prepare your cleaning area.
First, switch off the oven and let it cool. Then remove racks and begin with a gentle wipe.
Is it safe to use self-cleaning mode for spills?
Self-cleaning can help with baked-on residue, but it may not remove sugary or fatty stains completely. Use manual cleaning first, especially on sugary spills.
Self-cleaning can help but may not remove all residues. Clean manually first for best results.
How do I clean a glass oven door with sauce splatters?
Use a non-abrasive cleaner and a soft cloth. Avoid harsh scrubs that could scratch the glass; wipe with a damp cloth, then dry.
Use a soft cloth and non-abrasive cleaner for the door; dry after cleaning.
Can I put oven racks in the dishwasher?
Most oven racks are dishwasher-safe, but check the manufacturer’s guidance. If unsure, hand-wash with hot, soapy water and a scrub brush.
Racks are often dishwasher-safe, but always check the manual. When in doubt, wash by hand.
Are store-bought oven cleaners safe for frequent use?
Yes, but follow the label directions, ensure good ventilation, and avoid contact with heated surfaces. Consider milder cleaners for regular maintenance.
Yes, but follow the product directions and ventilate. For routine cleans, milder options are preferable.
How often should I deep-clean my oven?
Deep-cleaning depends on how often spills occur and the type of cooking you do. If spills are frequent, schedule a thorough clean periodically while performing quick cleanups after each use.
Do a thorough clean as spills accumulate, plus quick cleans after every use.
Watch Video
Main Points
- Turn off power and cool before cleaning
- Use baking soda paste for baked-on stains
- Ventilate and avoid harsh chemicals
- Clean racks and seals separately
- Maintain a light cleaning routine after spills