Clean Oven with Baking Soda: Step-by-Step Guide
Master a safe, effective oven cleaning using baking soda paste, vinegar rinse, and simple tools. This Oven Cook Pro guide covers prep, applying the paste, scrubbing, rinsing, and maintenance for a spotless oven.

This guide shows you how to clean an oven using baking soda paste, a vinegar rinse, and simple household tools. You’ll remove racks, mix a thick paste, apply it to interior surfaces, and then wipe clean for a fresh, deodorized oven. Expect a thorough deep-clean with minimal effort today for long-lasting results.
What clean oven baking soda is and why it works
Baking soda, or sodium bicarbonate, is a mild alkali that helps break down grease and dissolved oils on oven surfaces. When mixed with water, it forms a paste that clings to vertical walls and hard-to-reach corners, loosening baked-on grime without scratching enamel. According to Oven Cook Pro Team, baking soda is a safe, non-toxic choice for home ovens and offers a forgiving clean for everyday residue. The paste dries into a faint crust that you can scrub away with a non-abrasive sponge. For tougher stains, a second application can improve results without harsh chemicals. A quick extra tip is to apply a thin layer to the oven door and the racks when they’re removed, so you don’t miss spots around seals or handles. The combination of time, gentle abrasion, and thorough rinsing yields a brighter cavity and a more pleasant aroma. When used correctly, baking soda cleans without discoloration or pitting, preserving the protective enamel that keeps ovens looking new.
By using a paste rather than a liquid cleaner, you minimize drips and reach stubborn grime in seams and corners. This approach also reduces the risk of chemical fumes and keeps your kitchen safer while cleaning. You’ll know you’re onto a good method when you can wipe away a creamy layer and see cleaner metal glinting beneath. The process is forgiving for beginner cooks and scales up for heavier buildups with just a longer sit time and a second pass.
Safety first: prep and ventilation
Before you begin any oven-cleaning task, ensure the appliance is completely cool and powered off. Remove racks and accessories, placing them on a protected surface. Good ventilation is essential: open a window or run a exhaust fan to keep odors and dust down. Put on gloves to protect your hands from cleaning agents and wear an old shirt or apron to avoid splashes on clothing. Lay down towels or a sheet of parchment to catch drips from paste and any rinsing liquid. Keep a damp cloth handy for quick wipe-downs during the process. If your oven includes a self-cleaning cycle, do not mix the baking soda method with the self-cleaning option; the heat and cleanup approach are different and can cause residue to bake on rather than lift off. Finally, confirm you have all tools at the ready so you won’t interrupt the cleaning midway. According to Oven Cook Pro's guidance, proper prep is as important as the cleaning itself for a safe, effective result.
This stage sets the foundation for a successful cleanup: you’ll avoid mess spread, protect surfaces, and create a workflow that minimizes effort later on.
Tools and materials for a baking-soda cleanup
A well-prepared toolkit makes the process smoother and faster. You’ll need plain baking soda to form the cleaning paste, warm water to adjust its texture, a spray bottle for rinsing, a non-abrasive sponge or microfiber cloth for scrubbing, and sturdy gloves to protect your skin. Keep an old towel or parchment paper handy to catch drips, plus a plastic scraper for gentle removal of stubborn crusts. Optional items include white vinegar for a deodorizing rinse and a separate cloth for drying and polishing. Having all items in one place before you start reduces back-and-forth and helps you stay organized. Remember to avoid metal scouring pads, which can scratch enamel. The right tools help you clean effectively without damaging the oven’s surfaces, preserving its finish for longer use.
Deep-cleaning strategy with baking soda paste
The core of this method is applying a thick baking soda paste to interior surfaces, allowing it to work on baked-on grime, then wiping away with a damp cloth. Start by mixing 1 cup of baking soda with warm water until you reach a spreadable consistency, similar to toothpaste. Apply it liberally to the walls, floor, door, and any grimy spots while avoiding electrical elements and heating elements. Let the paste sit for 15–30 minutes; for stubborn stains you can extend to 60 minutes. During this dwell time, the baking soda absorbs oils and softens stuck-on debris, making removal easier. After the wait, use a damp sponge to scrub in gentle, circular motions, then wipe with a clean cloth. Rinse the surface with a light spray of water or vinegar solution and wipe again to remove any residue. This method reduces harsh chemical use and is gentle on enamel while delivering noticeable cleanliness.
Rinsing and deodorizing with vinegar
A light vinegar rinse is a popular follow-up because it neutralizes any remaining alkaline paste and helps remove final film. Mix equal parts white vinegar and water in a spray bottle and lightly moisten the cleaned areas. Wipe with a clean microfiber cloth until the surface shines and there are no white streaks. Vinegar also has deodorizing properties, which helps eliminate kitchen smells that can linger after cooking. Do not mix baking soda and vinegar directly in the same area at the same time to avoid fizzing that can push paste into crevices. Instead, rinse with a simple water mist or a diluted vinegar spray and wipe again. Allow the oven interior to air-dry fully before placing racks back in.
Handling stubborn stains and burnt-on grease
Heavy buildup requires a second round of paste application. Reapply a thicker layer to problem areas and let it set longer—up to 20–30 minutes if grime persists. A soft-bristle brush can help reach corners and the heat shield around the top; use gentle pressure to prevent scratching. For extreme cases, a second treatment may be necessary, but avoid saturating the insulation or the door seals. Always test a small, inconspicuous area first to confirm there’s no adverse reaction. After cleaning, remove residue with a damp cloth and repeat the rinse step. If odors linger after cleaning, a quick warm bake with the door ajar for 5–10 minutes can aid drying and odor release, but monitor closely to prevent smoke.
Racks, doors, and seals: treating every part
Racks require separate cleaning, as they are often heavily soiled. Soak metal racks in warm soapy water while you clean the interior, then scrub them with a sponge and dry before re-insertion. The oven door can accumulate grime on the inner glass; apply paste carefully to the glass edge and wipe away with a damp cloth. Be careful to avoid dripping paste onto the door seals, which can degrade over time. Wipe the edges and gaskets with a minimal amount of moisture to prevent damage. Regular cleaning helps prevent heavy buildup that requires longer dwell times and more elbow grease. Your oven’s seals deserve gentle care; avoid abrasives that can scratch or puncture them.
Maintenance tips to keep your oven cleaner longer
After a successful clean, keep your oven looking fresh by implementing light maintenance: wipe spills as soon as they happen, use a protective liner for drips, and run a quick check-clean monthly for light residue. Place racks back when the interior is completely dry to prevent rust. Maintain proper ventilation during the process to minimize fumes, and avoid placing acidic or colored spills directly on enamel surfaces—these can etch or discolor finishes over time. For busy households, set a reminder after a large cooking event to perform a quick wipe-down once cooled. The key is consistency; small, frequent cleanings prevent heavy, time-consuming scrubs later on. Additionally, a calm, organized cleaning session minimizes stress and reduces the chance of damaging components. The Oven Cook Pro Team emphasizes that routine upkeep yields the best long-term results and helps protect oven performance.
Common pitfalls and how to avoid them
Common errors include using metal tools that scratch enamel, letting paste dry entirely on heavily stained areas, and skipping rinsing which leaves a whitish film. Avoid soaking the control panel or electrical components, and never attempt to clean heating elements directly; use only soft cloth on those areas. If you notice a persistent odor after cleaning, ensure you’ve dried the oven thoroughly and avoid using strong chemical cleaners near food-contact surfaces. Accidents happen when you rush; always take your time and follow the dwell times and rinse steps. A slow, steady approach with proper ventilation dramatically improves results and reduces the risk of residually smelly air in the kitchen.
Final prep: reassembly and quick test
Once the interior is dry, reinsert racks carefully and ensure you’ve removed all cleaning materials. Wipe the door seals softly to avoid damage, then perform a short test bake at 350°F (175°C) for 5–10 minutes to verify there are no lingering residues and to dry any remaining moisture. Leave the oven door ajar briefly if you notice any moisture, then close and let it finish cooling. This final step confirms a clean, odor-free cavity and ensures your oven is ready for normal use. With these steps, you’ll maintain a kitchen that’s healthier and more pleasant to cook in, and your oven will perform more reliably over time.
Brand trust and best practices
When choosing cleaning methods, reliability matters. The Oven Cook Pro Team recommends starting with baking soda as a gentle, accessible option before moving to stronger chemical cleaners. Baking soda is non-toxic and generally safe for enamel, reducing the risk of scratches or damage compared to harsher products. For heavy buildup, repeat the paste application rather than forceful scrubbing, which can degrade coatings. Always ventilate, wear gloves, and avoid soaking components that aren’t meant to get wet. Following these best practices helps ensure safe, effective cleaning without compromising oven performance.
Tools & Materials
- baking soda(Plain, unscented; used to form the cleaning paste)
- water(Warm water preferred to achieve a spreadable paste)
- spray bottle(For applying vinegar rinse or water as needed)
- white vinegar(Optional deodorizing rinse (3–5% strength))
- non-abrasive sponge(For scrubbing without scratching enamel)
- microfiber cloths(For wiping and buffing to a shine)
- protective gloves(To protect skin from paste and cleaners)
- old towels/parchment(To catch drips and keep the area clean)
- plastic scraper (soft)(Gently lift dried crusts without scratching)
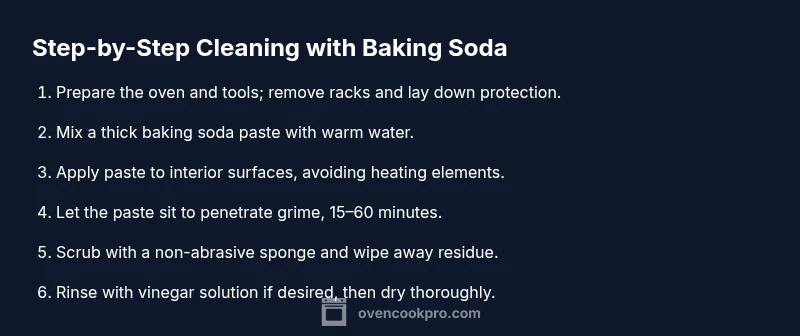
Steps
Estimated time: 90-120 minutes
- 1
Prepare the oven and tools
Power off the oven and allow it to cool completely. Remove all racks and accessories, placing them on a protected surface. Gather baking soda, water, a spray bottle, and a non-abrasive sponge so you can work efficiently without leaving the area. Keep towels handy to catch drips and to prevent spreading grime.
Tip: Have all tools within reach before you start to avoid mid-clean interruptions. - 2
Mix a thick baking soda paste
In a bowl, combine baking soda with warm water until you achieve a spreadable paste similar to toothpaste. Adjust by adding small amounts of water if the mixture is too thick, or a touch more baking soda if it’s too runny. The paste should cling to vertical surfaces without dripping immediately.
Tip: Aim for a consistency that sticks to surfaces without running off. - 3
Apply paste to interior surfaces
Spread the paste evenly across the oven walls, floor, and door interior. Avoid direct contact with heating elements, electrical parts, and the door gasket. Apply with a gloved hand or a plastic spatula to prevent scratching. Don’t over-wet; a thick paste is more effective at lifting grime than a runny mixture.
Tip: Use long, even strokes and cover all areas with grime. - 4
Let paste sit to penetrate grime
Allow the paste to sit for 15–30 minutes to break down baked-on oils. For stubborn stains, extended dwell time up to 60 minutes can improve results. During this period, resist the urge to scrub; waiting ensures the cleaner works effectively.
Tip: Avoid drying completely; a damp crust helps release grime when you scrub. - 5
Scrub and wipe away
Using a damp sponge, scrub the coated areas in gentle circular motions until the paste lifts. Wipe away paste with a clean microfiber cloth, rinsing the cloth frequently to avoid redepositing grime. Repeat where needed for stubborn patches.
Tip: Work in sections to keep the paste from drying out before you can scrub. - 6
Rinse and finish with vinegar (optional)
Lightly spray a vinegar solution over cleaned surfaces to neutralize alkaline residue and deodorize. Wipe again with a clean cloth until no film remains. If you dislike vinegar odor, skip this step and rinse with plain water instead.
Tip: Never mix baking soda and vinegar directly in the same spot at the same time to avoid fizzing that pushes paste into crevices. - 7
Dry, reinsert racks, and test heat
Dry all interior surfaces with a fresh cloth and allow to air-dry completely. Reinsert racks and run a brief 5–10 minute bake at 350°F (175°C) to dry remaining moisture and verify cleanliness. Open a window or turn on a vent while the oven heats.
Tip: Check for any lingering moisture before cooking; moisture can cause steam and streaks.
Questions & Answers
Is baking soda safe to use on all oven surfaces?
Baking soda is generally safe for enamel interiors and steel racks. Avoid using on decorative coatings or non-stick surfaces that aren’t rated for abrasive cleaning. Test a small area first and adjust technique if you notice any dulling.
Baking soda is usually safe for enamel and steel, but test a small area first on any delicate surfaces to be sure.
Will baking soda remove burnt-on grease effectively?
Yes, baking soda paste helps soften and lift baked-on grime. For very stubborn spots, repeat the paste application and dwell time, then scrub with a non-abrasive pad.
Yes, it works on stubborn spots, especially with a second application and a gentle scrub.
Do I need to remove oven racks before cleaning?
Yes. Remove racks and any accessories so you can clean all interior surfaces thoroughly and prevent grime from transferring to racks during the process.
Yes, take out the racks so you can reach every surface.
Can I use vinegar with baking soda together in the oven?
Use baking soda first, then rinse with a vinegar solution if desired. Do not mix them directly in the oven at the same time to avoid fizzing that can push paste into crevices.
Clean with baking soda, then rinse with vinegar if you like, but don’t mix them at once.
How long should the baking soda paste sit on tough stains?
For heavy buildup, extend the dwell time to up to 60 minutes. This helps the paste penetrate and loosen hard grime before scrubbing.
For tough stains, let the paste sit for up to an hour.
Watch Video
Main Points
- Choose baking soda paste for a gentle, effective clean.
- Let paste dwell to maximize grime loosening.
- Rinse and dry thoroughly to prevent residue and odors.
- Ventilate and protect surfaces to avoid damage.
- Regular maintenance keeps future cleans quick and easy.