What Oven Rack to Bake Pumpkin Pie: A Step-by-Step Guide
Learn the best oven rack position for pumpkin pie, plus preheating, parchment use, and timing. This step-by-step guide from Oven Cook Pro helps home bakers achieve a perfectly browned crust and creamy filling.

With this guide, you’ll know exactly what oven rack to bake pumpkin pie on to achieve light, evenly baked filling and a browned crust. You’ll assess rack height, preheat properly, and position the pan for air circulation. The quick answer covers the essential steps, common mistakes to avoid, and how to adjust for pie size and bake time.
Why rack position matters for pumpkin pie
The rack you choose and the exact position of your pan in the oven influence how heat reaches every part of the pie. For pumpkin pie, you want a crust that browns evenly and a filling that sets without overcooking. The question what oven rack to bake pumpkin pie is answered by prioritizing a stable heat environment with ample air circulation around the pan. A middle rack in most standard ovens provides a balanced heat source, reducing the risk of a pale crust on top or a soggy bottom. In practice, start with this default, observe how your oven behaves, and adjust in small increments if you notice hot spots or uneven browning. Oven Cook Pro’s analysis shows that this mid-position often yields the most reliable results for home bakers, especially when you’re using a conventional range. If your oven has two racks and you’re baking more than one item, place the pie on the center between them to maximize airflow and minimize direct exposure to any one heating element. Consistency in rack placement matters as much as the recipe itself when you bake pumpkin pie.
How to choose the right rack and pan
The rack choice goes hand in hand with pan selection. A sturdy pie dish (glass or ceramic) helps conduct heat evenly and supports the crust as it browns. Avoid placing the dish directly on a bare rack if you’re worried about heat concentration; instead, position it with a safe buffer of air around the sides. If your oven offers adjustable rack heights, the middle setting is a reliable starting point for what oven rack to bake pumpkin pie. The pan size also affects heat transfer; a 9-inch pie plate is the standard that most recipes assume and yields predictable results. When you place the pan, keep it centered and ensure there’s clearance from the oven walls to prevent scorching on the edges. For cleanup ease, some bakers opt for parchment under the pie; this can be helpful, but it’s not required for even baking. Oven Cook Pro recommends a calm, methodical approach rather than rushing decisions about rack readiness.
The recommended rack height for pumpkin pie
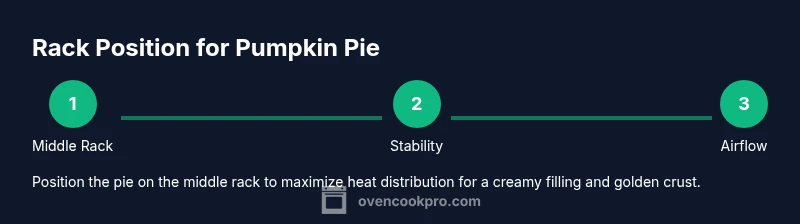
For consistent results, position the pie on the middle rack in most home ovens. The goal is to keep the pie away from direct heating elements and the oven walls while allowing the crust to bake without tipping toward dryness. If your oven has two racks, place the pie on the center between them, avoiding direct exposure to the upper or lower elements. Centering the pie also makes it easier to rotate the dish if you notice hot spots during baking. Different oven models may feel different, so treat the middle rack as your baseline and adapt if you observe uneven browning after your first bake. Remember that consistency matters; once you find a rack height that works for your oven, stick with it for future pumpkin pies to keep the results steady.
Prepping your oven and rack for baking
Before you bake, ensure the oven is preheated to a moderate temperature and the rack is clean and stable. Place the pie on a rack that’s free of obstructions and centered in the oven. If you’re using parchment paper for easier cleanup, position it so it won’t interfere with air flow around the pan. Slide the rack in slowly with oven mitts and confirm the dish is centered. Reserve extra hands-free space around the pan to avoid accidental nudges that could disrupt the crust. A steady, controlled environment helps achieve that classic, gently browned crust and puffed but delicate filling when you bake pumpkin pie.
Troubleshooting common issues while baking pumpkin pie
Uneven browning is the most common issue when people ask what oven rack to bake pumpkin pie. If the crust browns too quickly, shield the edges with foil or a crust protector and check the center for doneness. If the center remains too soft, you may need a bit more bake time or a gentle, short increase in heat toward the end. If you notice the filling cracking as it cools, ensure the pie has fully cooled before slicing and avoid cutting too soon. Ensure air can circulate around the pie by avoiding crowding pans on the same rack. Practical adjustments like rotating the pie or shifting the position of a second rack can balance heat and improve overall texture.
Adapting for pie sizes and crust thickness
Pumpkin pies come in several sizes; your rack strategy should stay consistent for even results. If you switch from a 9-inch to an 8-inch pie dish, the crust thickness changes and you may need a touch more bake time. Conversely, a larger 10-inch pie will bake faster on the same rack, so monitor carefully. The central lesson is to keep the pie on the middle rack for uniform heating across sizes, then rely on visual cues of doneness rather than rigid times. When you bake pumpkin pie, this approach helps you achieve reliable crust color and a creamy, set filling regardless of pan size.
Tools & Materials
- 9-inch pie dish (glass or ceramic)(Ensure it fits comfortably on the rack with space around the sides)
- Oven rack(Placed in the middle of the oven for even heat)
- Oven mitts(Heat-resistant, snug fit)
- Parchment paper (optional)(Under pie or on rack for easier cleanup)
- Digital thermometer (optional)(Check crust interior safely)
- Cooling rack(Let pie rest after baking)
Steps
Estimated time: 40-60 minutes
- 1
Choose the rack height
Select the middle rack as the standard starting point for pumpkin pie. This position balances heat from top and bottom elements and reduces direct exposure that can scorch the crust. If your oven runs hot on one side, adjust slightly toward the other rack to achieve even browning.
Tip: Starting with the middle rack minimizes hot spots and yields even crust browning. - 2
Place the pie dish on the rack
Center the pie dish on the rack so it’s stable and not touching the oven walls. Use oven-safe gloves to ease placement. Keeping the dish centered helps heat reach the filling evenly and prevents the edges from cooking too fast.
Tip: Center alignment prevents uneven browning and helps set the filling evenly. - 3
Prepare for airflow
If you use parchment under the pie, ensure it doesn’t extend beyond the dish so air can circulate. Avoid stacking other pans directly beneath or beside the pie, which can trap heat. A clear path around the dish promotes uniform baking.
Tip: Airflow is key to even browning of crust and uniform filling. - 4
Bake and visually monitor
Bake until the edges look set and the center still has a gentle jiggle when the pie is lightly nudged. Rely on sight and texture rather than time alone. If the crust browns too fast, loosely cover the crust with foil to protect it.
Tip: Look for a just-set center with a firm but wobbly middle. - 5
Rotate if needed and finish
If your oven has hot spots, rotate the pie 180 degrees halfway through. Do not move the pie while it's baking; rotate the rack or the dish carefully with mitts. This keeps the bake uniform and helps the filling set evenly.
Tip: Rotation reduces hot spots and achieves even color. - 6
Cool before slicing
Let the pie cool on a rack for at least 2 hours so the filling fully sets. A rushed slice can smear the texture and run the filling. Once cooled, slice cleanly and serve.
Tip: Cooling is essential for clean slices and stable filling.
Questions & Answers
What rack position is best for pumpkin pie?
The middle rack is typically ideal for pumpkin pie, balancing heat from top and bottom elements for even browning and a creamy filling.
For best results, bake on the middle rack to get even color and texture.
Should I use parchment paper under the pie?
Parchment paper is optional; it can help with cleanup or protection when transferring the pie, but it isn’t required for even baking.
Parchment paper is optional but handy for easier cleanup.
Can I bake pumpkin pie on the bottom rack?
Baking on the bottom rack can cause the crust to brown too quickly and the filling to set unevenly. Middle rack is a safer default.
Bottom rack is generally not recommended for even browning.
Do I need to rotate the pie during baking?
Rotating the pie or switching rack positions halfway through helps minimize hot spots and achieve even browning.
Rotate halfway through to avoid hot spots.
How many pies can I bake at once on one rack?
If baking more than one pie, space them on separate racks and avoid crowding to maintain airflow and even heating.
If you bake more than one pie, give them space and use separate racks.
Watch Video
Main Points
- Bake middle rack for even heat.
- Center the dish and allow air to circulate.
- Rotate if you notice hot spots.
- Cool completely before slicing.