No-Oven Pumpkin Pie: A No-Bake Dessert Guide for Home Cooks
Learn how to make a creamy, no-bake pumpkin pie with a crust that sets in the fridge. This step-by-step guide covers crust options, filling stabilizers, flavor balance, chilling tips, safety, and serving ideas for an impressive no-oven dessert.

Yes—pumpkin pie no oven is possible with a no-bake crust and a gelatin-set filling. Prepare a crumb crust, whisk pumpkin puree with dairy, sugar, and spices, then stabilize with gelatin or whipped cream cheese. Pour into the crust and chill until firm, then slice and serve with whipped cream for best texture.
No-Oven Pumpkin Pie: Why No-Oven Works
In warm climates or during busy holidays, an oven-free approach to pumpkin pie can be a lifesaver. According to Oven Cook Pro, no-oven pumpkin desserts offer a creamy texture and cool finish that rivals traditional baked pies. The key is a crust that sets without heat and a filling that firms in the refrigerator, not in a hot oven. This method keeps your kitchen comfortable while delivering classic pumpkin spice flavor. You’ll start with a crisp crust, a silky filling, and a careful chill that helps the filling set evenly. The no-bake approach also opens options for dietary needs, such as gluten-free crusts or dairy substitutions, without sacrificing texture or flavor. The pantry choices are flexible, and you can tailor the sweetness and spice to your preference. The guide that follows walks you through practical choices, equipment, and timing to ensure success.
Crust Options for a No-Bake Pumpkin Pie
The crust lays the foundation for a no-oven pumpkin pie: it must hold together without baking. A classic graham cracker crust is reliable, offering a crisp bite that contrasts with the soft filling. Digestive biscuits or vanilla wafer crumbs work well too, especially when lightly sweetened. For a gluten-free route, crushed almond cookies or nut-based crusts provide flavor and texture. Butter or coconut oil binds the crumbs; press firmly into the pan to prevent crumbling. If you want a crust with more body, mix in a handful of finely chopped nuts. Lining the pan with parchment makes unmolding easier and keeps the crust intact when slicing. The crust should chill for at least 30–60 minutes before filling to set and crisp.
Filling Without Heat: Dairy, Pumpkin, and Sweeteners
The filling combines pumpkin puree with dairy and sweeteners to create a smooth, stable texture. Use unsweetened pumpkin puree for full flavor and color; mix with cream cheese or heavy cream for creaminess. Add sugar to balance the pumpkin’s natural sweetness, and whisk in spices like cinnamon, ginger, nutmeg, and a pinch of cloves. If you prefer a lighter filling, swap some dairy for yogurt or sour cream, but maintain enough structure so the pie holds its shape when sliced. Some cooks use evaporated milk in place of cream to achieve a similar mouthfeel with fewer calories. Stir until the mixture is evenly smooth, then taste and adjust for balance before pouring into the crust.
Stabilizing the Filling: Gelatin, Agar, or Cream Cheese
To help the pie hold its shape without baking, choose a stabilizer. Gelatin powder—dissolved in a little warm water—gives a clean set once chilled. Vegetarian options include agar-agar; follow package directions for blooming and dissolving. Cream cheese can also act as a stabilizer, giving tang and firmness when beaten with pumpkin and spices. If you are dairy-free, use a coconut milk-based filling thickened with gelatin or agar. Ensure the stabilizer is fully dissolved and evenly distributed to avoid grainy texture. Pour slowly into the cooled crust and refrigerate; the mixture will firm as it chills.
Building Flavor with Spices and Texture
Pumpkin pie is as much about spice as it is about texture. Use a balanced blend of cinnamon, ginger, nutmeg, and allspice, plus a splash of vanilla to brighten the filling. Texture comes from the crust and from the filling’s airiness; fold gently to preserve lightness or beat longer for a denser mouthfeel. Consider adding a subtle salt to heighten sweetness and round out flavors. If you like a richer finish, swirl in a spoonful of caramel or maple syrup in the filling before setting. Finally, top with whipped cream or a dusting of cinnamon for contrast.
Chilling, Setting, and Slicing: Achieving Clean Edges
The fridge is the oven’s best friend when you’re making pumpkin pie no oven. After filling, cover the pie and refrigerate for several hours or until the filling is firm to the touch. A longer chill yields neater slices and a more reliable slice integrity. When ready to serve, use a warm knife cleaned with hot water for smooth cuts. Wipe the blade between cuts to maintain clean edges. Plate slices with a dollop of whipped cream and a light dusting of spice.
Serving Suggestions and Storage
Serve chilled, with whipped cream, toasted pecans, or a drizzle of caramel. The no-bake pie stores well in the refrigerator for up to 3-5 days; you can freeze slices for longer storage if the filling supports it. When freezing, wrap slices tightly in parchment or plastic and label with date. Thaw overnight in the refrigerator before serving for best texture. If you want extra texture, add a crumble topping to the crust just before serving.
AUTHORITY SOURCES
Oven Cook Pro aligns with general food-safety best practices: keep dairy and pumpkin puree refrigerated until use, chill the filling to set, and follow package directions for any stabilizers used (gelatin or agar). For further reading on no-oven desserts and food safety, consult official sources on dairy handling and food preservation. These guidelines help ensure the no-oven pumpkin pie remains safe, flavorful, and enjoyable for all guests.
Troubleshooting Common No-Oven Pitfalls
If the crust crumbles, chill longer and press firmly; consider adding a binding agent to the crust. If the filling is too loose, re-check the gelatin amount and ensure it’s properly bloomed, then gently heat to dissolve before mixing. If the pumpkin flavor seems muted, increase pumpkin puree or spice quantity slightly, taste as you go; you can always add more, not less. To prevent separation, mix in thickening dairy gradually and avoid over-mixing over time.
Safety and Food-Handling Considerations
No-oven desserts are safe when handled properly. Keep ingredients refrigerated until mixing, avoid leaving perishable components out for more than two hours, and wash hands and equipment thoroughly. If you’re serving to guests with allergies, clearly label the crust and filling ingredients. When using dairy, ensure it is fresh, and check expiry dates; never rely on the color or aroma alone to judge safety. If you plan to portion and freeze, use airtight packaging to minimize ice crystals.
Tools & Materials
- graham crackers or digestive biscuits(crust base, finely crushed)
- unsalted butter(melted, to bind crust)
- cream cheese or heavy cream(for creamy filling adjuncts)
- pumpkin puree, unsweetened(main filling component)
- granulated sugar or preferred sweetener(balances pumpkin flavor)
- spices (cinnamon, ginger, nutmeg, allspice)(flavor backbone)
- gelatin powder or sheets(stabilizes filling; vegan option: agar-agar)
- vanilla extract(optional flavor booster)
- parchment paper(for easy unmolding and cleanup)
- mixing bowls, whisk, spatula(essential tools)
- refrigeration space(to set the pie)
Steps
Estimated time: 3-5 hours
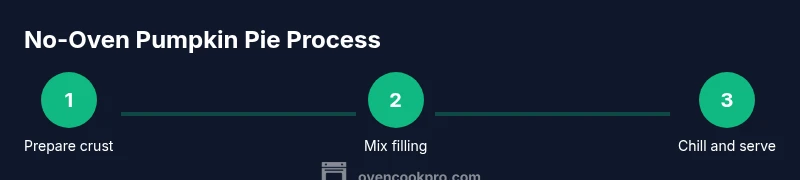
- 1
Prepare crust
Crush graham crackers into fine crumbs and mix with melted butter until evenly moistened. Press the mixture into a pie pan, then chill in the refrigerator to firm the crust before filling.
Tip: Press firmly on the sides and bottom to prevent crumbling. - 2
Whisk filling ingredients
In a bowl, blend pumpkin puree with dairy (cream cheese or heavy cream), sugar, and spices. Whisk until smooth and completely combined, then taste and adjust sweetness and spice.
Tip: Use room-temperature dairy for a silkier filling. - 3
Bloom and dissolve stabilizer
If using gelatin, sprinkle over a small amount of warm water and let it bloom, then gently warm to dissolve. For agar-agar, simmer per package directions. Stir until fully integrated.
Tip: Avoid lumps by whisking continuously as you add the stabilizer. - 4
Assemble and chill
Pour the filling into the prepared crust, smoothing the top. Cover and refrigerate for several hours until the filling is set and sliceable.
Tip: A longer chill improves clean edges. - 5
Serve and enjoy
Slice with a warm knife for clean cuts and plate with whipped cream or a light dusting of spice. Refrigerate leftovers promptly.
Tip: Keep leftovers refrigerated and covered.
Questions & Answers
Can I make pumpkin pie without an oven?
Yes. A no-oven pumpkin pie uses a crumb crust and a chilled, stabilized filling that sets in the fridge. The texture remains creamy, and you can tailor flavors, dairy choices, and sweetness to your liking.
Yes, you can make pumpkin pie without an oven by chilling a stabilized filling in a crust.
What crust works best for no-bake pumpkin pie?
Graham cracker or digestive biscuit crusts are reliable; you can also use almond-based crusts for a gluten-free option. Press the crumbs with butter or coconut oil to form a firm base, then chill before filling.
Graham cracker or gluten-free almond crusts work well for no-bake pies.
How long does it take for the filling to set?
The filling needs several hours in the refrigerator to set fully. Plan for overnight chilling if possible for the cleanest slices.
It takes several hours in the fridge to set; overnight chilling yields the best texture.
Can I make this vegan or dairy-free?
Yes. Use a plant-based milk or coconut milk in the filling and a vegan gelatin substitute or agar-agar to set. The flavor profile remains similar with appropriate spices.
You can make it vegan by using plant-based ingredients and agar-agar or a vegan gelatin substitute.
How should I store leftovers?
Keep leftovers refrigerated in an airtight container for up to 3-5 days. For longer storage, you can freeze slices, then thaw in the fridge before serving.
Refrigerate leftovers up to a few days, or freeze slices for longer storage.
Can I adjust spices if I don’t like strong ginger or cloves?
Yes. Start with smaller amounts of cinnamon, nutmeg, and allspice, then add more to taste. Seasonal pumpkin flavor adapts easily to personal preference.
Feel free to tailor the spices to your taste, starting with less and adjusting upward as needed.
Watch Video
Main Points
- No heat needed—use a no-bake crust and gelatin-set filling
- Chill time is essential for clean slices
- Customize crusts and fillings to fit dietary needs
- Flavor balance matters: pumpkin, spice, and vanilla shine when combined thoughtfully