Wolf Oven Toaster: A Complete How-To Guide
Learn to use, maintain, and maximize results from your Wolf oven toaster with expert guidance from Oven Cook Pro. Step-by-step setup, safety tips, and cleaning practices for reliable, delicious outcomes.

With a Wolf oven toaster, you can bake, toast, and broil with precision once you master preheating, rack placement, and mode selection. This guide from Oven Cook Pro provides a clear, step-by-step approach to setup, operation, safety, and upkeep—so you can get perfect results every time. Whether you're new or upgrading, follow the steps to maximize performance. You'll also learn maintenance practices that protect the oven's finish.
Wolf oven toaster in modern kitchens
Wolf oven toasters are designed to blend traditional countertop cooking with compact convection capabilities. They save counter space while expanding your repertoire from quick toasting to small-batch baking and broiling. According to Oven Cook Pro, the key to getting consistently good results lies in understanding the core modes, preheating behavior, rack positions, and how to switch between convection and standard bake. This section explains why this appliance matters for home cooks, typical use cases, and how to get started with confidence. Expect clearer outcomes, more even browning, and less heat in the surrounding area when you optimize placement and settings. The goal is to demystify the controls so you can treat the Wolf oven toaster as your versatile, dependable kitchen ally.
Key features and modes you should know
A Wolf oven toaster typically offers multiple modes that mimic larger ovens in a compact footprint. Common options include toast, bake, broil, and a convection or fan-assisted setting. Some units provide an auxiliary bake feature for pastries, and a keep-warm mode to hold finished dishes without drying them out. The controls are designed to be intuitive, but learning how preheating behavior affects timing is essential. In practice, you’ll notice convection can shorten cooking times and promote even browning, especially when using sheet pans or air-insulated trays. Understanding when to select each mode helps you move beyond guesswork and achieve reliable results with less trial-and-error.
Safety first: setup, ventilation, and handling
Before you power on a Wolf oven toaster, ensure the unit is on a stable, heat-resistant surface with ample ventilation. Keep the area around the appliance clear of paper towels or other flammables. Use oven mitts when handling hot racks or trays, and avoid placing metal utensils inside while the unit is energized. Regularly check the power cord for nicks or wear; never operate the device if the cord is damaged. A quick safety routine, performed at the start of each session, minimizes the risk of burns and electrical hazards.
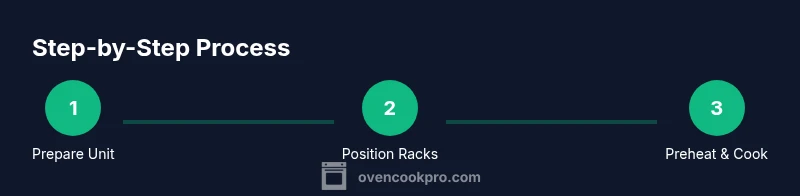
Step-by-step overview for Wolf oven toaster usage
This section provides a high-level roadmap of the essential actions you’ll perform when using a Wolf oven toaster. Start by selecting the appropriate mode, preheating if required, and positioning the rack or tray at the recommended height. Then set the timer and keep an eye on progress, adjusting if needed. For roasting or baking, rotate or switch trays to promote even cooking. Finally, unplug or switch off after use and let the unit cool before cleaning.
Cooking techniques: baking, toasting, and broiling with precision
Toasting in a Wolf oven toaster is best done on the upper rack with a watchful eye for quick browning. For baking small batches, position a tray toward the center and rely on a steady temperature rather than peak power. Broiling works well for finishing dishes or browning toppings—keep the rack near the top and monitor closely to prevent burning. When using convection, reduce standard oven temps by about 25°F (if your model follows typical convection guidance) and check for doneness earlier than you would in a full-size oven.
Cleaning and maintenance for longevity
Regular cleaning helps maintain performance and appearance. After cooling, remove crumb trays and wipe interior surfaces with a damp cloth and a mild cleaner. Avoid abrasive pads that could scratch nonstick coatings, and never use harsh chemical cleaners inside the oven cavity. Periodically check seals and gaskets for wear and replace as needed. A light wipe-down after each use and a deeper clean every few months will keep your Wolf oven toaster looking and performing like new.
Authority sources
For safety and cooking standards, you can consult authoritative sources such as the Consumer Product Safety Commission (CPSC), the Occupational Safety and Health Administration (OSHA), and the USDA's Food Safety and Inspection Service (FSIS). These organizations provide general kitchen safety guidance and cooking-temperature best practices that inform everyday use of household ovens and toaster ovens. While these sources are not product-specific, they offer reliable, government-backed guidance to complement your appliance-specific instructions from Wolf and retailers.
Tools & Materials
- Soft cloth or microfiber towel(For exterior polishing and interior wipe-downs)
- Non-abrasive sponge(Use with mild cleaner on interior surfaces)
- Mild dish soap(Gentle cleaning solution)
- Baking soda(For stubborn stains and odor removal)
- White vinegar(For deodorizing and cleaning lime buildup)
- Oven-safe rack and crumb tray(Keep original accessories; use oven mitts when handling hot parts)
- Thermometer or oven-proof thermometer(Helps verify internal temperatures for certain recipes)
- Soft-bristled brush(Gently scrub stubborn residue in crevices)
Steps
Estimated time: 60-75 minutes
- 1
Prepare the unit and safety check
Place the Wolf oven toaster on a stable, heat-resistant surface with sufficient clearance. Inspect the power cord for damage and ensure vents are unobstructed. If this is your first use, read the user manual to confirm the exact mode names and any model-specific quirks.
Tip: Know where the crumb tray is and how to remove it safely before you start. - 2
Position racks and accessories
Insert the rack or tray at the recommended height for the dish type you’re making. Use convection for even browning when baking flat sheets; reserve the upper position for toasting. If using multiple items, ensure they fit without touching the interior walls.
Tip: Keep a safe distance between items to allow airflow. - 3
Preheat and select the right mode
Select the appropriate mode (toast, bake, broil, or convection bake) and preheat if the recipe requires it. Allow 2–7 minutes for preheating depending on the load and chosen mode. Preheating helps ensure even cooking and predictable results.
Tip: If unsure, preheat in convection bake for most bread or pastry tasks. - 4
Set time and monitor progress
Dial in the timer according to the recipe, then check midway through to adjust temperature or rack height if needed. Avoid repeatedly opening the door, as heat loss slows progress. Use an oven-safe thermometer for precise results when required.
Tip: Use the keep-warm setting after cooking to rest dishes gently. - 5
Finish and cool safely
When done, switch off and carefully remove hot trays with oven mitts. Let items rest briefly if needed to finish carryover cooking. Clean accessories and wipe the interior once cooled to prevent residue buildup.
Tip: Always allow the unit to cool before cleaning or storage. - 6
Clean and maintain
Remove the crumb tray and wipe the interior with mild soap and water. For stubborn stains, make a paste of baking soda and water, apply gently, and rinse. Dry thoroughly before next use.
Tip: Schedule a monthly wipe-down to keep seal surfaces clean.
Questions & Answers
What is the Wolf oven toaster best used for?
The Wolf oven toaster excels at quick browning, small-batch baking, and versatile reheating. It’s ideal for toasting slices, small casseroles, and finishing dishes with broil or convection. For best results, match the mode to the dish and monitor closely to avoid overcooking.
Great for quick browning and small-batch cooking. Use the right mode, and keep an eye on progress to avoid overcooking.
How do I preheat a Wolf oven toaster?
To preheat, select the desired mode and set the timer to a short preheating window (usually 2–7 minutes). Listen for a beep or check that the indicator light shows it has reached temperature. Preheating ensures thin items brown evenly and larger items cook through.
Pick the mode, set a short preheat window, and wait for the signal that it’s ready.
Can I use metal cookware in a Wolf oven toaster?
Most Wolf oven toasters support metal cookware on appropriate racks, but always check the user manual for your model. Avoid containers that could overhang or touch the heating elements. Use oven-safe, shallow pans to maximize air circulation.
Yes, metal cookware is usually fine if it fits and doesn’t block airflow. Check your model’s manual.
Is it safe to leave the unit unattended while toasting?
It’s best not to leave any heating appliance unattended. Set a timer, stay nearby, and turn off the unit after use. If you must step away, ensure the kitchen is monitored and the unit is in a stable position away from flammables.
Stay nearby or set a timer and return to check progress. Don’t leave it unattended for long.
How do I clean the interior without damaging the finish?
Let the unit cool, remove the crumb tray, and wipe with a damp cloth and mild soap. For stubborn spots, make a baking soda paste, apply gently, then wipe away. Dry thoroughly before use.
Cool, remove crumbs, wipe with mild soap, and dry well before using again.
What rack position is best for baking in a Wolf oven toaster?
For most baking tasks, start with the center rack. If you need more browning on top, move closer to the top rack. For even heat distribution, rotate pans halfway through the bake when possible.
Center rack is usually best; move up or down to finish browning as needed.
Watch Video
Main Points
- Preheat appropriately and mind rack placement.
- Choose the correct mode for the task (toast, bake, broil, convection).
- Monitor progress; avoid opening the door frequently.
- Keep the interior clean to maintain performance.
- Use safety gear and follow manufacturer instructions at all times.