What Temperature to Bake Bacon in the Oven: A Practical Guide
Learn the best oven temperature for bacon, how long to bake it, and practical tips to achieve crispy, evenly cooked results every time.

Goal: Crisp, evenly cooked bacon without splatter by baking it in the oven. You’ll need a sheet pan, parchment, and a wire rack if you want extra crisp. Preheat to 400°F (205°C) and bake bacon for 12–20 minutes, depending on thickness, until the fat is rendered and edges are crisp. Drain on paper towels before serving.
Why bake bacon in the oven beats pan-frying
If you’re wondering what to bake bacon at in oven, 400°F (205°C) remains a solid starting point. Oven-baked bacon delivers even crispness without the splatter that greets you at the stovetop, and it scales up easily for larger batches. A parchment-lined sheet pan with a rack (or a single rack if you don’t have one) keeps the fat away from the bacon, helping it crisp uniformly. The Oven Cook Pro team notes that heat distributed across the pan produces even rendering of fat and consistent texture from edge to edge, making cleanup simpler too. You can also experiment with slight temperature tweaks: 350–375°F (175–190°C) for a softer bite or 425–450°F (218–232°C) for a quicker crisp. The goal is render quality fat without burning the edges, so start watching at the lower end of the range and adjust based on thickness. That approach works well for regular-cut, thick-cut, or streaky bacon, and it fits a breakfast plate, a salad topping, or a tasty snack straight from the oven.
Temperature, thickness, and layout that affect crispness
Crispness and doneness are not one-size-fits-all when baking bacon. Thickness matters: thin-cut bacon can crisp in as little as 12–15 minutes at 400°F (205°C), while thick-cut slices may need 16–20 minutes or a touch longer. If you prefer very chewy edge-to-edge rendering, you might pull at the 12–14 minute mark and let the residual heat finish the job. Layout also influences results: space slices no closer than 1/4 inch (6 mm) apart; crowded bacon steams and cooks unevenly. Using a wire rack elevates slices to expose fat to air for crisper bottoms and less sogginess, but even a single layer directly on parchment can yield excellent results. For a milder finish, you can drop to 375°F (190°C) and extend the bake by a few minutes, though you’ll want to monitor closely to prevent overcooking.
Prep and setup: parchment, racks, and fat management
Line a sheet pan with parchment paper or a silicone baking mat to simplify cleanup. An optional wire rack can improve air circulation and crispness by allowing fat to drain away from the bacon as it bakes. If you don’t have a rack, lay the bacon on parchment with a tiny gap between slices and flip once halfway through for even exposure. Gather a pair of tongs or a spatula for turning and transferring hot slices to a paper-towel-lined plate. Before you start, ensure your oven rack is positioned in the center to promote uniform heat distribution. Finally, set a timer in increments to avoid overcooking and to catch the moment when your bacon reaches peak crispness.
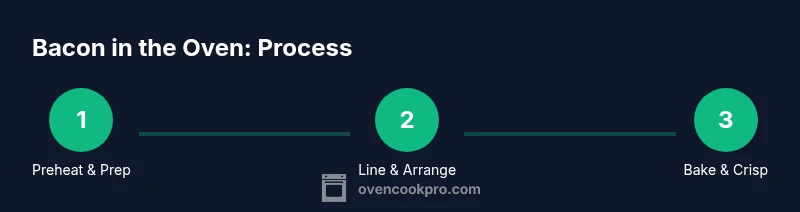
Step-by-step cooking timeline (overview)
This section provides a practical walkthrough that complements the detailed STEP-BY-STEP guide. Expect a total bake time in the 12–20 minute range, depending on thickness and desired crispness. Start at 400°F (205°C) and adjust based on observed results. After removal, allow the bacon to drain on paper towels briefly to remove excess fat, then serve promptly for best texture. If you’re cooking multiple trays, you can rotate racks halfway through baking to improve even results and avoid hot spots. Remember, thinner bacon crisps sooner, while extra-thick slices take longer and render more fat.
Troubleshooting crispness and doneness
If bacon looks pale or floppy, it likely needs more time, but keep a close eye to avoid burning. Overcrowding is a common cause of uneven cooking, so ensure adequate space between slices. If your bacon releases a lot of fat and fries rather than crisps, consider using a rack or draining the fat more aggressively after the first couple of minutes. Conversely, if you crave extra crispness, you can raise the oven temperature by 25°F (about 15°C) for the last few minutes while watching closely. For a consistent outcome, choose a single temperature and thickness range and stick with it across batches. The more you practice, the more predictable your results become.
Flavor twists and serving ideas
Bacon pairs with a wide range of flavors. Try a light maple glaze for a sweet-savory finish, a crackly pepper crust, or a brown-sugar-bourbon drizzle for an indulgent treat. Crumbled bacon can top salads, roasted vegetables, or baked potatoes for extra texture. Leftover bacon grease can be strained and stored for future use in pan sauces or roasting vegetables. Crispy bacon also makes a fantastic garnish for soups and mac and cheese, adding a smoky, salty accent to comfort-food classics.
Safety, cleanup, and best practices
Always handle hot pans with oven mitts—fat can stay dangerously hot and may splatter when moved. Use parchment or a silicone mat to minimize sticking and make cleanup easier. Allow the pan to cool before washing, and don’t pour hot fat down the drain; save it for reuse in cooking or dispose of it in a sealed container. If you notice smoke or a burning smell, pause cooking and open a window to ventilate. Following these steps ensures a safer kitchen and reliable results.
Quick tips for consistent results
- Pro tip: using a wire rack improves air circulation and crispness.
- Warning: hot fat can cause severe burns; never leave the oven unattended while bacon cooks.
- Note: don’t crowd slices; give each piece space to render fat evenly.
- Pro tip: preheat the oven and prepare your sheet pan ahead of time for smoother batches.
- Note: store leftovers in the refrigerator and re-crisp briefly in a hot oven before serving.
Tools & Materials
- Sheet pan(Large, rimmed, sturdy metal pan to hold fat and bacon)
- Parchment paper or silicone baking mat(Line the pan for easy cleanup)
- Wire rack (optional)(Elevates bacon for even air exposure)
- Tongs or spatula(For turning and transferring hot slices)
- Paper towels(To drain fat after baking)
- Oven-safe timer or mobile timer(Helps track multiple batches)
Steps
Estimated time: 25-35 minutes
- 1
Preheat and prepare
Preheat the oven to 400°F (205°C). Line a sheet pan with parchment paper and, if available, place a wire rack on top. This setup ensures fat drains and heat is evenly distributed for consistent results. Pro tip: preheating reduces the risk of soft, undercooked spots.
Tip: Use a preheated pan and rack to promote uniform rendering. - 2
Arrange bacon in a single layer
Lay slices in a single layer with a small gap between each piece. Avoid overlapping, which traps fat and leads to uneven cooking. If needed, work in batches to prevent crowding and ensure each slice browns evenly.
Tip: Spacing is essential for uniform crisping. - 3
Bake and monitor
Place the pan on the center rack and bake for 12–20 minutes, depending on thickness and desired crispness. Start checking at the 12-minute mark. If using a rack, rotate the pan halfway through for even exposure.
Tip: Thin-cut bacon crisps earlier; thick-cut needs closer to 18–20 minutes. - 4
Flip or rotate for even crispness
If you’re not using a rack, flip slices halfway through with tongs to ensure even browning. If you are using a rack, this step is optional but can help uniform texture across layers.
Tip: Flipping is especially helpful for very unevenly cut bacon. - 5
Check doneness and remove
When fat is rendered and edges are crisp (but not burnt), remove the pan from the oven. Transfer bacon to a plate lined with paper towels to blot excess grease.
Tip: Set a timer to avoid overcooking and watch closely near the end of cooking. - 6
Drain and serve
Let the bacon rest on towels for 1–2 minutes to finish crisping. Serve immediately for the best texture and flavor.
Tip: Crispness can diminish as bacon cools; reheat briefly if needed. - 7
Store leftovers safely
Chilled cooked bacon can be stored in an airtight container in the refrigerator for up to 4–5 days. Reheat in a hot oven or skillet for best texture.
Tip: Reheat in small batches to preserve crispness. - 8
Clean up properly
Let the pan cool completely before washing. Do not pour hot grease down the drain; save for future use or dispose of in a sealed container.
Tip: Line pans with parchment for quick cleanup to keep your oven tidy.
Questions & Answers
Can I bake bacon on foil instead of parchment?
Yes, you can bake bacon on foil, but parchment or a silicone mat helps prevent sticking and makes cleanup easier. Foil may also increase sticking if fat pools under the bacon. If you use foil, consider spraying lightly or using parchment on top to minimize waste and mess.
Foil works, but parchment makes cleanups easier and helps prevent sticking.
Should I flip bacon during baking?
If you’re using a rack, flipping isn’t strictly necessary, but it can help ensure even browning on both sides. When cooking directly on parchment, flipping halfway through can improve uniform crispness.
Flipping halfway can help if you’re not using a rack.
What thickness affects bake time in the oven?
Thinner bacon crisps faster (roughly 12–15 minutes at 400°F). Thick-cut bacon needs longer, typically 16–20 minutes or more. Always start at the lower end of the range and monitor for your preferred texture.
Thinner slices cook quicker; thicker slices need more time.
Can I bake frozen bacon in the oven?
It's best to thaw bacon before baking for even rendering. If you must bake from frozen, expect a longer total time and check for evenly rendered fat and crisp edges as you go.
Thawed bacon cooks more evenly; frozen may take longer.
Is oven-baked bacon healthier than pan-frying?
Baking can reduce splatter and allow fat to drain away, which may lower surface fat. However, bacon remains a fatty meat, so moderation is key. The overall health impact depends on portion size and accompanying foods.
It can reduce splatter and fat, but moderation matters.
How should I store and reheat cooked bacon?
Store cooled bacon in an airtight container in the fridge for up to 4–5 days. Reheat briefly in a hot oven or skillet to regain crispness. Do not microwave for best texture.
Cool, store in the fridge, reheat briefly for best texture.
Watch Video
Main Points
- Preheat to 400°F (205°C) for best results.
- Use parchment or a rack to simplify cleanup and improve crispness.
- Times vary by thickness; monitor closely and adjust as needed.
- Drain and serve promptly for peak texture.
- Save bacon grease for future flavor upgrades.