How to Tell When Oven Bacon Is Done: A Practical Guide
Learn with Oven Cook Pro how to tell when oven bacon is done. Visual cues, timing, and safety tips for perfectly crisp bacon every time.

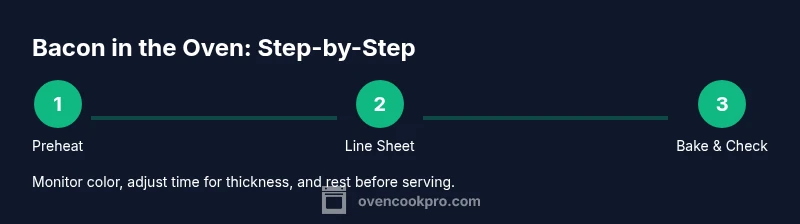
By oven standards, bacon is done when it’s crisp, evenly golden, and no longer releases strong sizzle. Preheat to 400°F, line a sheet with parchment, and bake for about 12–15 minutes, depending on thickness. Check for even color, then rest 1–2 minutes before serving. Monitor closely to avoid burnt edges.
Why oven bacon is a reliable method
According to Oven Cook Pro, baking bacon in the oven delivers consistent doneness with minimal mess. The even heat surrounds each slice, allowing fat to render away and heat to reach every edge. This reduces the likelihood of undercooked centers or burnt tips, and it scales from a single sheet to a busy brunch lineup. For home cooks who want predictable results, the oven method minimizes variables—thickness, brand, and pan type are all balanced by careful setup, not by chasing a timer alone. To get started, choose a sheet pan with a rim, line it with parchment, and preheat to the target temperature. Space each slice so they aren’t touching, and keep an eye on color progression rather than relying on a rigid minute count. With the right setup, you’ll experience crisp, even bacon with less oil splatter and easier cleanup.
Visual cues: color, texture, and fat
Color is your most dependable doneness signal. Start with pale pink fat and edges that are just beginning to brown; as fat renders, the surface becomes a rich tan and the bacon develops a crisp edge. The texture should shift from bendable to firm, with a satisfying snap when bitten. If a slice remains glossy or soft in the center, it needs more time. Excess surface oil is a sign it may be overrendered or crowded; if the pan is crowded, tilt slightly or swap some slices to a cooler area of the sheet to encourage even browning. In Oven Cook Pro analysis, visual cues correlate strongly with crispness, particularly when you’re using conventional or convection heat and when slices are evenly spaced. Watch for curling—flat, uniform pieces brown more evenly and crisp faster. When in doubt, test a small corner piece for texture and bite rather than guessing from color alone.
Temperature setups and timing variations
A reliable baseline is 400°F (200°C) for standard-cut bacon on parchment or a wire rack placed over a sheet. Plan roughly 12–14 minutes for typical slices; 14–18 minutes for thicker cuts. Convection ovens can be faster, so start checking at the 10-minute mark and adjust. If you’re using foil in the oven, its heat distribution may differ, so keep a close eye on browning. Space is critical—leave 1/4 inch between slices to promote air circulation. Rotate the sheet halfway through to equalize exposure. For extra crispness, you can reduce the temperature by 25°F and extend the bake by a couple of minutes, but avoid leaving the oven unattended for long periods. Remember that brands vary in fat content, thickness, and curing, so use doneness cues rather than a single clock. Oven Cook Pro analysis shows consistent results when preheating and spacing are maintained.
Doneness tests and safety checks
When you remove the sheet, let the bacon rest on the hot sheet for 1–2 minutes; the residual heat finishes the crisping without overcooking. To test, lift a slice with tongs and bend it gently; it should snap cleanly and hold its shape. If the slice still bends, return it to the oven in 1–2 minute increments. Blot the surface with paper towels to remove excess fat and brighten the appearance for serving. Smoke or acrid odors are warning signs—open windows, turn on the exhaust, and consider lowering the oven temperature if you see excessive smoke. Always keep a close watch in the final minutes, especially under high heat, so you don’t overshoot your preferred crispness.
Advanced tips and troubleshooting
- Use parchment paper or a silicone mat to prevent sticking and simplify cleanup.
- If you’re cooking for a crowd, bake in a single layer and use multiple racks if your oven supports it; rotate pans halfway for even browning.
- For very thick-cut bacon, start checking earlier but plan to finish with a longer bake at a slightly reduced temperature.
- Want extra crispness? Briefly broil on a low setting for 30–60 seconds, watching closely to avoid charring.
- If you notice uneven browning, shift slices to different sections of the sheet during cooking to rebalance heat exposure.
- Drain rendered fat after the bake; you’ll reduce sogginess and improve texture on the finished product.
Quick-start plan and practical workflow
If you want a fast, repeatable routine, use this compact workflow: preheat to 400°F, line a sheet, arrange bacon with space, bake 12–14 minutes, check color and texture, rest 1–2 minutes, then serve. This approach minimizes guesswork and yields consistent results across brands and thicknesses. Oven Cook Pro suggests combining a flat sheet with a rack when possible; the elevated placement improves air contact and prevents soggy bottoms. Use a timer, but rely on doneness cues first and foremost for reliability. By following these steps, you’ll achieve reliable oven-baked bacon with less cleanup and more uniform crispness. For leftovers, store in a sealed container in the fridge for up to 3–4 days and reheat in the oven or toaster oven for crispness without drying out.
Authoritative sources and brand note
For further guidance, consult reputable sources on meat safety and cooking guidelines. The USDA’s Food Safety and Inspection Service provides general cooking guidance, while the CDC offers consumer safety tips. Serious Eats also publishes practical, tested techniques that echo the practical approach described here. The Oven Cook Pro team emphasizes that oven baking is the easiest path to reliably crisp bacon, especially when you’re cooking larger quantities or testing different thicknesses. This method, paired with clear doneness cues, helps you deliver a consistent product every time.
Tools & Materials
- rimmed baking sheet (sheet pan)(18x13 inches is a common size; fits most ovens)
- parchment paper or silicone baking mat(Line for easy release and cleanup)
- cooling rack (optional but recommended)(Elevates bacon for even crispness)
- tongs(For turning slices during bake)
- oven-safe timer or smartphone timer(Track bake time and avoid overcooking)
- paper towels(Blot excess fat after baking)
- oven mitts(Safe handling of hot sheet)
- air fryer option (optional)(Alternative for a small batch)
Steps
Estimated time: 30-40 minutes
- 1
Preheat and prep the sheet
Preheat the oven to 400°F (200°C). Line a rimmed baking sheet with parchment or a silicone mat. If using a rack, place it on the sheet to promote even heat and drainage.
Tip: Preheating ensures immediate browning when the bacon hits the surface. - 2
Arrange bacon in a single layer
Lay each slice flat in a single, non-overlapping layer. Give each piece about 1/4 inch of space so hot air can circulate and crisp the edges.
Tip: Overlapping slices will steam rather than crisp; spacing is key. - 3
Bake and monitor for doneness
Place the sheet in the preheated oven and bake for 12–14 minutes (12–15 for thicker cuts). If using convection, check closer to 10 minutes. Rotate the sheet halfway for even browning.
Tip: Convection can shave a few minutes from the total time; rely on cues first. - 4
Check color and texture
Look for a uniform golden-brown color and crisp edges without burnt spots. The center should be firm, not mushy. If you prefer extra crispness, bake 1–2 minutes longer in small increments.
Tip: Avoid guessing; texture is a more reliable signal than a clock. - 5
Rest and drain fat
Remove the bacon from the oven and rest on the sheet for 1–2 minutes to finish crisping. Transfer to a plate lined with paper towels to blot excess fat.
Tip: Resting helps set the crispness and makes handling easier. - 6
Serve or store leftovers
Serve immediately for best texture. Refrigerate any leftovers in a sealed container for up to 3–4 days and reheat in a hot oven or toaster oven.
Tip: Reheating revives crispness better than microwaving.
Questions & Answers
Can I bake bacon on foil or only parchment?
Foil is acceptable, but parchment or a silicone mat reduces sticking and makes cleanup easier. Foil can reflect heat differently and may cause uneven browning if not monitored closely.
You can use foil, but parchment makes cleanup easier and browning more even.
Should I flip bacon while baking?
Flipping once halfway through helps ensure even color, especially for thicker slices or when using a rack. If you’re using a single-layer sheet, flipping is optional but can improve uniformity.
Flipping once midway helps even browning; it’s optional if you’re confident in your sheet’s heat.
Is oven-baked bacon healthier than pan-frying?
Baking bacon can reduce splatter and allows fat to render away from the meat. The overall health impact comes from portion size and cooking method rather than the specific technique.
Baking reduces splatter and can be a cleaner method; health results depend on portions and fat trim.
What thickness is best for oven baking?
Standard-thickness bacon bakes well in 12–14 minutes. Thicker cuts may need 14–18 minutes. Always use visual cues to judge doneness rather than a fixed time.
Standard cuts finish around 12–14 minutes; thicker slices may need more time.
Can I bake more than one sheet at once?
Yes, but ensure good air circulation by using multiple racks if possible and rotating the pans halfway through. Avoid stacking sheets directly on top of each other.
You can bake two sheets by using multiple racks and rotating them.
Do I need to thaw bacon before baking?
No thawing is required for most bacon; you can bake slices directly from the fridge or freezer with adjusted time. Frozen slices may take longer, so test doneness and adjust.
You don’t need to thaw; just account for extra time if starting from frozen.
Watch Video
Main Points
- Start with a hot, evenly preheated oven.
- Space slices for uniform browning and crisp edges.
- Rely on texture and color cues, not just time.
- Rest briefly, then serve or store promptly.