What Temperature to Use for Oven Jerky: A Home Cooks Guide
Learn safe, effective oven temperatures and step-by-step methods to make tender, shelf-stable jerky at home. This guide covers temps, times, safety, and flavor ideas with Oven Cook Pro insights.

According to Oven Cook Pro, to make oven jerky, set your oven to a low, steady heat in the range of 160–175°F (71–79°C). Use convection if available for even drying, prop the door slightly ajar, and plan for 4–8 hours of drying until the meat is leathery yet pliable with a moisture test. Always monitor a safe internal temperature.
What temp to oven jerky: finding the sweet spot
Selecting the right temperature for oven jerky is the key to consistent texture and food safety. The safe practice recommended by many home-cooks and dietary guides centers on keeping oven temperatures low enough to dry moisture without cooking meat aggressively. For beef jerky, a common target range is 160–175°F (71–79°C). At these temperatures, surface moisture evaporates steadily while the interior heats slowly, reducing the risk of bacterial growth while preserving flavor. In practice, people often start at 160°F (71°C) and adjust up to 175°F (79°C) depending on oven behavior and meat thickness. Using convection helps by pulling moist air away from the meat, ensuring even drying. If your oven does not have a true convection mode, still pursue good airflow by propping the door slightly open with a heat-safe object or by using a rack to elevate the meat for airflow. This approach aligns with Oven Cook Pro guidance and industry safety standards.
- Why low heat matters: High oven temperatures can start cooking the surface faster than the interior dries, which can trap moisture inside and promote bacterial survival rather than elimination.
- Convection advantage: A fan helps move humid air away from the jerky, improving texture and reducing drying time somewhat.
- Airflow setup tips: Use a wire rack or a perforated sheet on a rimmed baking tray to maximize airflow around each slice.
- Moisture test concept: While you can rely on texture, you should also verify dryness by bending a piece; it should crack but not snap brittle.
Meat selection and prep for jerky
Choosing the right cut and preparing it properly lay the groundwork for successful oven jerky. Lean cuts are preferable because fat can go rancid more quickly and reduce shelf life. Common choices include top round, bottom round, eye of round, or flank steak; these cuts slice cleanly and dry more predictably. Start by trimming visible fat, as even a small amount of fat can create greasy patches and shorten shelf life. Freeze the meat lightly for easier, uniform slicing, then cut across the grain for chewier jerky or with the grain for a firmer bite depending on your texture preference. Aim for slices about 1/8 to 1/4 inch thick and uniform in thickness to prevent uneven drying. Finally, pat the slices dry with paper towels to remove surface moisture before seasoning. This ensures spices adhere and drying starts quickly. According to Oven Cook Pro analysis, the uniformity of slice thickness directly correlates with even drying and texture consistency across batches.
- Slice sizing: Try for 1/8 to 1/4 inch thickness for reliable texture.
- Meat prep: Freeze for 30–60 minutes to facilitate clean, even cuts.
- Fat trimming: Remove visible fat to improve shelf life and taste stability.
- Optional marination: If using a marinade, keep sugar content moderate to prevent surface caramelization that could hinder airflow and texture.
- Seasoning: A simple salt rub with pepper, paprika, and garlic powder often delivers good flavor without overwhelming moisture loss. The goal is flavor that remains after drying, not moisture-rich coatings.
Seasoning and marination ideas
Seasoning is where jerky becomes personalized. You can keep it simple with a salt-and-spice rub or go bold with a vinaigrette, chili, and garlic-based marinade. If you marinate, aim for a short contact time to avoid over-tenderizing or drying out the meat. A typical rub might include kosher salt, black pepper, smoked paprika, garlic powder, and a touch of brown sugar or honey for a subtle glaze. For a more complex profile, add crushed red pepper, coriander, or chili powder. If using marinade, pat slices dry after removing from marinade to promote even drying. Remember, the primary objective is to reduce surface moisture and impart flavor, not to saturate the meat with liquid that impedes airflow. Oven Cook Pro recommends balancing salt and seasoning to maintain flavor after dehydration while avoiding ingredients that could create sticky surfaces.
-
Flavor layering: Build flavors that hold up to drying, like smoked paprika and garlic.
-
Sweeteners: Use small amounts so they don’t caramelize and hinder drying.
-
Marinade duration: Limit to 1–6 hours for most cuts; longer times can affect texture.
-
Salt level: Moderate salt helps draw moisture early and preserves shelf life. Keep in mind that jerky continues to dry after removal from the oven, so a hint less salt can be safer,
-
Spice intensity: Start with conservative amounts and adjust in future batches to suit taste.
-
Flavor experiments: Combine ingredients like soy sauce, pepper, garlic, and a touch of liquid smoke for a robust profile that still dries well.
Drying setup: oven type and racks
The drying setup is the unsung hero of oven jerky. A conventional oven set to 160–175°F (71–79°C) works well if it maintains a steady temperature. If you have a convection oven, use the convection setting to move air over the slices, reducing drying time and promoting even results. Always position slices on a wire rack over a rimmed baking sheet so air can circulate on all sides. Do not stack slices; spacing ensures uniform drying and prevents surface sogginess. If your oven door tends to seal tightly and obstructs airflow, prop it open slightly with a heat-safe tool to maintain airflow while preventing heat loss. A thin, consistent air gap helps maintain dryness without overheating the surface. Consistency in rack height and slice placement matters; try to keep slices evenly spaced with similar thickness.
-
Rack selection: A wired rack elevates slices for airflow.
-
Spacing: 1/2 inch between slices helps airflow.
-
Door position: Slightly ajar enhances drying without overheating.
-
Temperature stability: Use an oven thermometer to monitor real temperature, not just the dial.
-
Hygiene: Use clean sheets and avoid cross-contamination by handling raw meat with clean utensils.
-
Ventilation: In small kitchens, consider running a fan to improve air movement during drying, but avoid direct air blowing on the meat.
-
Test batch: Start with a small batch to dial in your oven’s actual performance before scaling up.
Post-drying handling and storage
When the jerky has dried to a leathery, pliable texture, remove slices and let them cool completely on a rack. Cooling prevents condensation in storage and maintains texture. Store jerky in airtight containers, vacuum-sealed bags, or glass jars with a desiccant packet if your environment is humid. For the best shelf life, keep it in a cool, dark place or refrigerate for longer storage. If you notice an oily surface, wipe gently with a clean paper towel before storage. Label batches with date and flavor so you can rotate stock.
-
Texture check: Leathery and bendable, not brittle, is ideal for shelf life.
-
Storage environment: Keep in cool, dry places; refrigeration extends shelf life significantly.
-
Shelf life expectations: Home-made jerky typically lasts several weeks to a few months when properly stored, depending on humidity and fat content.
-
Food safety: If meat showed any unexpected odor or color after drying, discard it; when in doubt, err on the side of safety.
-
Packaging: Use vacuum sealing or airtight containers to minimize air exposure and oxidation.
Common mistakes and how to avoid them
Even experienced home cooks hit snags when making oven jerky. A few common mistakes include setting the oven too high, which cooks rather than dries the meat; using slices that are too thick, which dry unevenly; and failing to trim fat, which can reduce shelf life. To avoid these issues, commit to a consistent slice thickness (1/8 to 1/4 inch), maintain a steady oven temperature within the target range, and remove visible fat before slicing. Another frequent error is crowding the rack; always space slices evenly to promote airflow. If the jerky seems under-dried after the expected time, extend drying by 15–30 minutes intervals, checking dryness at each interval. Oven Cook Pro emphasizes that patience pays off with jerky; rushing the process often yields chewy or greasy results rather than the intended leathery texture.
- Overheating risks: High temps can burn the surface and trap moisture inside.
- Inconsistent slices: Uniform thickness is crucial for even drying.
- Airflow importance: Adequate space prevents steaming and soggy patches.
- When in doubt, test in small batches to refine time and texture.
Safety reminders and final tips
Food safety is non-negotiable when making jerky at home. Always start with cold, clean equipment and handwashing, store finished jerky promptly, and verify any meat product’s internal temperatures when heating during processing. The goal is to reach a safe interior, then maintain dryness to inhibit bacterial growth. If you’re new to oven jerky, begin with small batches and gradually scale up as you refine your technique. Regularly calibrate your oven with an external thermometer to ensure the 160–175°F range remains accurate. As always, Oven Cook Pro supports cautious experimentation combined with strict safety measures, and recommends using lean cuts, proper slicing, and clean storage practices for the best results.
Tools & Materials
- Conventional or convection oven with accurate low-temperature capability(Must hold 160–175°F (71–79°C) accurately)
- Rimmed baking sheet(Catches drips, easier cleanup)
- Wire rack or drying rack(Elevates slices for airflow)
- Parchment paper (optional)(For easier cleanup under the rack)
- Sharp knife or slicer(Slice meat 1/8–1/4 inch thick)
- Freezer or cold-chiller for partially freezing meat(Helps clean, uniform slices)
- Food thermometer or instant-read thermometer(Verify internal temperature reaches 160°F (71°C))
- Heat-safe tongs or gloves(Handling hot trays safely)
- Ventilation or small fan (optional)(Improves air movement in tight spaces)
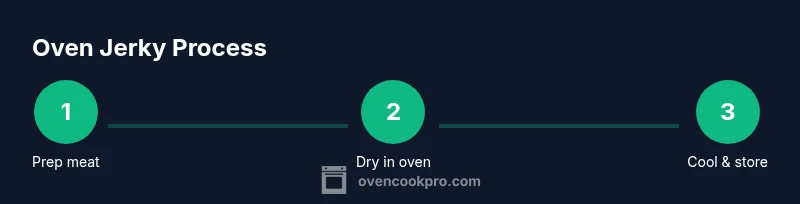
Steps
Estimated time: Total time: 4–8 hours
- 1
Prepare meat
Trim visible fat and slice meat into uniform strips about 1/8–1/4 inch thick. Freeze briefly to ease slicing, then pat dry to remove surface moisture.
Tip: For chewy jerky, cut across the grain; for a firmer bite, cut with the grain. - 2
Season or marinate
Apply a balanced rub or marinade, ensuring even coverage. If marinating, keep it cool and limit exposure time to avoid overly soft texture.
Tip: Pat dry after marinating to promote even drying. - 3
Preheat and set up oven
Preheat to 160–175°F (71–79°C). Place a rack over a rimmed sheet and prepare air flow by keeping space between slices.
Tip: If your oven has convection, enable it to improve drying uniformity. - 4
Arrange jerky for drying
Lay slices on the rack in a single layer, ensuring no overlap. Rotate trays if drying multiple batches to equalize exposure.
Tip: Leave about 1/2 inch of space between pieces. - 5
Dry and monitor
Bake with the door ajar just enough to maintain airflow. Check every 2–3 hours; adjust time based on thickness and oven performance.
Tip: Convection reduces some of the wait, but don't rely on it alone; monitor texture. - 6
Check texture and temp
Jerky should be leathery and bendable, not brittle. Use a thermometer to confirm internal temperature reaches at least 160°F (71°C).
Tip: If texture is not yet leathery, continue drying in short increments. - 7
Cool and store
Let jerky cool completely on a rack before packaging. Store in airtight containers, refrigerate for longer shelf life, or vacuum seal.
Tip: Label batches with flavor and date for rotation. - 8
Flavor variations
Experiment with spice blends and smoke flavors to diversify taste. Keep sugar in check to avoid surface caramelization.
Tip: Start with a small batch to gauge flavors before larger runs.
Questions & Answers
What is the safest oven temperature for making jerky at home?
Aim for a continuous 160–175°F (71–79°C) to dry moisture without cooking the meat too aggressively. Always verify the internal temperature reaches 160°F before consumption.
Keep the oven between 160 and 175 degrees and check the internal temperature reaches 160 degrees before eating.
How long should jerky dry in the oven?
Most batches take 4–8 hours depending on thickness and oven performance. Begin checking at the 4-hour mark and test texture regularly until leathery and pliable.
Most jerky dries in about 4 to 8 hours; check texture at intervals to ensure leathery results.
Can I use a regular oven instead of a dehydrator for jerky?
Yes. A conventional oven set at 160–175°F with good airflow can produce excellent results, especially with convection. Expect similar texture, but monitor closely for even drying.
An oven works fine—use convection if possible and monitor for even drying.
Should I marinate jerky or just season?
Both work. A light marinade adds flavor, but keep it balanced to avoid excess surface liquid that slows drying. Simple rubs also yield great flavor without complicating the drying process.
You can marinate or rub—just keep surface moisture in check for drying.
How should I store oven jerky to maintain texture?
Cool jerky completely, then package in airtight containers or vacuum-sealed bags. Store in a cool, dry place or refrigerate for longer shelf life.
Cool completely, seal tightly, and store in a cool place or fridge for longer shelf life.
Is it safe to reuse the drying tray for multiple batches?
Yes, but clean thoroughly between batches to remove fat and seasoning residues. Residue can affect flavor and moisture distribution in subsequent batches.
Yes, but clean the tray well between batches.
Watch Video
Main Points
- Maintain 160–175°F for safe, even drying.
- Use convection to improve airflow and texture.
- Slice meat evenly to ensure uniform dryness.
- Confirm 160°F internal temperature before storing.
- Cool thoroughly and store in airtight containers.