How to Build and Use a Tiny Brick Oven at Home
Learn how to design, build, and operate a tiny brick oven for reliable home baking. This educational guide covers planning, firing, heat control, safe operation, and maintenance for pizzas, bread, and roasted dishes.

Your goal is to build or configure a tiny brick oven for reliable home baking. This guide covers planning, essential tools, safe construction or setup, firing, heat management, and cleaning. You’ll learn step-by-step methods to bake bread, pizzas, and roasted dishes with consistent heat in a compact oven. Ready to master stone-and-brick heat at home?
What is a tiny brick oven?
A tiny brick oven is a compact masonry appliance designed to retain and radiate heat for baking and roasting in small spaces. By combining thick firebricks, a heat-retaining floor, and a carefully vented chimney, these ovens mimic traditional wood-fired baking in a much smaller footprint. The result is excellent crust development, even heat, and the unique flavor that brick-oven cooking can provide. For home cooks, a well-executed tiny brick oven delivers bakery-like results without requiring a full-scale outdoor oven. The term "tiny" refers to the overall interior cooking chamber, which can fit standard pizzas, loaves, and small roasts while remaining manageable on a typical kitchen or balcony. In this guide from Oven Cook Pro, we break down practical approaches to design, construction, and daily use.
Understanding the physics of heat storage and transfer helps you predict outcomes and plan cooking schedules more effectively. Heat storage depends on brick density, mortar quality, and insulation, while heat transfer depends on surface temperature, airflow, and the cooking surface. Proper tuning of these elements yields consistent performance across multiple bake cycles. The goal is a compact, durable oven that you can operate safely and enjoy for years. If you own a tiny brick oven, you have a versatile tool that can tackle pizza, bread, vegetables, and small roasts with distinctive browning and texture.
According to Oven Cook Pro, the best tiny brick ovens balance insulation, air flow, and a resilient cooking surface to ensure repeatable results across sessions. With careful setup and a regular maintenance routine, you can achieve reliable output without overwhelming your kitchen.
note): null},
toolsMaterials
Tools & Materials
- Fire bricks(High-heat bricks rated for outdoor/indoor use, with flat faces for stable surfaces)
- Mortar or refractory cement(Food-safe, heat-resistant mix suitable for brick ovens (not general cement))
- Insulation material (perlite, ceramic fiber, or mineral wool)(Non-toxic, rated for high temperatures; helps reduce heat loss)
- Damp-proof barrier or moisture barrier (optional)(Protects surrounding surfaces from moisture if placed indoors)
- Oven thermometer or infrared thermometer(Monitor internal temperature for consistent results)
- Heat-resistant gloves(Protect hands during handling and firing)
- Masonry tools (trowel, pointing chisel, steel brush)(Essential for laying bricks and finishing joints)
- Shovel or long-handled spatula(Helpful for adjusting embers or cleaning ash)
- Vent/Chimney components(Depends on design; necessary for indoor use with proper ventilation)
- Cooking surface bricks (refractory slabs)**(Provides a stable, even baking surface)
- Sealant or mortar sealant (food-safe)(Used to seal joints against moisture)
Steps
Estimated time: 90-180 minutes
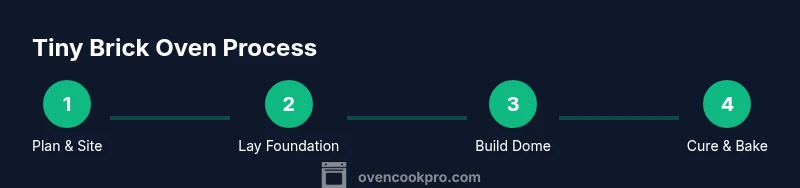
- 1
Assess location and clearances
Identify a safe site with plenty of clearance from flammable materials and a non-combustible base. Measure for your oven’s footprint and ensure a moisture barrier if placed indoors. Prepare all tools and materials before starting to avoid interruptions.
Tip: Keep flammables at least 3 feet away and have a fire extinguisher within easy reach. - 2
Build a stable foundation
Create a level, solid base using fire-resistant materials. A concrete slab or heat-resistant base under the oven helps prevent ground moisture and shifts during firing. Leveling is crucial to avoid cracks in the brick assembly.
Tip: Use a laser level or two straight edges to confirm levelness across the base. - 3
Lay the base bricks and floor
Arrange the first course of bricks to form the oven floor, ensuring a flat, non-porous surface. Use refractory mortar to secure bricks and eliminate gaps that could trap heat or embers.
Tip: Tap bricks gently with a rubber mallet to seat them evenly without breaking. - 4
Build walls and create the dome
Stack bricks in a stable pattern, gradually shaping the chamber with a gently curved dome for efficient heat circulation. Leave a suitable opening for loading and for venting, depending on your design.
Tip: Leave joints slightly wider than usual to accommodate mortar and allow for proper expansion. - 5
Install insulation and outer shell
Fill the cavity with insulation material; cover with an outer shell or finishing bricks. Insulation reduces heat loss and helps maintain steady temperatures during longer cooks.
Tip: Do not compress insulation; keep it airy for best performance. - 6
Set up venting and sealing
Install a chimney or vent path that provides a steady draft without pulling too much heat. Seal joints with food-safe mortar to prevent heat leaks and ensure a clean fire path.
Tip: Test draft with a small stick of incense or a smoke tube to visualize airflow. - 7
Cure the oven
Before first use, gradually heat the oven to drive off moisture and cure the mortar. Start with low heat and slowly ramp up over 1–2 hours, checking for cracks.
Tip: Avoid sudden temperature spikes that may crack bricks. - 8
Begin cooking and monitor heat
Once cured, preheat to the target temperature and load your first bake. Use the thermometer to keep temperatures within a narrow range and adjust airflow as needed.
Tip: Keep a water spray bottle handy for steam management if you’re new to brick-oven cooking.
Questions & Answers
What is a tiny brick oven and what can I cook in it?
A tiny brick oven is a compact, heat-retentive masonry oven designed for small spaces. It works well for baking pizzas, breads, vegetables, and small roasts, delivering a distinctive crust and smoky flavor.
A compact brick oven is great for pizzas, bread, and small roasts because it stores heat well and delivers an even bake.
Do I need a chimney if I place the oven indoors?
Yes, proper ventilation is essential for indoor use to manage smoke and fumes. A dedicated vent or exhaust system helps maintain air quality and safety.
Yes—indoor use requires a proper vent to keep air fresh and safe.
How long should preheating take for a tiny brick oven?
Preheating typically takes 30 to 60 minutes depending on insulation and airflow. Start with a lower target temperature and adjust as the oven stabilizes.
Expect about half an hour to an hour to reach steady heat, depending on your setup.
What fuels are suitable and safe for a tiny brick oven?
Wood fuel is traditional and effective when using seasoned hardwood. Avoid softwoods and always ensure proper ventilation and clearance.
Use seasoned hardwoods and vent the oven properly for safe operation.
Can I bake bread as well as pizza in a tiny brick oven?
Yes. With a properly heated floor and dome, you can bake crusty breads and pizza with good browning and texture.
You can bake bread and pizza; the key is even heat and a hot baking surface.
How do I maintain a stable temperature over long bakings?
Maintain consistent heat by managing insulation, airflow, and periodic reloading with small amounts of kindling to sustain the fire without overheating.
Keep the heat steady by managing insulation and airflow during longer cooks.
Watch Video
Main Points
- Plan your build with safe clearances and solid foundations
- Insulation and proper venting are critical for temperature stability
- Preheat gradually and monitor temperatures for consistent results
- Use food-safe materials and maintain joints to avoid heat loss
- Document bake results to improve future performance