Oven S'mores: A Step-by-Step Guide to Melty Marshmallows in the Oven
Learn to make perfect oven s'mores with a step-by-step guide, browning tips, safety notes, and flavor twists for family-friendly treats.

Master the art of oven s'mores with a simple, reliable method that combines melted chocolate, gooey marshmallows, and crisp crackers. In minutes you’ll achieve even browning and a mess-free finish, ideal for weeknights or gatherings. This guide walks you through precise steps, safe handling, and tasty variations.
Why oven s'mores deserve a place in your kitchen
According to Oven Cook Pro, oven s'mores are an approachable, family-friendly treat that lets you control marshmallow browning and keep mess to a minimum. They are perfect for weeknight treats, backyard parties, or when a campfire isn't available. The technique brings the classic campfire experience into your oven, with predictable results and minimal cleanup, making it an excellent option for both beginners and experienced home cooks. The concept is simple: you layer graham crackers with chocolate and marshmallows, then heat until the marshmallows puff and the chocolate softens. The result is gooey, toasty, and shareable.
Beyond convenience, oven s'mores offer flexibility. You can tailor sweetness by choosing milk, dark, or white chocolate, adjust marshmallow amount for chewier or lighter results, and even mix in toppings like peanut butter or crushed peppermint. For families, it’s a safe alternative to open flames, especially when kids want to participate in the preparation. The Oven Cook Pro team has found that using the oven gives you consistent browning without the risk of uneven burns that sometimes occur with open flame roasting. With a few simple steps, you can produce a dessert that feels indulgent yet approachable.
noteVibesApiItems":[],"tip":"If you’re serving a crowd, layer on parchment to prevent sticking and make cleanup easier."
tip2":null},
Tools & Materials
- Graham crackers(Regular or mini versions work; choose unsalted if you want to control saltiness.)
- Chocolate(Milk, dark, or white chocolate bars; choose a size that matches your crackers.)
- Marshmallows(Mini or large marshmallows; use a generous amount for gooey texture.)
- Baking sheet(Choose a rimmed sheet to catch any drips.)
- Parchment paper or aluminum foil(Line the sheet for easy cleanup and to prevent sticking.)
- Oven mitts(Heat-resistant; keep one handy for handling the hot sheet.)
- Cooling rack (optional)(Helps marshmallows set without becoming soggy.)
Steps
Estimated time: 15-25 minutes
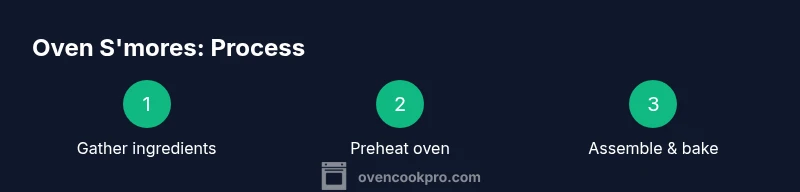
- 1
Gather ingredients and tools
Collect graham crackers, chocolate, marshmallows, and the baking sheet with parchment or foil. This ensures you can move quickly when the oven is hot and marshmallows start to puff. Having everything within reach minimizes the risk of mishaps during assembly.
Tip: Lay out ingredients in the order you’ll assemble to speed up the process. - 2
Preheat the oven
Preheat to a moderate range of 350–400°F (175–205°C). This range provides a balanced browning without scorching the crackers. A steady oven helps marshmallows puff evenly across the surface.
Tip: If your oven runs hot, start at 350°F and monitor closely after 2 minutes. - 3
Assemble on the sheet
Place graham crackers on the lined baking sheet. Top each cracker with a piece of chocolate and a marshmallow or two. Top with another cracker to form a sandwich, or keep marshmallows open-faced for quicker melting.
Tip: For extra gooeyness, press the marshmallows gently after placing the top cracker. - 4
Bake until marshmallows puff
Slide the sheet into the oven and bake for 2–4 minutes, watching closely. Remove when marshmallows have puffed and the chocolate is soft but not fully melted. Time varies with oven and marshmallow size.
Tip: Do not overbake; marshmallows can burn fast once they start browning. - 5
Finish and rest
Carefully remove the tray with oven mitts. If you want, press the top cracker lightly to compress the layers. Let the s'mores rest for 1–2 minutes so the chocolate can meld without seeping out.
Tip: Cooling briefly helps set the structure for even bites. - 6
Serve and enjoy
Transfer to a serving plate and cut into halves if desired. Serve warm for the best texture contrast between gooey marshmallows and crisp crackers.
Tip: Pair with milk or coffee for a classic finish.
Questions & Answers
Can I use a microwave instead of an oven?
A microwave will melt marshmallows, but it won’t brown them or crisp the crackers the same way an oven does. For that classic texture, use the oven.
You can, but you won’t get the toasted edges; the oven gives the browning you expect in s'mores.
What if I don’t have graham crackers?
You can substitute with digestive biscuits or chocolate wafer cookies, but the texture will vary. Aim for a sturdy, simple cookie that won’t crumble easily.
If you don’t have graham crackers, use a sturdy cookie that won’t crumble under heat.
How can I make dairy-free oven s'mores?
Use dairy-free chocolate and dairy-free marshmallows. Some brands also offer dairy-free graham crackers to keep flavors cohesive.
Choose dairy-free chocolate and marshmallows to keep the treat accessible for dairy-free diets.
How should leftovers be stored?
Oven s'mores are best eaten fresh, but you can store cooled, assembled sandwiches in an airtight container for a day or two. Reheat briefly if desired.
They’re best fresh; if you must store, keep them airtight and rewarm slightly before eating.
Can I bake multiple trays at once?
Yes, but rotate trays halfway through for even browning. Avoid stacking; give each tray space for heat circulation.
Yes, you can bake two trays, just rotate them halfway to keep browning even.
Is a toaster oven suitable?
A toaster oven works fine for small batches. Watch closely, as temperatures can vary more with smaller appliances.
Toaster ovens are fine for a few s’mores, just monitor closely for quicker browning.
Watch Video
Main Points
- Preheat properly for even browning
- Layer components evenly for consistent melt
- Monitor closely to avoid burnt marshmallows
- Customize with toppings for flavor variety
- Clean up is faster with parchment or foil