How to Make S'mores in the Oven
Learn how to make delicious s'mores in the oven with a simple, step-by-step method. Melted chocolate and gooey marshmallows come together on crisp graham crackers—perfect for indoors. Oven Cook Pro explains the best temps, timing, and safety tips for perfect oven s'mores.

You can make s'mores in the oven by layering graham crackers, chocolate, and marshmallows on a baking sheet. Toast the marshmallows briefly under the broiler or in a hot oven until melted and golden, then sandwich with another graham cracker. This method yields gooey, evenly melted s'mores without fire.
Why Oven-Made S'mores Are a Great Option
Oven-made s'mores offer a reliable, smoke-free alternative to campfires, especially for kitchens with kids or limited outdoor space. According to Oven Cook Pro, the oven provides consistent heat that melts chocolate evenly and puffs marshmallows without the uneven browning you sometimes see with open flames. If you’re asking how do you make s mores in the oven, you’re in the right place: the method below uses a simple three-ingredient setup and a short heat period to deliver gooey perfection every time. The key is controlling heat and air flow so the marshmallows melt without burning. With a little prep and a steady eye, you’ll get restaurant-quality s'mores in minutes rather than minutes by a campfire.
This guide intentionally keeps the process approachable for home cooks of all levels, including beginners. You’ll learn how to balance chocolate melt, marshmallow puff, and cracker crunch, plus how to adapt for different ovens. The Oven Cook Pro team emphasizes that small adjustments in rack position and heat level can yield noticeably better results.
Essential Ingredients and Equipment You’ll Need
For a classic oven s'mores setup, start with quality ingredients and a sturdy tray. You’ll want to line up graham crackers, your favorite chocolate, and marshmallows, plus a heat-safe tray and basic kitchen tools. If you’re aiming for speed, miniature marshmallows melt quickly and evenly, while larger marshmallows can create a dramatic puff before melting. The equipment list below keeps cleanup simple and your workspace organized. Line the tray with parchment to prevent sticking, or use foil for easier cleanup if parchment isn’t available. Keep a timer handy so you don’t over-toast the marshmallows.
- Graham crackers (regular or honey) – 12 crackers total (for 6 sandwiches)
- Chocolate – 1 to 2 squares per sandwich
- Marshmallows – a handful per sandwich; mini marshmallows are fastest
- Baking sheet – rimmed helps catch drips and prevents sliding
- Parchment paper or aluminum foil – optional, for easier cleanup
- Oven mitts or heat-resistant gloves – essential for handling hot trays
- Tongs or spatula – helpful for moving hot marshmallows without burns
- Knife or offset spatula – for neat, clean serving if you want to slice into portions
Oven Settings: Broil vs Bake – Which Method is Best?
Most oven s'mores pull their texture from a quick heat source that melts the chocolate and puffs the marshmallows. The two most common approaches are broiling and baking. Broiling is the fastest method, typically 1–3 minutes, but it requires constant attention to prevent scorching. Baking at a moderate temperature (around 350–375°F / 175–190°C) yields a more even melt with less risk of burning, but takes 5–7 minutes. For beginners, start with bake to reduce the risk of scorching and adjust your time based on how quickly your marshmallows puff. If your oven has a convection setting, you can use a lower bake temperature and shorten the time slightly, but monitor closely to avoid over-melting the chocolate. The key is proximity to the heat source and regular checks during the melting process.
Oven Cook Pro analysis shows that the top heating element is most effective for browning the marshmallows a touch while keeping the chocolate intact. Avoid placing the tray in the direct center of the oven if your model tends to heat unevenly — a rack two levels from the top is often ideal for a balanced melt.
Step-By-Step Prep: Assembly and Heating
A smooth assembly makes a big difference in final texture. Start with a preheated tray and a clean workspace so you can move quickly when the marshmallows are at peak puff. Assembly should be done in batches if you’re making multiple sandwiches to avoid crowding and uneven heating. As you work through each sandwich, keep a timer handy and watch the marshmallows closely so they don’t burn. The steps below break down the process into single actions with clear outcomes, helping you stay consistent across batches.
- Preheat the oven to 375°F (190°C) and line a baking sheet with parchment or foil. This prepares a stable surface and eases cleanup.
- Arrange graham crackers on the sheet, topping each bottom cracker with a square of chocolate. The chocolate should sit directly on the cracker so it melts into the cracker as the marshmallow heats.
- Place 3–4 marshmallows on each chocolate-topped cracker, spacing them evenly to promote uniform melting.
- Slide the tray into the oven and heat for 5–7 minutes, checking at 4 minutes to ensure marshmallows are puffing without burning.
- Remove from oven when marshmallows are golden and just melted. Immediately top with the second graham cracker half and press gently to spread the melted chocolate.
- Let the sandwiches rest for 1–2 minutes before serving to avoid hot molten centers and to solidify the chocolate for cleaner bites.
Variations, Add-Ons, and Serving Ideas
S'mores are highly adaptable. For a darker, more intense finish, use extra-dark chocolate or add a thin caramel drizzle between the layers. If you’re serving adults, consider a sprinkle of flaky sea salt on the melted chocolate for a surprising punch. Try using flavored chocolate (like mint or orange) for festive twists. If you prefer a softer center, reduce the toasting time slightly; for a crunchier bite, add a small pinch of graham cracker crumbs between layers. Serving suggestions include pairing with sliced strawberries for a contrast in texture and acidity, or dipping the finished sandwiches in melted peanut butter for a savory-sweet variation.
Tips for neat presentation: use a warm knife to cut the sandwiches into halves or triangles and serve on a warm plate to maintain the melty texture. For kids, pre-assemble and let them help with the final step under supervision. This hands-on activity can be a fun, interactive dessert.
Safety, Clean-Up, and Storage
Always exercise oven safety when working with hot trays. Use oven mitts, keep sleeves rolled up, and never leave the oven unattended during broil. Clean the tray promptly after cooling to prevent hardened sugar residues. If you anticipate leftovers, store cooled sandwiches in an airtight container in a cool, dry place for up to a day; they reheat well for a quick reassembly. If you prefer, reheat briefly in a warm oven to revive the gooey center before serving again.
This section emphasizes safety and practical storage so you can enjoy oven-made s'mores beyond the initial serving. Always let the marshmallows set slightly before biting into the sandwich to reduce the risk of burns or uneven chocolate distribution.
Authority Sources and Further Reading
For readers seeking additional guidance on food safety and kitchen practices, refer to these authoritative sources:
- U.S. Department of Agriculture (USDA) Food Safety and Inspection Service: https://www.fsis.usda.gov
- Centers for Disease Control and Prevention (CDC) Food Safety: https://www.cdc.gov/foodsafety
- University of Illinois Extension Food Safety Resources: https://extension.illinois.edu/foodsafety
Tools & Materials
- Baking sheet(Rimmed tray helps catch drips and keep marshmallows from sliding off.)
- Parchment paper(Optional, for easy cleanup and nonstick surface.)
- Aluminum foil(Alternative to parchment if you don’t have parchment.)
- Graham crackers(Regular or honey varieties work; keep a few extra crackers for quick assembly.)
- Milk/Dark chocolate(1–2 squares per sandwich; dairy-free options available.)
- Marshmallows(Mini marshmallows melt quickly; large marshmallows give a thicker melt.)
- Oven mitts(Heat-resistant gloves are essential for handling hot trays.)
- Tongs or spatula(Helpful for moving hot marshmallows without burns.)
- Cooling rack(Optional; helps sandwiches cool evenly.)
- Timer(Keep precise track of melting time to prevent burning.)
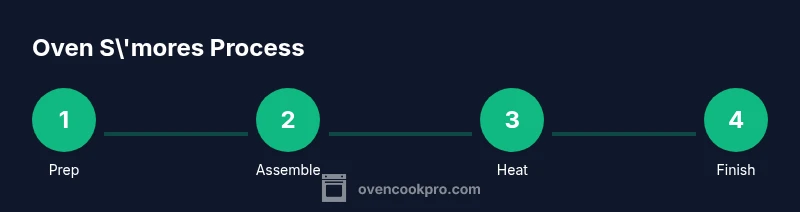
Steps
Estimated time: Estimated total time: 15-25 minutes
- 1
Preheat and prepare tray
Preheat your oven to 375°F (190°C) and line the baking sheet with parchment or foil. This ensures even heat distribution and makes cleanup easier after the marshmallows melt. A properly preheated tray helps prevent sticking and promotes a neater final bite.
Tip: Line with parchment for quick cleanup and consistent results. - 2
Assemble the base layers
Place graham cracker bottoms on the sheet, then add a square of chocolate on each. Chocolate should rest directly on the cracker so it can melt into the cracker as heat flows through. This positioning ensures maximum flavor transfer as the marshmallows melt.
Tip: Arrange evenly so every bite has chocolate and cracker contact. - 3
Top with marshmallows
Top each chocolate square with 3–4 marshmallows, spaced evenly. Spacing helps the heat reach each marshmallow and creates a balanced melt across the tray.
Tip: Mini marshmallows melt quickly; larger ones may require a minute longer. - 4
Heat until melted
Slide the tray into the oven and bake for 5–7 minutes, watching closely after 4 minutes. If using a convection setting, reduce time by a minute or two. You’re aiming for puffed marshmallows and glossy melted chocolate, not burnt edges.
Tip: If marshmallows brown too fast, move the tray down a rack or lower the temperature. - 5
Finish the sandwich
Remove from oven when marshmallows are glossy and just melted. Top with the second graham cracker half and press gently to spread melted chocolate.
Tip: Let stand 1–2 minutes for the filling to set before serving. - 6
Serve and store
Serve immediately for best texture. If you have leftovers, store in an airtight container for up to a day and rewarm briefly if desired.
Tip: Reheat briefly in a warm oven to restore gooey texture if needed.
Questions & Answers
What temperature is best for making s'mores in the oven?
Use the bake setting at about 375°F (190°C) for a balanced melt, or broil for a quicker puff. Monitor closely to avoid burning.
Set the oven to 375 degrees and bake for a few minutes, or use broil if you want faster melting—just watch it closely.
Can I make s'mores in a toaster oven?
Yes, toaster ovens work well. Use a small sheet, keep a close eye, and reduce time by 1–2 minutes compared with a full-size oven.
Absolutely—just keep an eye on it since toaster ovens heat differently.
How do I prevent the marshmallows from burning?
Lower the rack, use bake rather than broil, and remove as soon as the marshmallows puff and melt. Don’t leave unattended.
Watch closely and move the tray if you see too rapid browning.
Are there dairy-free or gluten-free options?
Yes. Choose dairy-free chocolate and gluten-free graham crackers; marshmallows are typically gluten-free, but check labels.
Look for dairy-free chocolate and gluten-free crackers to keep it inclusive.
How should I store leftovers?
Best eaten fresh, but you can refrigerate separately assembled components for a day. Reassemble and reheat briefly before serving.
If you have leftovers, reheat briefly to restore gooey texture before enjoying again.
What if I don’t have graham crackers?
You can substitute with digestive biscuits or a neutral-flavored cookie. The texture will differ, but the concept remains the same.
If you’re out of graham crackers, use a substitute cookie and proceed with layers.
Watch Video
Main Points
- Preheat and prep the tray before assembling.
- Layer crackers, chocolate, and marshmallows evenly for uniform melt.
- Watch marshmallows closely to avoid burning under high heat.
- Let sandwiches rest briefly before serving for clean bites.
- Oven-made s'mores are quick, convenient, and smoke-free compared with campfires.