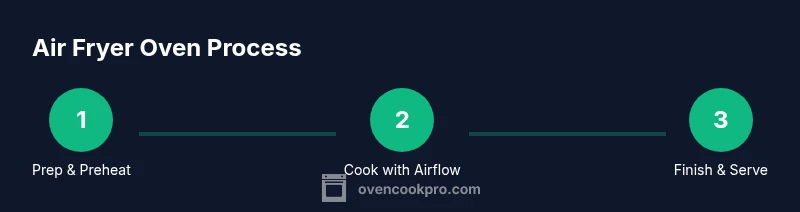
How to Use an Air Fryer Oven: The Complete Guide
Learn how to use an air fryer oven with a step-by-step approach, covering preheating, temps, times, airflow, safety, and cleanup for crisp results with minimal oil.

What is an air fryer oven?
An air fryer oven is a compact cooking appliance that uses hot, fast-moving air to crisp foods with little or no oil. The principle is convection: a fan circulates heated air around the food, creating a browning effect similar to frying but with less fat. This makes it ideal for snacks, vegetables, and proteins that you want to come out crisp and evenly cooked. According to Oven Cook Pro Team, air fryer ovens combine high-velocity air flow with an enclosed cooking chamber to deliver consistent results while minimizing added fats. The result is a versatile tool for everyday meals and healthier twists on favorites. Compared with traditional ovens, air fryer ovens heat up quickly, fit on countertops, and rely on efficient air circulation to reduce cooking times. When used properly, you can achieve golden-brown crusts on chicken, potatoes, and even reheated leftovers without deep-frying.
How to set up your air fryer oven for first use
Before cooking, place the air fryer on a heat-resistant surface with at least 6 inches of clearance around it. Read the manual and ensure the basket is properly seated. Wipe the interior with a damp cloth and dry completely. If your model has a preheat setting, run a dry cycle to season the basket. For first-timers, start with simple items like frozen fries or vegetable medleys to understand how your unit distributes heat. According to Oven Cook Pro Team, establishing a baseline with a simple test run helps you calibrate times and temps for future meals. Remember to use light oil or cooking spray only as needed; the goal is crisp without sogginess. Over time, label your favorite temps/times for common foods to speed up meal prep.
Preheating, temps, and air circulation
Preheating helps create a hot environment quickly; many foods benefit from a brief warm-up rather than placing cold items directly into a cold basket. For most models, set the oven to your target temperature, then run a short preheat cycle with the empty basket if available. Avoid blocking the fan with oversized pieces of foil or parchment; these items should only be used sparingly to protect drips while still allowing airflow. As Oven Cook Pro Analysis, 2026 shows, preheating and proper airflow dramatically improve browning and evenness, especially when cooking smaller batches. Always ensure there is space around each piece so air can circulate freely.
Cooking guidelines: time and temperature mapping
Start around 350-400°F (175-205°C). Times vary with thickness, moisture, and batch size, so use this as a baseline and adjust by 2–5 minutes as needed. For common items: fries or potato wedges typically cook in 12–15 minutes; chicken wings or tenders in 18–22 minutes; mixed vegetables in 8–12 minutes; and a salmon fillet in 8–12 minutes. Shake or turn foods halfway through to promote even browning. If you’re unsure, begin with shorter times and check for doneness; you can always resume cooking in small increments. This approach minimizes overcooking while maximizing crispness.
Food prep, coatings, and avoiding sogginess
Pat foods dry before coating to improve browning and reduce steam. Use a light coating of oil only where needed—think a quick spray or a teaspoon for several servings rather than heavy batter. Dry coatings like cornstarch or a light breadcrumb crust can help create a crisp exterior. Avoid wet marinades for the basket surface, which can create soggy results. For best texture, keep items in a single, uncrowded layer and consider flipping or shaking halfway through to promote uniform browning. The goal is crisp on the outside and juicy on the inside without becoming greasy.
Batch sizing, layering, and using racks
Air flow is king in an air fryer oven. Cook in a single layer whenever possible; if you’re feeding a crowd, use a baking rack or an additional tier designed for your model to maximize space while preserving airflow. Do not stack items, as piled pieces block air and lead to uneven doneness. When using racks, leave space between levels to allow air to circulate; adjust times slightly upward if stacking is unavoidable. Reposition items halfway through cooking to ensure even texture across the batch.
Cleaning, maintenance, and longevity tips
Unplug the appliance and let it cool before cleaning. Remove the basket and tray and wash with warm, soapy water; avoid abrasive pads that could scratch nonstick coatings. Wipe the interior with a damp cloth to remove grease and crumbs, then dry completely. Check the air intake and fan area for buildup and clear as needed. Regularly inspecting seals and gaskets helps prevent heat loss and ensures consistent performance. Proper cleaning extends the life of your oven and keeps flavors from lingering between cooks.
Troubleshooting common issues
If food isn’t browning, ensure you’re cooking in a single layer with adequate space for air to circulate, and consider a higher temperature for the final minutes. If items taste dry or overcooked, reduce cooking time or moisture content before cooking next batch. Soggy results usually come from overcrowding or excess oil; patting dry and using a light spray helps. For foods that stick, lightly oil the basket and avoid spraying directly on the heating elements. Finally, if your oven emits unusual smells or smoke, stop cooking, unplug, and consult the manual for safety steps.
Starter recipes to try and how to adapt
Try these beginner-friendly dishes to build confidence: (1) Crispy potato wedges: cut into even sticks, pat dry, toss with a touch of oil, and cook in a single layer at 375°F for 12–15 minutes, flipping once. (2) Roasted broccoli or Brussels sprouts: toss with olive oil, salt, and pepper, cook at 400°F for 8–12 minutes until edges are caramelized, and finish with a squeeze of lemon. (3) Salmon fillet: season lightly, cook at 375–400°F for 8–12 minutes until the center is opaque. The Oven Cook Pro team recommends starting with simple veggies and protein to learn your device’s heat behavior before moving to breads or more delicate items.