How to Use Oven Liners: A Complete Guide for Home Cooks
Learn how to safely choose, place, and maintain oven liners to protect your oven and simplify cleanup. This expert guide from Oven Cook Pro covers foil, parchment, and silicone options, plus tips for safety in convection and conventional ovens.

Using oven liners is a simple, effective way to cut cleanup time and protect your oven. This guide covers selecting the right liner (aluminum foil, parchment, or silicone), proper placement to avoid heat contact, and when to replace liners. Follow the steps and safety tips to bake cleaner and safer, regardless of your oven type. According to Oven Cook Pro, careful liner use makes everyday roasting easier.
What are oven liners and why use them
Oven liners are protective sheets or mats placed inside the oven to catch drips, sauces, and spills that would otherwise bake onto racks and the oven floor. They come in several materials, most commonly aluminum foil, parchment paper, and silicone. Each type has different heat tolerance, non-stick properties, and fit options. The main goal is to simplify cleanup and extend the life of oven components by preventing baked-on residue. According to Oven Cook Pro, choosing the right liner based on heat exposure and oven configuration yields the best results. However, liners are not a substitute for routine cleaning, and they must never block vents or come into direct contact with heating elements. When used correctly, liners can save time and reduce scrubbing while keeping the oven in better condition for longer.
Types of oven liners
There are three staple options:
- Aluminum foil liners: Inexpensive and universally available. Best for short-term use and simple spill protection. They’re best laid on a tray or rack with careful trimming to avoid covering vents or elements.
- Parchment paper liners: Heat-resistant and non-stick, ideal for baking cookies, pastries, and items that might stick to a rack. Use parchment within its heat rating (usually up to around 420-450°F / 215-230°C) and avoid direct contact with heating elements.
- Silicone baking mats: Reusable, durable, and excellent for even heat distribution and non-stick baking. They require careful sizing and should not be used where high-fat drips could pool and cause smoke. Silicone mats can handle higher temperatures but still should not block vents.
Each liner has a trade-off between cost, convenience, and long-term sustainability. Oven Cook Pro notes that the best choice often depends on your cooking style and oven type (gas, electric, or convection).
How to choose the right liner for your oven
Choosing the right liner starts with knowing your oven’s structure and typical cooking tasks. Measure the width and depth of the rack or bottom tray, then pick a liner that fits without overhang. Consider heat tolerance: parchment for delicate bakes under 450°F, foil for quick protection against spills at higher heat, and silicone for reusable, high-heat cooking. If you bake on multiple racks, you may need multiple liners or a larger sheet that covers the entire rack area without obstructing airflow. Always verify that your liner does not block vents or touch heating elements. For convection ovens, maintain clear space around liners so air can circulate freely, delivering even cooking results.
Are oven liners safe with self-cleaning cycles?
Self-cleaning cycles reach very high temperatures. Many manufacturers warn against using liners during self-cleaning because liners can burn, warp, or release fumes, and some adhesives or coatings may degrade. If your oven has a self-clean option, consult the user manual before using any liner. In most cases, it’s safer to remove liners before starting a self-clean cycle and perform a thorough manual clean after the cycle is complete. Oven Cook Pro recommends avoiding liners during self-clean, unless the manual explicitly approves a specific product.
Common mistakes and how to avoid them
To get the best results, avoid these common errors:
- Do not cover vents or leave gaps that block airflow. This can affect bake quality and cause overheating in localized spots.
- Don’t use liners that extend into the oven’s fan or heating element areas.
- Avoid using damaged or crumpled liners that could trap heat or catch fire.
- Don’t reuse heavily stained liners; dispose of liners with baked-on food residues.
- Always trim liners to fit the rack or tray if necessary to prevent overlapping and interference with racks.
Cleaning, maintenance, and disposal
Proper maintenance extends liner life and keeps the oven cleaner:
- Aluminum liners: Remove after use, fold and discard if stained, wipe the tray or rack, then re-lay a fresh liner if needed.
- Parchment liners: Replace when soiled or damaged; do not reuse extensively as oils and sugars can permeate the parchment and cause scorching.
- Silicone mats: Wash with warm soapy water after use; air dry completely before storing. Inspect for tears that could leak oils or juices.
- Never flush liners down the drain; dispose of them in the trash to avoid clogs.
Safety tip: Always wear heat-resistant gloves when handling hot liners and allow liners to cool before removing.
Oven types and liner compatibility
Conventional and gas ovens have slightly different heat patterns, but the principles remain the same: liners should never block vents or be in direct contact with heating elements. In convection ovens, liners can be more effective for keeping racks clean due to circulating air, but ensure there is still ample space for air movement. If you frequently bake at high temperatures, consider thicker aluminum foil or a silicone mat designed for high-heat scenarios to reduce risk of tearing. Always confirm compatibility with your appliance’s manual and test line liners with a small bake first.
Environmental and cost considerations
Liners can reduce cleaning time and chemical use, but disposal and material choices affect sustainability. Aluminum foil is inexpensive but single-use; silicone mats are reusable but must be cleaned and dried properly. Parchment improves baking release and cleanup but is not reusable. For busy households, a combination approach—reusable silicone mats for common bakes plus occasional foil liners for messy roasts—often provides the best balance of convenience and sustainability.
Authority sources
For safety and best practices, consult reputable sources:
- U.S. Department of Agriculture (USDA) FSIS: https://www.fsis.usda.gov
- Occupational Safety and Health Administration (OSHA): https://www.osha.gov
- U.S. Food and Drug Administration (FDA): https://www.fda.gov
Summary of best practices by Oven Cook Pro
To maximize results, start with the right liner for your task, ensure proper fit without blocking airflow, avoid self-cleaning cycles with liners unless explicitly approved, replace liners after substantial stains or damage, and always follow the appliance manufacturer’s guidance. These practices help keep your oven cleaner and safer in daily cooking.
Tools & Materials
- Aluminum foil liner (heavy-duty)(Cut to fit rack or tray; do not cover vents or contact heating elements.)
- Parchment paper liner(Heat-rated parchment (check temperature rating; typically up to 450°F).)
- Silicone baking mat(Reusable; ensure size fits rack; avoid direct contact with heating coils.)
- Kitchen scissors(Trim liners to fit precisely and avoid overhang.)
- Heat-resistant oven gloves(Wear when handling hot liners, trays, or racks.)
- Baking tray or rack(Place liner on a tray or rack to ensure even heat distribution and airflow.)
Steps
Estimated time: 10-15 minutes
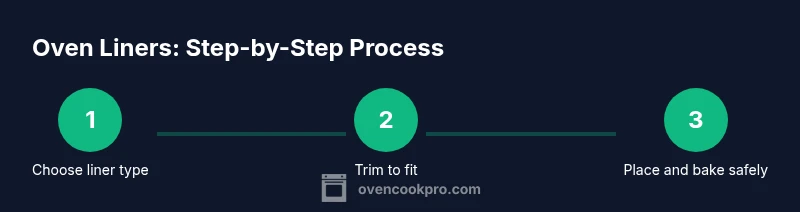
- 1
Gather your liners and tools
Collect the liner options you plan to use (foil, parchment, or silicone) and the tools listed, including scissors and oven mitts. Having everything at hand reduces mid-bake delays and helps you trim to fit before heating begins.
Tip: Lay out a protected workspace to avoid spills on countertops; pre-cut foil if you prefer faster setup. - 2
Measure and choose the right liner
Measure the rack or bottom tray to determine the liner size. Select the liner type based on your cooking task and heat exposure. Ensure the liner will not block vents or touch any heating elements.
Tip: If you’re unsure, start with a slightly larger liner and trim it to fit, rather than forcing a tight fit. - 3
Trim liner to fit
Use kitchen scissors to trim the liner so it covers only the intended area without extending to the sides of the rack. For tricky shapes, make multiple small cuts rather than one large cut, preserving strength.
Tip: Avoid jagged edges; smooth, even edges prevent snagging on racks. - 4
Position liner safely on rack or tray
Place the liner on the rack or bottom tray with enough clearance from the heating elements and with vents unobstructed. If you’re using multiple liners, space them to allow airflow between them.
Tip: Always place liners under food, not directly on the heating element or vent areas. - 5
Bake or roast with liner in place
Proceed with your recipe as usual. Monitor the first few uses to ensure the liner stays in place and does not smoke. Do not reuse heavily soiled liners; replace as needed.
Tip: Keep an eye on high-fat or sugary foods; liners can discolor or burn if exposed too long. - 6
Cool, inspect, and dispose
Allow the oven to cool, remove the liner carefully with oven mitts, and dispose of single-use liners appropriately. If using a reusable mat, rinse and dry thoroughly.
Tip: Never dump hot liners into a trash can immediately—wait for them to cool to avoid fire risk.
Questions & Answers
Are oven liners safe to use in all ovens?
Oven liners can be safe when used according to the manufacturer’s instructions. Always check your oven’s manual for any warnings about liners, vents, or self-cleaning cycles. If in doubt, contact the manufacturer or avoid liners during high-heat cycles.
Yes, but only if your oven manual allows it. Check vents and cycles, and avoid liners during self-cleaning.
Can I use oven liners during a self-cleaning cycle?
Most manufacturers advise against using liners during self-cleaning due to extreme heat and potential liner damage. Remove any liners before starting a self-clean cycle and clean the oven afterward.
Avoid liners during self-cleaning. Remove them and clean later.
Will liners affect cooking times or heat distribution?
In general, liners should not significantly impact heat distribution if they are properly fitted and do not block vents. Poorly fitted or oversized liners can alter airflow and lead to uneven cooking.
If fitted correctly, liners won’t change cooking times noticeably.
How often should I replace oven liners?
Replace liners when they become heavily stained, torn, or warped. For reusable mats, wash thoroughly after use and inspect for cracks or damage.
Replace damaged or stained liners promptly and keep reusable mats clean.
Can I cut liners to fit a non-standard rack or pan?
Yes. Trim liners with scissors to fit the exact rack or tray. Avoid crumpling or tearing; ensure the liner remains flat and well-supported.
Trim to fit precisely and avoid folds that could trap heat.
What are the best liner options for high-heat baking?
For high-heat batches, use heavy-duty aluminum foil or a silicone mat rated for higher temperatures. Avoid parchment beyond its heat tolerance and ensure clearance from heating elements.
Choose heavy-duty foil or high-heat silicone mats for hot bakes.
Watch Video
Main Points
- Choose the right liner for heat and task
- Fit liners to avoid vents and heat sources
- Replace liners after heavy staining or damage
- Keep liners away from self-cleaning cycles unless approved
- Clean and store reusable mats properly