Fried Bacon in Oven: A Step-by-Step Guide
Learn how to fry bacon in the oven for perfectly crisp strips with minimal splatter. This step-by-step guide from Oven Cook Pro covers temps, racks, and cleanup for reliable results.

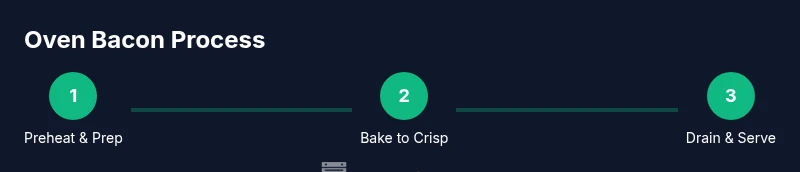
You can fry bacon in the oven to achieve crisp, even results with minimal splatter. Preheat to 400°F (204°C) and bake in a single layer on a rack or parchment-lined sheet for 12–15 minutes, flipping if needed. Remove and drain briefly on paper towels before serving. This method is quick, predictable, and easy to clean up afterward.
Why oven-baking bacon is a smart choice
Cooking bacon in the oven offers even rendering, fewer splatters, and a straightforward cleanup compared with pan frying. This method also scales up easily, so you can cook multiple pounds without standing over a hot skillet. According to Oven Cook Pro, the oven method tends to produce uniformly crisp edges while preserving tenderness in the center, making it a reliable choice for weekday breakfasts and weekend brunches alike. Using a rack improves air circulation and reduces grease pooling, while parchment or foil liner speeds cleanup and keeps your sheet pristine. For best results, start with cold bacon on a cold sheet; as the fat renders, the slices flatten and cook more evenly, which minimizes curling and uneven browning. If you like extra-crisp bacon, you can finish under a brief broil, but monitor closely to avoid charring.
Choosing the right bacon and setup
Not all bacon is created equal for oven frying. Thinner slices render quickly and can become crisp with less time, while thick-cut bacon benefits from a slightly longer bake. For consistent results, choose bacon with a balanced streak of fat and lean meat. According to Oven Cook Pro analysis, using a rack yields crisper texture and more even browning by allowing fat to drain away as the bacon cooks. If you don’t have a rack, lay the bacon directly on parchment-lined sheet, but prefer a rack when possible. Pre-cut strips from a standard grocery pack work well, while thick-cut bacon may require 2–3 minutes longer in the oven. Regardless of cut, avoid overlapping slices to ensure uniform heat exposure.
Prep: racks, pans, and parchment
Preparation matters as much as technique. Line your sheet with parchment paper or foil to keep cleanup simple. If you have a wire rack, set it inside the sheet and arrange bacon in a single layer without touching. Space is essential; overlap leads to uneven rendering and soggy edges. Preheat the oven so the fat renders immediately once the bacon hits heat, producing crisper results. If you’re using a rack, spray or brush the rack lightly with a neutral oil to prevent sticking. Have tongs ready to transfer bacon without splashing hot fat onto your hands. A clean, dry towel nearby helps pat away excess fat after cooking.
Step-by-step bake: temperature, time, and texture
The core of this method is predictable heat and time. Preheat the oven to 400°F (204°C). Arrange bacon in a single layer on a rack or parchment-lined sheet, ensuring no pieces touch. Bake for 12–15 minutes, checking at the 12‑minute mark for preferred crispness. If slices vary in thickness, rotate the sheet halfway through the bake to promote even browning. When done, remove with tongs and drain briefly on paper towels. Let the bacon rest 1–2 minutes before serving to finish crispiness and reduce oiliness. For extra texture, you can place the finished bacon under brief broil for 30–60 seconds, but watch closely to prevent burning.
Finishing touches: draining fat and serving ideas
Drain the cooked bacon on paper towels to remove surface fat. This helps maintain crispness and prevents soggy edges. Transfer to a warm plate and serve immediately, or let cool for later use in sandwiches, salads, or breakfast bowls. The rendered bacon fat can be saved for savory cooking; strain and store in a glass jar in the fridge for up to a week, or freeze for longer storage. Crispy oven bacon pairs beautifully with eggs, avocado toast, maple syrup drizzle, or a simple green salad with a tangy vinaigrette. If you’re cooking for a crowd, keep a warm oven on standby to reheat slices quickly without losing texture.
Troubleshooting common issues
If bacon looks limp or greasy after baking, it may have cooked too slowly or been overcrowded. Ensure slices are in a single layer with space between them. If edges aren’t crisp, your bake time or temperature might be slightly off for your oven; consider a 5‑minute extended bake at 25–50°F higher temperature, but monitor closely to prevent burning. Curling often happens with curved or thick-cut slices; starting with a cold sheet and using a rack can help prevent this. If bacon becomes overly dry, reduce the bake time by 1–2 minutes next time. Always pat dry before serving if you notice additional moisture on the surface.
Health, safety, and cleanup
Oven-baked bacon produces less airborne grease than pan frying, but fat can still splatter. Use a rimmed sheet to contain spills and keep a splash guard handy if your oven is prone to splatter. Always use oven mitts when handling hot sheets and racks, and let the fat cool before disposing; pour into a heatproof container for reuse or disposal. Cleaning is simpler with parchment or foil liners that catch most of the grease. For the most consistent results, wipe the sheet and rack after it cools to remove any residue, which makes future batches faster and easier.
Flavor variations and serving ideas
Enhance oven-baked bacon with subtle flavor twists. Try a light dusting of black pepper, smoked paprika, or a touch of brown sugar for a crispy, caramelized finish. For a savory kick, drizzle a tiny amount of maple syrup toward the end of the bake and then re-crisp for a few more minutes. Crumbled bacon can top salads, baked potatoes, or roasted vegetables to add a salty crunch. If you’re short on time, you can finish the bacon under a quick broil to intensify browning and texture. The key is to monitor closely so you don’t burn the fat or over-dehydrate the meat.
Common mistakes and how to fix them
Overcrowding is the most common culprit behind uneven cooking and soggy bacon. Always cook in a single layer with space between slices. Using a rack makes a big difference, but if you don’t have one, parchment on a sheet still works well. Not preheating the oven leads to softer results; always start with a hot oven. Finally, neglecting to drain fat can leave you with greasy slices; give them a proper drain and a brief rest before serving.
Tools & Materials
- rimmed baking sheet(At least 12x17 inches; helps catch grease and prevents spills)
- wire baking rack (optional but recommended)(Elevates bacon for even air circulation and crisper texture)
- parchment paper or aluminum foil(Line the sheet for quick cleanup)
- tongs(Use to lift bacon without splashing hot fat)
- paper towels(For draining excess fat after cooking)
- oven mitts(Heat-resistant protection when handling hot pans)
- container for fat(Heatproof jar or can for saving rendered fat)
Steps
Estimated time: 25-30 minutes
- 1
Preheat oven
Set your oven to 400°F (204°C) and allow it to fully preheat. A hot start helps render fat quickly and makes the bacon crispier. This step establishes a stable heat environment so the slices cook evenly from edge to edge.
Tip: If your oven runs cool, give it a few extra minutes beyond the standard preheat time. - 2
Prepare pan and lining
Line a rimmed sheet with parchment paper or foil to minimize cleanup. If you have a rack, place it on the sheet to lift the bacon above its own fat. This improves air flow and results in crisper strips.
Tip: A rack is preferred, but parchment alone still works well for good results. - 3
Arrange bacon in a single layer
Lay the bacon strips in a single, even layer. Avoid overlapping; crowding slows rendering and leads to uneven texture. If needed, bake on two trays to maintain space between slices.
Tip: Firm strips that don’t bend hold their shape better during cooking. - 4
Bake and monitor
Place the pan in the preheated oven and bake for 12–15 minutes. Start checking at 12 minutes and adjust based on desired crispness and thickness. If using two racks, rotate midway for uniform browning.
Tip: Thickness and oven variation mean you may need up to 2 extra minutes; monitor closely toward the end. - 5
Drain and rest
Transfer the bacon to paper towels to drain and pat away excess fat. Let it rest 1–2 minutes to finish crisping as the surface moisture evaporates. Serve promptly for maximum crunch.
Tip: Avoid stacking slices while hot to prevent steam-softening. - 6
Save the fat (optional)
Carefully pour the hot rendered fat into a heatproof container for later use in cooking. Strain if needed to remove solids. Fat can add rich flavor to roasted vegetables or sautéed eggs.
Tip: Allow fat to cool before sealing the container. - 7
Clean while warm
While the pan is still warm, slide it out and wipe away grease with a paper towel. For stubborn residue, a quick soak with warm soapy water helps break down the fat.
Tip: Avoid placing a hot pan under water to prevent warping or stress. - 8
Reheat or repurpose
If you’re preparing bacon for later, reheat on a sheet at 350°F (177°C) for a few minutes until crisp. Alternatively, crumble cooled bacon over salads, pasta, or potatoes.
Tip: Recrisping in a hot oven preserves texture better than microwaving. - 9
Compare thickness
If your favorite bacon is particularly thick, plan for the longer end of bake time and test for crispness at the 14–16 minute mark. Thicker slices will render more fat but may require extra time.
Tip: Never assume identical results across brands; adjust as needed. - 10
Finish the batch
If cooking multiple trays, keep warm with a low oven setting or tent the plates under foil to prevent cooling too quickly. Recheck for crispness before serving all at once.
Tip: Small adjustments in heat or time can dramatically affect final texture.
Questions & Answers
Can I bake bacon in the oven without a rack?
Yes. Bacon can be baked directly on parchment-lined sheets without a rack, but you may get slightly less even crispness and more grease pooling. If you don’t have a rack, rotate the tray halfway and keep slices in a single layer for best results.
Yes, you can bake bacon on parchment directly, but using a rack yields crisper bacon and less grease pooling.
What temperature is best for crispy bacon?
A common, reliable temperature is 400°F (204°C). This heat level renders fat steadily and yields consistent browning across slices.
About four hundred degrees is ideal for crispy bacon.
How long does bacon take in the oven?
Most bacon crisps in 12–15 minutes, depending on thickness and desired doneness. Start checking at the 12-minute mark and adjust if needed.
Most bacon crisps in around 12 to 15 minutes; check early if slices are thin.
Can I cook multiple trays at once?
Yes. Use a second tray or rotate trays between racks halfway through cooking to ensure even browning. Expect a few extra minutes if using more sheets.
Yes, you can cook several sheets at once; rotate halfway through for even browning.
How should I store and reheat leftover bacon?
Cool completely and refrigerate in an airtight container for up to several days. Reheat in a warm oven or skillet until crisp again for best texture.
Store cooled bacon in the fridge and reheat in the oven or skillet until crisp.
Are there health or safety concerns with this method?
Bacon fat is hot, and splatter can occur. Use a rimmed sheet, line with parchment, and handle with oven mitts to stay safe. Proper draining and cleanup reduce grease buildup.
Yes—hot fat can splatter; stay safe by using a rimmed sheet and good protection.
Watch Video
Main Points
- Preheat to 400°F for best crispness.
- Cook bacon in a single layer with space between slices.
- Drain on paper towels and rest briefly before serving.
- Save rendered fat for flavorful cooking and cleanup efficiency.