How to Install and Use a Double Wall Mounted Oven
Learn how to install, operate, and maintain a double wall mounted oven with expert guidance from Oven Cook Pro. This comprehensive how-to covers space planning, electrical needs, safety, and ongoing maintenance for reliable, even cooking results.

By the end of this guide, you will be able to evaluate, install, or upgrade to a double wall mounted oven with confidence. You’ll understand space requirements, electrical needs, and ventilation, plus a safe, step-by-step approach. Gather essential tools, verify cabinet compatibility, and follow oven safety best practices to ensure reliable performance and even cooking outcomes.
What is a double wall mounted oven?
A double wall mounted oven is a built-in cooking appliance that stacks two separate oven cavities inside a single cabinet column. The design saves floor space, creates a professional-looking kitchen, and allows simultaneous baking and roasting at different temperatures. According to Oven Cook Pro, these units are ideal for households that cook frequently and want precise control over two simultaneous cooking scenarios. The key distinction from a single wall oven is the third advantage: the top and bottom cavities can operate independently, giving you flexible meal timing without crowding the stovetop. When you start, confirm that the cabinet opening matches the oven’s cutout dimensions and that the surrounding cabinetry can support the weight and heat distribution. The Oven Cook Pro team emphasizes partnering with a qualified installer if you’re unsure about mounting hardware or electrical connections.
Benefits and limitations of this design
A double wall mounted oven brings several practical benefits: enhanced kitchen ergonomics since you don’t bend to access the oven, a cleaner countertop area, and the ability to cook complex meals with two separate temperature zones. It also reduces energy use when only one cavity is in use and improves airflow around hot surfaces, aiding even browning. However, the setup requires careful planning of electrical supply, proper ventilation, and robust cabinet bracing to avoid sagging doors. In some layouts, alignment with the rest of the kitchen cabinetry may demand more precise carpentry work. The balance between convenience and installation complexity is a core consideration a homeowner must weigh before purchase.
Key specs to check before buying
When evaluating a double wall mounted oven, focus on cavity sizes (width, height, depth), the number of heating modes (bake, broil, convection), and control interface ease. Check the installation depth to ensure it sits flush with the surrounding cabinetry. Confirm that your kitchen has a dedicated electrical circuit capable of supporting both cavities and any integrated features (like self-cleaning modes). Look for venting compatibility and an anti-tip bracket to secure the unit. The manufacturer’s installation manual will outline minimum clearances and required mounting hardware. If you’re working with an older home, budgeting for additional framing or bracing prevents future expansion issues and aligns the unit with standard cabinet heights.
Safety considerations and building codes
Oven installations involve electrical and thermal hazards, so safety must be the primary concern. Always de-energize circuits at the breaker box before any wiring work, wear appropriate PPE, and verify that the cabinet and wall materials can tolerate sustained heat exposure. Local building codes often require a licensed electrician for resistive wiring and a professional carpenter for cabinet modifications. The Oven Cook Pro Team notes that following manufacturer specifications reduces warranty voids and minimizes risk during operation. Keep a smoke detector in the kitchen area and verify that the oven vent path is unobstructed to prevent heat buildup. Document all compliance steps for future maintenance or resale.
Measuring space and planning layout
Accurate measurements prevent delays and costly rework. Start by measuring the cabinet opening height, width, and depth, then compare to the oven’s cutout dimensions plus required clearance. Plan for the hinge door swing and ensure there is adequate clearance for user access and airflow. Consider floor plan alignment with adjacent appliances like a microwave shelf or warming drawer. Don’t forget to account for electrical outlets, a dedicated circuit, and wiring routes to the back of the unit. If you’re consolidating services (gas, electric, and venting), sketch a layout that keeps all connections accessible for future service.
Installation readiness: tools, brackets, and safety gear
Preparation is the difference between a smooth install and a rushed, risky job. Gather the essential tools: a drill with metal bits, a level, screwdrivers, a masonry bit if you’re mounting to studs, a stud finder, a torque wrench, and a voltage tester. Check for the correct mounting brackets and hardware as specified by the oven manufacturer. Have a helper on site to assist with heavy lifting and alignment. Inspect the cabinet interior for moisture, wood grain stability, and any signs of prior damage. Finally, review the installation manual to confirm the exact sequence for mounting and wiring procedures before you begin.
Maintenance and preventive care after installation
Proper maintenance preserves performance and safety. Clean the door seals regularly with a mild detergent and warm water to maintain airtight closures. Inspect the gasket for wear and replace if there are cracks or loss of resilience. If your unit features a self-cleaning mode, follow the manufacturer’s cycle instructions and avoid using aggressive cleaners. Periodically check mounting brackets and cabinet screws for tightness, especially after heavy use or relocation. Vacuum or wipe the vent openings to prevent lint buildup that could impede airflow. Keeping a simple log of service checks helps identify wear patterns and plan proactive maintenance. The Oven Cook Pro Team recommends quarterly inspections for high-use kitchens.
Common pitfalls and how to avoid them
A frequent pitfall is underestimating the cabinet modifications needed for a perfect fit. Avoid rushing wall cuts or misaligning the oven doors, which can cause uneven gaps and air leaks. Another error is neglecting a proper electrical plan, which can lead to tripped breakers or insufficient power to the two cavities. Don’t ignore ventilation—poor venting can cause heat buildup behind the unit. Always verify the unit is level and securely mounted, because misalignment can strain hinges and affect door operation. Finally, never shortcut safety checks; even experienced DIYers benefit from a professional review to ensure compliance with local codes.
Final preparations before first use
Before turning on the oven for the first time, confirm that the appliance is level, secured, and properly wired. Run a short test bake with a simple dish to check for even heat distribution and verify that both cavities operate independently as intended. Inspect all control panels for any error codes and clear them according to the manual. Confirm the vent path remains unobstructed and that you can access service panels if needed. After the initial test, perform a routine cleaning cycle if your model supports it, then label the unit’s minimum clearances and safety reminders in a kitchen notebook for future reference. The Oven Cook Pro Team emphasizes documenting all steps for peace of mind and long-term reliability.
Tools & Materials
- Measuring tape(At least 1.5 m (60 in) to verify cabinet clearance)
- Cordless drill and bits(For pilot holes and mounting brackets)
- Screwdrivers (Phillips and flat-head)(Various sizes to fit screws provided by the oven)
- Level(Ensure the oven sits perfectly plumb and square)
- Stud finder(Locate studs for secure mounting)
- Voltage tester(Confirm power is off before wiring work)
- Safety gear(Safety glasses and gloves)
- Anti-tip brackets(Secure to prevent tipping during use)
- Non-conductive ladder or step stool(Access cabinet height safely)
- Cabinet shims(Fine-tune level and alignment as needed)
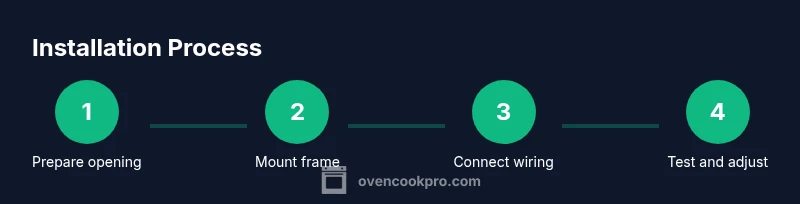
Steps
Estimated time: Estimated total time: 2-4 hours
- 1
Prepare the cabinet opening
Clear the space and verify the cabinet cutout matches the oven’s specified dimensions. Remove any obstructing shelves or hardware. Use a straightedge to confirm the opening is square, then mark any required cut adjustments.
Tip: Double-check clearance for door swing and ventilation before proceeding. - 2
Disconnect power and verify conditions
Turn off the main breaker feeding the kitchen outlets and use a voltage tester to confirm no power is flowing. Remove any existing appliance from the opening and inspect wiring routings for safety and accessibility.
Tip: Label wires clearly if you must disconnect any connections for later reconnection. - 3
Position the mounting frame and brackets
Install the oven’s mounting frame per the manufacturer’s instructions, align with the cabinet face, and level the frame. Attach anti-tip brackets to the cabinet walls or studs to secure the unit.
Tip: Have a helper hold the unit while you loosely thread the brackets to prevent movement. - 4
Make electrical connections
Connect the oven to the dedicated circuit according to the manufacturer’s wiring diagram. Ensure ground continuity and secure all connections in an accessible junction box.
Tip: If unclear about wire color codes, consult the installation manual or a licensed electrician. - 5
Secure, align, and test fit
Push the oven into the cabinet opening, align with adjacent surfaces, and tighten mounting screws. Recheck the level, door alignment, and gap uniformity all around the unit.
Tip: Inspect for any compression on electrical cables or vent lines during final alignment. - 6
Initial power-on and functional check
Restore power, run a basic bake cycle, and verify both cavities heat correctly. Observe for unusual noises, smoke, or error codes and address immediately.
Tip: Document any error codes and consult the manual or support if they appear.
Questions & Answers
Do I need a licensed electrician to install a double wall mounted oven?
Most installations require a dedicated circuit and proper grounding; check local codes. If the unit has a plug, ensure it matches the supply. When in doubt, hire a licensed electrician to ensure safety and code compliance.
Most installs require a dedicated circuit and proper grounding. Check local codes and hire a licensed electrician if you’re unsure.
Can I install the oven in an existing cabinet?
Yes, if the opening matches the oven’s cutout dimensions and the cabinet can support the weight and heat. You may need to trim, reinforce, or reframe the cabinet.
Yes, provided the opening fits and the cabinet is structurally capable. You may need cabinet modifications.
What are common venting and clearance requirements?
Follow the manufacturer’s clearance specs and ensure proper venting to outside air. Maintain space from heat-sensitive surfaces and avoid obstructing the oven’s intake and exhaust paths.
Follow the spec for clearance and ensure good venting. Don’t block air paths or heat-sensitive areas.
What maintenance is required after installation?
Regular cleaning of door seals, periodic inspection of mounting brackets, and annual checks of electrical connections help prevent issues. Use manufacturer-recommended cleaners and follow self-cleaning guidelines.
Clean seals regularly and check brackets. Follow self-cleaning guidelines and keep connections tight.
How long does installation typically take?
Time varies with cabinet modifications and wiring complexity. Plan several hours for a thorough install, plus time for any unforeseen carpentry or electrical tasks.
Expect a few hours, depending on cabinetry and wiring tasks. Plan ahead.
Can I DIY or should I hire a pro?
If you have electrical and cabinetry skills, some aspects can be DIYable. For safety and code compliance, especially electrical work, hire a professional if you’re not confident.
DIY is possible for skilled homeowners, but professionals are recommended for electrical work.
Watch Video
Main Points
- Plan cabinet and wiring before buying.
- Secure mounting with anti-tip brackets.
- Verify both cavities operate independently.
- Follow manufacturer instructions for ventilation.