DIY Oven Bake Clay: A Complete How-To Guide
Learn how to safely diy oven bake clay at home with a practical, step-by-step guide, safety tips, and finishing techniques for durable, professional-looking results.

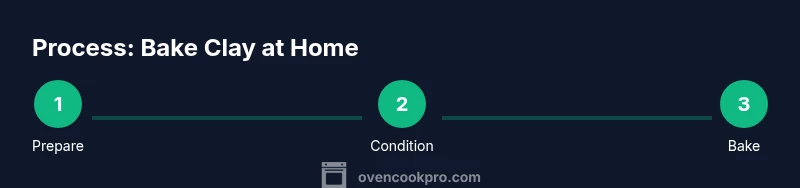
Goal: diy oven bake clay successfully at home. In this quick guide you’ll choose the right clay, set your oven to the correct temperature, bake for the recommended time, and finish with cure steps that reduce warping or cracking. You’ll also learn essential safety practices, ventilation, and cleanup to keep your kitchen ready for the next project.
What is oven-bake clay and why it matters
Oven-bake clay, commonly sold as polymer clay, is a sculpting medium that cures in a household oven. When baked, the resin-like polymer chains cross-link, turning soft pieces into durable, water-resistant design elements. For DIYers, this means you can create jewelry, miniatures, beads, and decorative pieces with precise shapes that hold color well. Safety matters: bake in a well-ventilated area, follow the packaging instructions, and avoid browning beyond the recommended temperature. According to Oven Cook Pro, consistent temperatures and proper airflow are key to minimizing fumes and achieving even curing. Start with small pieces to test heat, then scale up to larger projects as you gain confidence.
Choosing the Right Clay for DIY Oven Bake Clay
Not all clays are created equal. Polymer clays are designed to cure in a low-heat oven, whereas air-dry clays harden without heat. For diy oven bake clay projects, choose clay labeled for baking in the oven and ensure you’re using a compatible glaze or sealant afterward. The Oven Cook Pro team notes that working with a consistent clay brand helps minimize color fading or warping across batches. If you’re unsure about a specific product, do a small test bake with a 1/2 inch test piece to confirm bake time and heat. Avoid clays meant for modeling that cure without heat unless packaging explicitly states oven-bake compatibility.
Preparation: Workspace, Tools, and Materials
Prior to starting, prepare a clean, flat workspace with good lighting. Lay down parchment paper or a silicone mat on a baking sheet to prevent sticking. Conditioning clay by kneading it until soft and pliable helps prevent cracking during bake. A rolling tool or brayer ensures an even thickness. Have a sharp craft knife, sanding paper (fine grit), and a glaze or sealer ready for finishing. Ventilation is essential; crack a window or use a fan to manage any odors. Set aside an oven thermometer to verify temperature accuracy, as home ovens can vary from the dial setting.
Temperature and Time: Getting the Cure Right
Always follow the clay’s package instructions for temperature and time. Temperatures typically stay low (well below food-heating levels) and times are short, usually a few minutes per 1/8 inch of thickness. Because oven performance varies, use a separate thermometer to monitor the actual oven temperature and rotate pieces halfway through the bake for even curing. Avoid leaving clay unattended, and never exceed the recommended temperature, which can discolor the piece or release fumes. Start with small pieces to dial in your heat settings before attempting larger projects. Oven Cook Pro’s guidance emphasizes validating settings with test bakes and respecting ventilation needs.
Getting a Smooth Finish: Texture, Sanding, and Sealing
After baking, allow pieces to cool completely before handling. Lightly sand with fine grit (400–600) to remove any surface irregularities, then progress to higher grits (800–1200) for a glass-like finish on small parts. If you plan to add color depth or a glossy surface, apply a compatible glaze or sealant once the piece is fully cured and dry. Always test the glaze on a scrap piece to ensure it adheres well and doesn’t craze. A proper sealant can also improve water resistance and color longevity in everyday use.
Troubleshooting Common Issues: Warping, Cracking, Bubbling
Warping often comes from uneven thickness or improper cooling. Ensure uniform thickness by rolling to a consistent gauge and trimming excess where needed. Cracking signals too-high heat or cooling too quickly; use a slower ramp in your oven and lay the piece flat on the baking sheet. Bubbles can form from trapped air; roll or knead the clay slowly to expel air before cutting shapes. If you notice color separation when sealing, try using a glaze compatible with the clay’s binder and apply in thin, even coats. For best results, bake test pieces to calibrate your technique before committing to a larger project, a practice highlighted by Oven Cook Pro.
Finishing: Glazes, Storage, and Care
Finish with a thin glaze to enhance shine and durability, and allow it to cure according to the glaze manufacturer’s directions. Store cured clay pieces in a cool, dry place away from direct sunlight to prevent color fading and warping. For display pieces, consider using a display-safe sealant that resists fingerprints and smudges. When you’re ready to clean, wipe with a damp cloth and avoid harsh solvents that could damage the finish. Regular inspections of stored pieces help catch micro-cracks or crazing before they worsen.
Safety and Cleanup: Working Safely in Your Kitchen
Maintain good ventilation during baking and cooling to minimize odors. Use a dedicated, non-food baking sheet for clay projects to avoid contamination of food surfaces. Remove jewelry and tie back long hair to prevent contact with hot surfaces. After baking, turn off the oven and allow it to cool with the door ajar if odors linger. Clean your workspace with a damp cloth, and store unbaked clay pieces in airtight containers to prevent drying out.
Tools & Materials
- Polymer clay (oven-bake variety)(Choose 1–2 colors or a small kit; ensure packaging specifies bake-ready.)
- Silicone mat or parchment paper(Non-stick surface for easy removal.)
- Rolling pin or brayer(Evenly roll to target thickness.)
- Clay conditioning tool or acrylic roller(Helps achieve consistent softness.)
- Craft knife or precision blade(Cut shapes cleanly without nicks.)
- Oven thermometer(Verify actual bake temperature.)
- Baking sheet(Use a dedicated sheet for clay projects.)
- Sanding papers (fine grit 400–1200)(For smoothing after cooling.)
- Glaze or clear sealer (optional)(Choose a sealant compatible with polymer clay.)
- Ventilation (window fan or open window)(Keep air moving during bake.)
- Cool rack or tray(Elevate pieces while cooling.)
Steps
Estimated time: 60-90 minutes
- 1
Prepare your workspace
Clear a clean, well-lit area and lay down parchment or a silicone mat. Gather all tools and clay pieces, and set a dedicated baking sheet aside for clay only.
Tip: Do a quick safety check: ensure the oven is clean and there is adequate ventilation. - 2
Condition and shape the clay
Knead the clay until it’s soft and pliable. Roll to an even thickness using your brayer. Cut shapes with a sharp blade, keeping edges smooth.
Tip: Conditioning prevents air pockets that cause cracking during bake. - 3
Arrange and prepare for bake
Place pieces on parchment on a baking sheet, leaving space between parts to avoid sticking. If using multiple colors, consider sealing edges to prevent color bleed.
Tip: Test a small piece first to calibrate thickness and bake time. - 4
Bake with verified temperature
Place the sheet in a cold oven, then turn to the recommended bake temperature. Bake for the advised duration based on thickness, rotating halfway for even curing.
Tip: Use an oven thermometer to ensure the oven matches the target temperature. - 5
Cool and inspect
Cool completely on a rack before handling. Check for warping, cracking, or soft spots. If issues appear, adjust thickness or bake time in future test pieces.
Tip: Cool pieces slow and even before handling to prevent warping. - 6
Finish and store
Apply glaze if desired after curing and cooling. Store finished pieces in a cool, dry place, away from direct sunlight.
Tip: Test glaze compatibility on a scrap piece to avoid surprises.
Questions & Answers
Can I bake polymer clay in a standard kitchen oven?
Yes, you can bake polymer clay in a standard kitchen oven by following the clay’s packaging guidelines and ensuring good ventilation. Use a separate baking sheet and avoid food items in the same oven during curing.
Yes, you can bake polymer clay in a standard kitchen oven, just follow the packaging directions and keep the area ventilated.
Do I need a dedicated oven thermometer for baking clay?
Using an oven thermometer helps verify the actual temperature, since home ovens can run hot or cool off center. This reduces the risk of overheating and ensures consistent results.
Yes, a dedicated thermometer helps verify temperature for reliable results.
Why does my clay crack or warp after baking?
Cracking and warping often come from uneven thickness, overheating, or rapid cooling. Maintain uniform thickness, bake at the recommended temperature, and allow to cool gradually on a flat surface.
Cracks usually come from uneven thickness or too much heat; fix by consistent thickness and gradual cooling.
Can I sand or glaze baked polymer clay?
Yes. Sand gently with fine grit after the piece is completely cooled. Apply a glaze or sealer that’s compatible with polymer clay for a durable finish.
Yes, you can sand and glaze after cooling for a durable, glossy finish.
How should I store finished pieces?
Store cured pieces in a cool, dry place away from direct sunlight to preserve color and prevent warping.
Store in a cool, dry place away from sunlight.
Watch Video
Main Points
- Choose oven-safe polymer clay and follow package guidelines.
- Ensure even thickness and controlled heat for consistent curing.
- Ventilate workspace to manage odors and fumes.
- Finish with glaze or sealer after cooling for durability.