Crispy Oven Bacon: A Thorough Step-by-Step Guide for Home Cooks
Learn a reliable method to achieve perfectly crispy oven bacon with minimal mess. This comprehensive guide covers preheating, sheet prep, timing, variations, and safety tips for thicker cuts and everyday cooking.

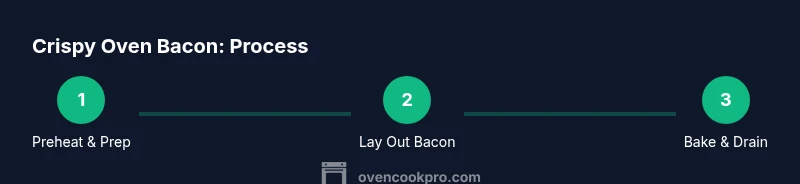
You’ll master crispy oven bacon in five steps: preheat the oven to 400°F, line a rimmed sheet with parchment, arrange bacon in a single layer without overlap, bake 12–15 minutes until edges are golden and center is set, then drain on a rack and pat dry. For chewier bites, shorten time; for extra crisp, bake a bit longer.
Why Crispy Oven Bacon Is a Smart Choice
Crispy oven bacon has become a staple in many kitchens because it delivers consistent, restaurant-quality texture with less mess than pan-frying. With the right setup, you’ll get evenly crisp slices without frequent flipping or splatter. According to Oven Cook Pro research, oven cooking reduces splatter dramatically and yields uniform crispness across the tray, even on busy mornings when you’re juggling multiple dishes. The key is starting with quality bacon and a reliable bake environment that maximizes airflow while minimizing fat pooling. When done correctly, crispy oven bacon can elevate breakfasts, sandwiches, and side dishes, and it stores well for quick future meals. If you’re new to this method, expect a slight learning curve as you dial in thickness and bake time, but the payoff is steady, dependable results that are easy to repeat.
Key Factors That Influence Crispness
Crispness is primarily affected by temperature, air contact, and resting time. Higher heat at the start helps render fat quickly, while finish-time exposure gives you that desirable crunch without drying out the meat. Thickness matters: regular sliced bacon crisps differently than thick-cut varieties. Parchment paper or a silicone mat minimizes sticking and facilitates clean-up, while an optional rack lifts slices off the fat so air can circulate around every side. Convection in your oven accelerates drying and evenly distributes heat, which can shave a minute or two off total bake time. Keep in mind that ovens vary; a few minutes’ difference can mean the distinction between floppy edges and perfectly crisp tips. Always aim for a light-amber color and a gentle snap when you bite into a piece.
Prep Work: Tools, Ingredients, and Setup
You don’t need fancy ingredients for this technique—just good-quality bacon and a clean pan. But the setup matters. A rimmed baking sheet is essential to catch rendered fat and prevent accidental overflow. Parchment paper helps with cleanup and prevents sticking, while a rack (if available) allows fat to drain away and air to flow under the slices. Preheating ensures the bacon starts cooking immediately and doesn’t steam in a cold pan. The goal is even rendering of fat and uniform browning across every slice, not just the center. If you’re cooking for a crowd, consider batch-cooking on two sheets to avoid overcrowding.
Step-by-Step Cooking Process
The actual cooking sequence is simple, but timing matters. Place your bacon in a single layer, with no overlaps to prevent sticking and uneven crisping. Bake until the edges turn golden and the fat is mostly rendered, then remove and let the slices drain on a rack to finalize their texture. If you prefer chewier bacon, pull it a touch earlier; for extra crunch, let it rest a bit longer while keeping a close eye on color changes. Remember, the bacon continues to crisp slightly as it cools, so remove it when it’s just shy of desired crispness.
Variations: Thick-Cut vs Regular Bacon
Thick-cut bacon presents a small challenge: it needs longer to render fat and reach a full crisp without burning the edges. Start with a shorter initial bake time if you’re using thick-cut slices and monitor closely. Regular-cut bacon becomes crispy a bit faster and works well with shorter rest times. If you’re experimenting, try a quick test with two tiny strips of each thickness to calibrate your oven’s behavior before cooking a full tray.
Troubleshooting Common Issues
If slices curl, it’s usually due to uneven render or crowding. Ensure slices lay flat and aren’t touching. If grease smoke appears, crack a window or temporarily reduce temperature to avoid bitter flavors. Soggy centers indicate insufficient air contact or overly thick slices; in that case, increase heat slightly or extend the bake by a minute or two. Burning tips usually point to very thin slices or too-long bake times—pull once the color shifts from pale gold to amber.
Serving Ideas and Cleanup
Crispy oven bacon pairs well with eggs, toast, and greens, or blends nicely into flavors for casseroles and sandwiches. For best texture, pat off excess grease with paper towels immediately after removing from the rack. Store leftovers in an airtight container for up to four days and reheat briefly on a sheet in a 350°F oven to restore crispness. Cleanup is straightforward: crumple the parchment, pour off the rendered fat into a heat-safe container, and wash the sheet promptly to prevent hardened grease buildup.
Authority Sources and Further Reading
For reliability and safety, refer to these authoritative sources:
- https://www.fsis.usda.gov/food-safety
- https://www.cdc.gov/foodsafety/index.html
- https://www.hsph.harvard.edu/nutritionsource/
These resources provide general guidance on food safety and temperature considerations that align with home-cooking practices for crispy oven bacon. Always verify temperatures with your oven’s manual and adjust based on your altitude and rack position.
Tools & Materials
- rimmed baking sheet(14x18 inches or larger recommended)
- parchment paper or silicone mat(for easy cleanup and nonstick surface)
- oven-safe rack (optional)(raises bacon for better air flow)
- tongs(to adjust slices if needed during bake)
- paper towels(to drain and pat dry after baking)
- cooling rack (optional)(used for final drain and crisping)
Steps
Estimated time: 30-45 minutes
- 1
Preheat and prep the pan
Preheat your oven to 400°F (200°C) and line a rimmed baking sheet with parchment. This setup prevents sticking and makes cleanup easier, while starting hot helps render fat quickly.
Tip: Place the rack on the sheet for maximum air circulation if you have one. - 2
Lay bacon in a single layer
Arrange slices in a single layer, without overlapping. Space is essential for even cooking and uniform crispness across all pieces.
Tip: If you’re using regular-cut bacon, a few overlaps can still crisp up, but avoid dense packing. - 3
Bake until crisp
Bake for 12–15 minutes, checking around the 12-minute mark. Edges should be golden and the fat rendered but centers may still release a touch of pliability.
Tip: For thinner cuts, start checking sooner to prevent over-crisping. - 4
Drain and rest
Remove the tray and transfer bacon to a rack to drain for 1–2 minutes. The resting period helps set the crisp texture.
Tip: Pat with paper towels if you see excess fat pooling on the surface. - 5
Serve or store
Serve immediately for best texture, or store cooled slices in an airtight container for up to four days. Reheat on a sheet at 350°F for a quick upgrade.
Tip: Reheat briefly to avoid re-wilting; heat is enough to re-crisp without drying.
Questions & Answers
What temperature is best for crispy oven bacon?
Most ovens perform best around 400°F (200°C) for crispy oven bacon, but thickness and oven calibration can shift this slightly. Start here and adjust by 1–2 minutes based on results.
Crispy oven bacon is usually best at 400 degrees Fahrenheit, but you may adjust a minute or two based on thickness and your oven.
How long does bacon take in the oven?
Typical bake time is 12–15 minutes for standard slices, but thicker bacon may need up to 18 minutes. Check for golden edges and rendered fat as your cue.
Most bacon takes about 12 to 15 minutes; thicker slices may need a bit longer. Watch for golden edges and rendered fat.
Can I use foil instead of parchment?
Foil works but tends to stick and can make cleanup harder. Parchment or a silicone mat is preferred for easy release and cleaner sheets.
Foil can be used, but parchment makes cleanup easier and helps prevent sticking.
Is oven bacon healthier than pan-frying?
Oven cooking reduces splatter and allows fat to render away from the bacon, which can yield crisper results with less mess. Nutritional differences depend on portion and bacon type.
Oven bacon reduces splatter and can be easier to drain, though the fat content depends on the cut you choose.
How should I store and reheat leftover bacon?
Cool fully, store in an airtight container for up to four days, and reheat on a sheet at 350°F for a few minutes until crisp again.
Let bacon cool completely, store in an airtight container, and reheat on a sheet at 350 degrees until crisp.
Can I cook bacon in a convection oven?
Yes—convection can speed up crisping. Start with 375°F and monitor closely; you may shave a minute or two off the standard bake time.
Convection ovens work well for bacon; consider lowering the temperature a bit and watching closely.
Watch Video
Main Points
- Preheat to 400°F and use parchment for best results
- Cook in a single layer with good air circulation
- Drain on a rack to finish crisping
- Adjust time based on thickness for perfect texture
- Store leftovers properly and reheat to crisp