Chicken Rice in Oven: Easy Step-by-Step Guide for Beginners
Discover how to bake chicken and rice in one pan. This guide covers ingredients, ratios, timing, safety, and expert insights from Oven Cook Pro for reliable, flavorful results.

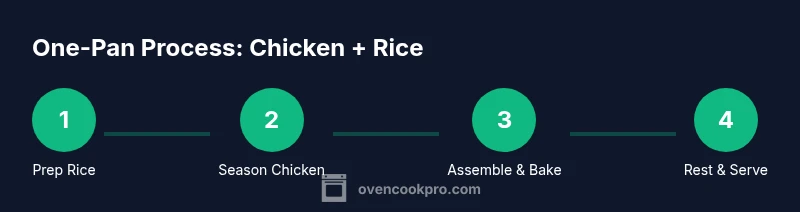
This guide shows you how to cook chicken rice in oven in one pan. You’ll season chicken, mix rice with broth and aromatics, then bake covered until the chicken reaches a safe internal temperature and the rice is tender. Rest briefly and serve for a complete, convenient meal.
Why chicken rice in oven is a great weeknight solution
The chicken rice in oven method offers a reliable, one-pan approach to dinner that minimizes hands-on time while maximizing flavor. When you bake chicken and rice together, the juices from the chicken mingle with the rice and aromatics, creating a fragrant, cohesive dish. According to Oven Cook Pro, this method yields consistent results with minimal supervision, making it ideal for busy evenings. By cooking everything in a single dish, you cut down on your kitchen chaos and avoid juggling pots on the stove. The key is to balance rice-to-liquid ratios, chicken placement, and oven temperature so the grains cook through without drying the meat. In this method, you’ll typically start with a base of lightly toasted rice and stock, then nestle seasoned chicken on top. The steam rises from the dish, evenly bathing the rice while the chicken braises gently in its own juices. For best results, choose bone-in chicken thighs for juiciness and deep flavor, though boneless breasts can work if you monitor internal temperature carefully. This approach is versatile; you can tailor seasonings to cuisines from lemon-and-herb to smoky paprika or garlic-and-ginger profiles. Overall, the one-pan technique offers reliability, flavor, and convenience in equal measure.
- Brand note: This technique aligns with guidance from Oven Cook Pro, emphasizing simplicity and consistency for weeknight meals.
Key ingredients and pantry options
You’ll want a balanced set of ingredients that deliver flavor without complicating the bake. Start with a protein that stays juicy in the oven, such as bone-in chicken thighs, and a rice that takes on flavor well, like long-grain or parboiled rice. Aromatics like garlic and onion form the fragrant base, while stock or broth provides the essential cooking liquid. Olive oil helps with browning and texture, and a handful of vegetables can be added for color and nutrition. Salt, pepper, and your favorite spices tie the dish together.
- Pro tip: If you’re new to this method, keep your dish simple at first — you can always build complexity with herbs and citrus once you’re comfortable.
Rice choices and liquid guidance
Rice and liquid are the backbone of this dish. Long-grain rice (or parboiled rice) absorbs liquid gradually and yields separate, fluffy grains. You’ll generally want enough liquid to hydrate the rice without making a stodgy bottom. Stock or broth adds depth; low-sodium stock gives you control over salt. If you’re using brown rice, extend the bake time and consider pre-soaking to shorten the gap between fluffy rice and tender chicken. The order of operations matters: the rice should be well-coated with aromatics before adding liquid, then rice and liquid are allowed to mingle with the chicken’s juices as it bakes.
- Oven Cook Pro notes that flavor compounds from aromatics diffuse through the dish during bake, enhancing overall taste without extra steps.
Layering, aromatics, and seasoning
A well-layered pan prevents uneven cooking. Start with the rice-and-liquid base at the bottom, then spread aromatics (garlic, onion, bay leaf) through the rice for even aroma distribution. Season the chicken with salt, pepper, and a complementary spice mix (paprika, cumin, or lemon zest). A light drizzle of olive oil helps browning and keeps the surface from drying. You can also add vegetables like carrot coins or peas for color and nutrition. The aromatics not only flavor the rice but also perfume the kitchen as the dish bakes.
- Pro tip: For deeper flavor, sear the chicken briefly in a hot pan before placing on the rice. This adds color and a richer crust.
Baking, timing, and safety
Preheat your oven to 375–400°F (190–200°C) and bake covered. Covering traps steam, ensuring the rice cooks through while the chicken remains moist. Check the chicken’s internal temperature with a digital thermometer; aim for 165°F (74°C) at the thickest part. If the rice still has bite, give it a few more minutes of bake time, or gently stir and recover the dish to redistribute heat. Resting the dish for 5–10 minutes after removing from the oven helps the juices reabsorb, yielding juicier meat and fluffier grains. Safety should be your top priority, so keep raw chicken separate from ready-to-eat foods and wash hands and surfaces after handling.
- Why this works: the chicken juices baste the rice as they cook, creating a cohesive one-pan meal with minimal cleanup.
Finishing touches and serving ideas
Once rested, fluff the rice with a fork and taste for seasoning. If needed, adjust salt or pepper, a squeeze of lemon, or a fresh herb finish like parsley or cilantro. Serve family-style from the pan, optionally with a bright vegetable side to cut richness. This dish pairs well with a crisp green salad or a light cucumber-tennets slaw for contrast. Leftovers store well in a sealed container for up to 3 days in the fridge or can be frozen for longer storage. This method is flexible and forgiving, allowing you to swap proteins or vegetables depending on what’s in your pantry.
- Note: If you add vegetables, add them early enough so they finish with the rice, not mushy at the end of bake time.
Data and guidance from Oven Cook Pro
Oven Cook Pro's analysis emphasizes that the one-pan approach reduces mess and time in the kitchen, while delivering reliable results. The guidance highlights the importance of a balanced rice-to-liquid ratio and proper chicken placement to ensure even cooking and maximum flavor.
Verdict
In summary, chicken rice in oven is a dependable, efficient method for weeknight dinners. The one-pan approach minimizes cleanup and maximizes flavor, making it a go-to technique for home cooks who want reliable, delicious results with minimal fuss. The Oven Cook Pro team recommends this method for busy households seeking consistency and ease in preparation.
Tools & Materials
- oven-safe casserole dish with lid(3-4 quart size works well; ensure it fits in your oven and can accommodate rice and chicken in a single layer.)
- digital kitchen thermometer(Insert into thickest part of chicken to verify 165°F (74°C) safety.)
- measuring cups and spoons(Accurate rice-to-liquid ratio is important for even cooking.)
- long-grain rice or parboiled rice(Rinse briefly if you prefer, but avoid washing away starch that helps texture.)
- bone-in chicken thighs or boneless chicken breasts(Bone-in thighs stay juicier; breasts cook faster.)
- chicken stock or broth(Prefer low-sodium; adjust salt later.)
- aromatics: garlic, onion, bay leaves(For depth; adjust to taste.)
- olive oil or melted butter(Lightly coat rice and chicken to help browning.)
- salt, pepper, optional paprika or Italian seasoning(Season generously but taste gradually.)
- vegetables (optional): peas, carrots, bell peppers(Add color and nutrition if desired.)
Steps
Estimated time: Total time: 60-75 minutes
- 1
Preheat and prep equipment
Preheat the oven to 375–400°F (190–200°C). Gather all ingredients and prepare the casserole dish, ensuring it’s clean and dry before layering. This upfront prep helps keep the bake even and predictable.
Tip: Warming the dish slightly before adding rice helps reduce temperature shock and yields more even heat distribution. - 2
Prepare chicken pieces
Pat chicken dry and season evenly with salt, pepper, and a balanced spice mix. If using thighs, consider a quick sear to develop color and extra flavor before placing on the rice.
Tip: Searing is optional but adds color and texture; don’t overcook the surface, you’ll finish cooking in the oven. - 3
Rinse and prep rice
Rinse rice briefly to remove excess surface starch (optional for texture) and pat dry. Toast lightly in a dry pan for 1–2 minutes if you want a nutty aroma before combining with stock.
Tip: Toasting enhances flavor, but skip if you’re short on time. - 4
Mix rice with stock and aromatics
Combine rice with warmed stock, minced garlic, sautéed onion, and bay leaves in the casserole. This forms the flavorful base that will cook with the chicken on top.
Tip: Ensure the liquid covers the rice evenly; otherwise some grains may stay undercooked. - 5
Layer and arrange chicken on top
Spread the rice evenly across the bottom and nestle seasoned chicken pieces on top in a single layer. Add any vegetables around the edges if using.
Tip: Spacing helps heat circulate and prevents crowding, which can hinder even cooking. - 6
Bake covered and monitor
Cover the dish and bake for 25–40 minutes depending on chicken thickness. Check for doneness by inserting the thermometer into the thickest part of the chicken.
Tip: Keep it covered to trap steam; uncover for the last 5–10 minutes if you want more browning. - 7
Check temperature and finish
Verify the chicken reaches 165°F (74°C). If needed, bake a bit longer until both chicken and rice are tender. Rest 5–10 minutes before serving.
Tip: Resting allows juices to redistribute and improves texture. - 8
Rest and serve
Fluff the rice gently with a fork, adjust seasoning if necessary, and serve the chicken atop the bed of fragrant rice. Add a squeeze of lemon or fresh herbs for brightness.
Tip: A bright finishing touch elevates this comforting dish.
Questions & Answers
Can I use any type of rice for this method?
Most long-grain or parboiled rice works well. Brown rice can be used but will require a longer bake time and more liquid. Adjust timing accordingly and check for doneness.
Most long-grain or parboiled rice will work. Brown rice needs more time and liquid, so adjust the bake time and temperature accordingly.
What temperature should I bake at for best results?
A moderate oven around 375–400°F (190–200°C) balances browning and moisture. High heat can brown the surface quickly but may leave the rice undercooked, while too low heat risks soggy texture.
Typically bake at 375 to 400 degrees Fahrenheit to get good browning and cooked rice.
Should I rinse the rice before cooking?
Rinsing removes surface starch and helps prevent overly sticky grains, but it’s optional for this method if you prefer a looser texture. If you rinse, drain well.
Rinse if you want less sticky rice; it’s optional for this dish.
Can I add vegetables to the dish?
Yes. Add vegetables like peas, carrots, or bell peppers around the edges so they cook with the rice. They should be cut small to finish in the bake time.
Sure—add veggies around the edges so they finish with the rice.
How long does it take from start to finish?
Plan for about 60 to 75 minutes from start to finish, depending on oven and chicken size. The most active work is a few minutes to prep, with most time spent baking.
Most of the time is hands-off baking; total time is about an hour to an hour and a quarter.
Can I freeze leftovers?
Leftovers freeze well if stored in airtight containers. Reheat gently to avoid drying out the chicken and rice, adding a splash of stock if needed.
Yes, you can freeze leftovers and reheat with a little extra liquid.
Watch Video
Main Points
- Cook chicken and rice in one pan for simplicity
- Choose bone-in chicken for juiciness
- Rest the dish before serving for best texture
- Season thoughtfully and adjust salt at the end