Recipes for Convection Oven: Easy, Even-Baking Tips
Discover how to use a convection oven for reliable, even cooking. This guide covers preheating, temperature adjustments, and practical, step-by-step recipes.

Master convection oven recipes by using hot, circulating air for even browning and faster cooking. Start with the convection setting, preheat to the recipe temperature, and space foods on shallow pans. Rotate trays for uniform browning. This guide includes step-by-step directions, practical tweaks, and safety notes to help convert traditional recipes with confidence. Whether baking cookies, vegetables, or proteins, you’ll learn how to convert conventional recipes with proper cookware and timing.
Why Convection Oven Cooking Matters
Convection ovens use a fan and exhaust system to circulate hot air around food. This constant airflow speeds up heat transfer, producing crisp edges and evenly browned surfaces while often shortening overall bake times. For home cooks, the result is more predictable roasts, cookies with uniform browning, and reliably roasted vegetables. According to Oven Cook Pro analysis, the key to success with convection is understanding air flow: give food space, avoid stacking, and let the fan do the heavy lifting rather than relying on high heat alone. When you start with these principles, you can transform almost any bake into a well-executed convection result, even if you only have basic kitchen tools.
Key Differences Between Convection and Conventional Baking
Conventional ovens heat from elements at the top and bottom, with no forced air. Convection ovens move heat with a fan, reducing temperature consistency and speeding cooking. Consequences: foods brown more evenly; cookies spread less; casseroles can cook more quickly; vegetables roast with crisper edges. Practical guidance: use lower temperatures by about 25°F (14°C) and check doneness earlier than you would in a conventional bake. The airflow is most effective when food is on the center rack and pans are not crowded. If your oven uses two fans or inaccurate temps, rely on an oven thermometer and adjust accordingly. By understanding these differences, you can choose proper times and temperatures for different foods and avoid common under- or over-browning issues.
How to Convert Your Favorite Recipes for Convection
Many recipes convert well to convection with small adjustments. Start by lowering the oven temperature by about 25°F (14°C) from the original non-convection directive and reduce bake time by roughly 10-20%. Arrange foods in single layers with space between pieces to promote airflow, and choose metal pans for faster heat transfer. Avoid glass when possible; it heats more slowly and can lead to uneven browning. For delicate items such as custards or bread that relies on a steady rise, test a small portion first or skip convection on the first attempt. Label your changes in the recipe so you can reuse the successful settings next time. Finally, monitor progress with a timer and visual cues rather than trusting the clock alone, because oven performance varies.
Best Cookware and Setup for Convection Ovens
For convection baking, metal pans with rims promote even airflow and browning. Avoid deep or glass bakeware that traps heat and slows airflow. Always line pans with parchment paper or use silicone mats to prevent sticking and facilitate cleaning. Elevate foods on a wire rack when possible to maximize air exposure around the bottom and sides. Preheating the oven helps stabilize the interior temperature, while a reliable timer plus an oven thermometer ensures you hit target times. Keep a few spare silicone spatulas and tongs ready to turn or flip foods swiftly.
Practical Convection Baking Scenarios
Sheet-pan dinners shine in a convection oven: toss chicken pieces with vegetables on a single or two pans, space them apart, and roast until the chicken is cooked through and vegetables are caramelized. Cookies bake with quicker, more even browning when you spread dough evenly in a shallow pan and monitor color closely. Roasting nuts or seeds in a convection oven can reduce toasting times, but watch closely to prevent burnt edges. Finally, vegetables—especially potatoes and carrots—develop crisp edges and a tender interior when allowed to breathe across the pan and not overcrowd the surface.
Common Mistakes and Troubleshooting
Overcrowding pans blocks airflow and leads to soggy results. Always leave space between pieces and swap to multiple pans if needed. Never skip preheating, as dramatic temperature shifts slow browning and affect texture. Opening the door mid-bake cools the oven and disrupts airflow, which can cause uneven results. If you notice uneven browning, rotate pans halfway through and consider a slight adjustment to the temperature or bake time based on your oven’s actual performance.
Build Confidence with a Simple Weeknight Convection Dinner
A quick weeknight convection dinner starts with a single sheet-pan: chicken thighs, broccoli florets, and red peppers arranged in a single layer. Preheat, season generously, and roast until the chicken reaches safe internal temperature and vegetables are tender with caramelized edges. This approach highlights how convection excels at multi-item meals because everything finishes together when air flows freely. With practice, you’ll be able to scale this method to larger batches or different proteins.
Tools & Materials
- Convection oven with true convection setting(Verify your oven has a working convection function.)
- Instant-read oven thermometer(Cross-check actual temperature against dial.)
- Shallow rimmed baking sheets (half-sheet pans)(Promotes air exposure for crisp edges.)
- Parchment paper or silicone baking mats(Prevents sticking and speeds cleanup.)
- Silicone spatula or tongs(Turn foods without puncturing for even browning.)
- Digital timer(Track bake times precisely.)
- Oven-safe rack for elevated placement(Improves air circulation under food.)
- Oven mitts(Protect hands when handling hot pans.)
Steps
Estimated time: 45-60 minutes
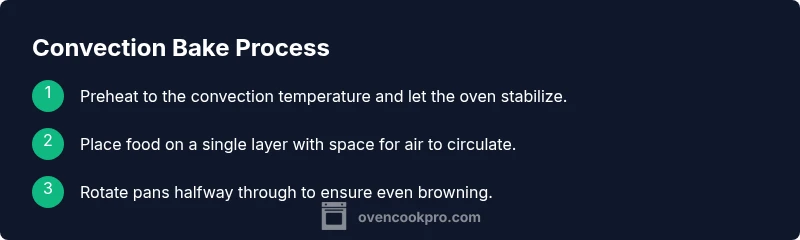
- 1
Preheat with convection
Set the oven to the recipe’s convection temperature and allow the oven to preheat fully. This ensures consistent heat distribution from the moment food goes in. Preheating typically takes about 5-10 minutes depending on your oven and the target temperature.
Tip: Use an oven thermometer to confirm the target is reached before you start baking. - 2
Gather ingredients and prep pans
Prepare all ingredients and line pans with parchment or mats. Keep ingredients ready at room temperature where appropriate to avoid temperature shocks when they hit the hot oven.
Tip: Cut vegetables to uniform sizes for even cooking. - 3
Arrange foods with space for airflow
Spread foods in a single layer with space between pieces. Overcrowding slows heat transfer and reduces browning. If needed, use a second pan or bake in batches.
Tip: Place pans on the center rack(s) to maximize air exposure. - 4
Bake and monitor, rotate trays
Bake for the time specified in the recipe, but start checking earlier than conventional timing. Halfway through, rotate trays to promote even browning across all surfaces.
Tip: Use a timer and visually assess color rather than relying solely on time. - 5
Check for doneness and remove
Use a thermometer for proteins or a skewer for vegetables and baked goods to ensure proper doneness. Remove items promptly to avoid overcooking.
Tip: If browning too quickly, lower the oven temperature by 5-10°F (3-6°C) and extend the time slightly. - 6
Rest, serve, and clean up
Let foods rest briefly to reabsorb juices and finish cooking off the heat. Clean pans promptly to prevent set-in residue and to keep your oven working efficiently.
Tip: Clean as you go to maintain consistent oven performance.
Questions & Answers
Can I use a convection oven for all my recipes?
Convection works well for roasting, cookies, and many vegetables or proteins. Delicate custards or certain breads may require conventional bake settings. Always test a small portion first when trying a new dish.
Convection is great for roasting and many baked goods, but for some delicate recipes you might want to go conventional.
How do I convert a conventional recipe to convection?
Lower the temperature by about 25°F (14°C) and reduce bake time by roughly 10-20%. Space items for airflow, and consider using metal pans. Monitor closely and adjust as needed since ovens vary.
Lower the temp and watch the time; convection changes heat transfer and browning.
Does it matter if my oven is gas or electric?
Performance can vary between gas and electric ovens due to heat distribution. Expect convection to improve browning in both, but you may need to tweak time and temp slightly based on your particular unit.
Convection helps in both gas and electric ovens, but adjust for your oven’s quirks.
What cookware works best with convection?
Metal pans with light-colored or shiny surfaces promote even browning. Avoid thick glass that retains heat unevenly. Use parchment or silicone mats to prevent sticking and ease cleanup.
Metal pans and proper lining help convection work best.
Should I preheat my convection oven?
Yes, preheating helps stabilize internal temperatures and yields consistent results. Some ultra-fast recipes may work without preheating, but for most convection cooking, preheat is recommended.
Preheating gives you consistent results most of the time.
Watch Video
Main Points
- Preheat for best results.
- Space and rotate pans for even browning.
- Lower convection temps and shorten times when converting recipes.
- Use metal pans for quicker heat transfer.