Squash Oven Recipe: A Step-by-Step Guide to Perfect Roasting
Master roasting squash in the oven with this step-by-step squash oven recipe. Learn selection, prep, temps, and variations to achieve caramelized, tender squash every time.

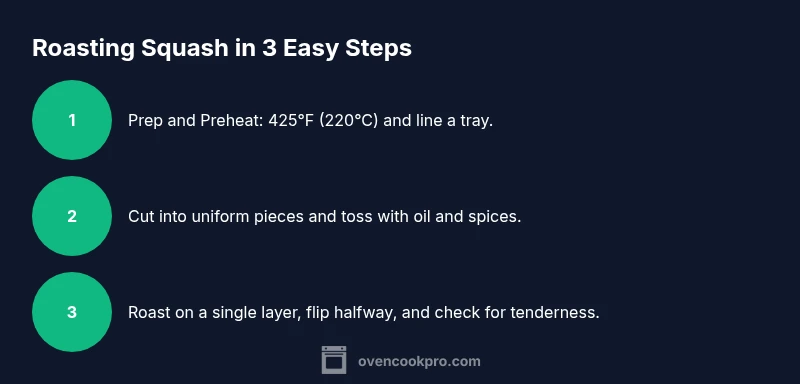
Roast squash perfectly in the oven by choosing the right squash, cutting evenly, tossing with oil and seasonings, and roasting until tender and caramelized. This guide covers prep, roasting times, and flavor variations using common tools. According to Oven Cook Pro, preheating to a high oven and spreading pieces in a single layer delivers even browning.
Choosing the Right Squash for Roasting
Winter squash varieties differ in texture and sweetness, and the best squash for roasting depends on your goal. Butternut squash yields creamy, orange flesh with a natural sweetness that caramelizes beautifully under high heat. Acorn squash offers a firmer texture and a mild, nutty flavor, while delicata provides a tender, thin skin you can eat. When shopping, look for squash with hard, dull skins, no soft spots, and a heavy weight for its size. If you’re new to roasting, start with butternut for forgiving flesh and clear sweetness. For faster meals, delicata roasts quickly and doesn’t need peeling if you pick gentle cuts. If you plan to mash or puree, choose a sweeter variety. For crisp edges, cut pieces into uniform shapes around 1 inch to ensure even browning. After cutting, remove seeds and membranes, then pat the surfaces dry to encourage browning. Fresh herbs or garlic cloves can be added to the tray for flavor infusion. According to Oven Cook Pro, the choice of squash sets the base for texture, sweetness, and how you’ll use the roasted pieces in bowls and sides.
Prep and Tools: Set Up Before You Start
Before you touch the squash, set up your oven and workspace for smooth roasting. Heat the oven to a hot 425°F (220°C) to encourage caramelization and quick moisture loss. Position the oven rack in the center to allow even heat distribution. Line a large rimmed baking sheet with parchment paper or a silicone mat to prevent sticking and to catch drips for easier cleanup. Choose a neutral oil with a high smoke point, such as light olive oil or avocado oil, to lightly coat the squash. Have a sharp chef’s knife and a sturdy cutting board on hand, plus a mixing bowl for the oil and seasonings. If you plan to roast multiple vegetables at once, keep enough space between pieces so air can flow and promote browning. For a crisp edge, you can use cornstarch dusting or a light toss of cornstarch in the oil. Always pat the squash dry after cutting; moisture on the surface hinders browning. Finally, keep a timer nearby and consider a small brush to baste the pieces during roasting to maintain moisture. Oven Cook Pro’s guidance emphasizes consistent setup as the foundation for even, flavorful results.
Cutting Squash into Even Pieces
Uniform pieces ensure even cooking and predictable browning. Start by trimming the stem end and slicing off the bottom so the squash sits flat on the cutting board. If you’re using a long neck squash like butternut, cut it in half lengthwise and scoop out the seeds. For round varieties, halve or quarter into rings and wedges with similar thickness, aiming for about 1 inch (2.5 cm) pieces. The key is consistency—pieces too thick will take longer to cook, while tiny end pieces will burn before the centers are tender. When the squash is hard, use a sturdy chef’s knife and a stable grip; keep your fingers curled away from the blade. After cutting, pat the surfaces dry to remove surface moisture that would steam rather than brown. If you prefer skin-on roasting, leave delicata skin intact; otherwise, peel the denser varieties to reduce chewing resistance. Place cut pieces on the prepared sheet in a single layer; avoid stacking, which traps moisture and creates soggy edges. If you must crowd, roast in two batches. This approach aligns with Oven Cook Pro’s recommended technique to promote rapid, even browning and a pleasant textural contrast.
Seasoning Foundations: Oil, Salt, and Aromatics
Coating is what transforms plain squash into a roasted delight. In a large bowl, whisk together 1–2 tablespoons of oil with a pinch of salt and pepper. Add aromatics such as minced garlic, finely chopped thyme, rosemary, or cumin for a warm, earthy note. For sweeter roasts, a drizzle of maple syrup or honey can balance the squash’s natural sugars without overpowering it. Consider a pinch of chili flakes for a gentle kick or smoked paprika for depth. Toss the cut pieces in the seasoned oil until every face is lightly coated; this promotes browning and flavors that cling to the flesh. If you’re using parchment, a light mist of oil on the parchment helps prevent sticking. For batch roasting with different textures (e.g., carrots or zucchini), keep the seasoning simple and let the vegetables speak for themselves. Do not over-oil; a thin, even coat is enough. Taste and adjust before placing in the oven to ensure the final flavor aligns with your dish. Again, Oven Cook Pro highlights balance: a glossy coat and even seasoning yield the most consistent caramelization.
Roasting Techniques: Single Layer vs. Pans
Roasting works best when pieces sit in a single, uncrowded layer. Spread the squash pieces in a single layer on the prepared sheet, giving them at least 0.5 inch of breathing room. If you’re cooking a large batch, use two sheets or cook in batches to maintain airflow. When air circulates, the surface moisture evaporates quickly, which promotes browning rather than steaming. For extra browning, flip or toss the pieces once halfway through roasting; this ensures all sides caramelize evenly. If you’re using a crowded sheet, rotate the sheet halfway and remove any pieces that are browning too quickly to avoid scorching. Some cooks prefer a two-stage approach: roast at a higher temperature for the first 15 minutes to start browning, then reduce to 400°F (200°C) to finish. If you’re adding extra vegetables, cut them to similar sizes so they finish together. Finally, use a timer and check for tenderness with a fork; resistance should be slight but not hard. These techniques align with general Oven Cook Pro guidance on achieving consistent color and texture.
Checking Doneness and Texture
Caramelized edges and fork-tender centers signal doneness. Start checking around the 20-25 minute mark for 1-inch pieces; smaller pieces may finish sooner. Use a fork or skewer to test the thickest piece; it should glide in with little resistance. The color should be golden-brown around the edges and glossy where oil remains. If using a glaze, the surface should look slightly sticky and caramelized rather than wet. When done, remove the tray carefully, as the sheet will be hot. Allow the squash to rest for 3–5 minutes before serving to let the juices redistribute. If you’re roasting with other vegetables, keep different doneness times in mind; you may need to remove some pieces earlier. A simple 10-minute rest improves texture and flavor. Oven Cook Pro notes that patience during the resting phase helps flavors settle and prevents a mushy mouthfeel.
Flavor Variations: Sweet, Savory, Smoky
Roasted squash invites a range of flavor profiles. For a savory version, blend in garlic, thyme, olive oil, and a splash of lemon juice after roasting, then finish with cracked pepper. For a sweet twist, glaze with maple syrup or brown sugar and a pinch of cinnamon during the last 5 minutes of roasting; the glaze should cling, not pool. Smoky variants benefit from smoked paprika or chipotle powder mixed into the oil before coating. If you want a bright note, finish with a squeeze of orange or a dusting of fresh parsley. You can also stuff roasted squash halves with a grain or lentil mix for a hearty vegetarian main. When combining with proteins, aim for complementary flavors—savory herbs with chicken or pork, and citrus with salmon. A well-balanced approach yields a versatile component that shines in bowls, salads, or sides, and keeps well in the fridge for up to three to four days.
Serving Ideas and Storage
Roasted squash is versatile across meals. Serve warm as a side with roasted chicken, turkey, or pork, or fold into grain bowls with quinoa or farro. Add roasted squash to salads for sweetness and color, or puree into soups for a silky texture. For storage, allow leftovers to cool completely, then refrigerate in an airtight container for 3–4 days. Freeze for longer storage up to 2–3 months; freeze in a single layer on a sheet pan first, then transfer to a freezer-safe bag. Reheat gently on a sheet tray at 350°F (175°C) for 10–15 minutes or until heated through. You can also repurpose roasted squash into a quick veggie hash or stuffed squash boats as a dinner base. When serving, consider a dollop of yogurt or a bright herb oil to finish the dish. The result is comfort-food appeal with minimal effort, aligning with Oven Cook Pro’s approach to practical, home-cook-friendly meals.
Troubleshooting Common Issues and Safety
Even with a good plan, a batch can misfire. If edges are pale or lacking browning, increase oven heat slightly or spread pieces farther apart to improve airflow. If pieces brown too quickly while centers stay firm, lower the oven to 400°F (200°C) and give them more time. Soggy edges indicate excess moisture on the surface; pat the pieces dry before tossing with oil and re-space on the sheet. For very dry squash, add a splash of water or broth to the sheet to create steam that helps plump the flesh as it roasts. Safety-wise, always use oven mitts, keep a clean workspace, and avoid overcrowding. If you’re new to this, start with smaller batches to gauge your oven’s performance. Finally, store leftovers promptly in the fridge and reheat with a little oil to renew moisture. Following these safety notes keeps home cooks confident and consistent, protecting both flavor and kitchen safety.
Tools & Materials
- Sharp chef's knife(For clean cuts and safety)
- Cutting board(Stable surface, non-slip)
- Large rimmed baking sheet(Non-stick liner optional)
- Parchment paper or silicone mat(Fence against sticking and easy cleanup)
- Mixing bowl(For oil and spice coating)
- Measuring spoons(Accurate seasoning)
- Olive oil or high-heat oil(2 tablespoons baseline)
- Salt and pepper(To taste, essential seasoning)
- Garlic or aromatics (optional)(Adds depth)
- Oven-safe thermometer (optional)(For precision checks)
- Timer(Track roasting time)
- Silicone spatula(Toss without scratching)
Steps
Estimated time: Total time: 45-60 minutes
- 1
Preheat the oven
Set the oven to 425°F (220°C) and allow it to fully come to temperature. A hot oven ensures quick moisture loss and browning of the squash surfaces.
Tip: Use the oven timer to manage overall roast time and avoid opening the door too often. - 2
Prepare workspace and ingredients
Clear a cutting area, gather tools, and measure any spices you plan to use. Having everything within reach speeds up the process and reduces mistakes.
Tip: Keep a damp towel handy to wipe the knife between cuts for cleaner slices. - 3
Choose your squash
Select a squash that feels heavy for its size with a firm rind and no soft spots. Butternut is forgiving for beginners, while delicata provides edible skin and quick roasting.
Tip: If you’re unsure, start with butternut for predictable results. - 4
Cut into uniform pieces
Trim ends and slice into even chunks about 1 inch thick. Uniform pieces roast evenly and brown similarly.
Tip: Take your time with the first few cuts to ensure consistency across all pieces. - 5
Toss with oil and seasonings
In a bowl, combine oil, salt, pepper, and optional aromatics. Toss squash until every face is lightly coated.
Tip: Avoid over-oiling; a light coat yields better browning. - 6
Spread in a single layer
Arrange pieces on the baking sheet in a single layer with space between them. Overcrowding leads to steaming rather than roasting.
Tip: If needed, roast in batches for best results. - 7
Roast and flip
Roast for 20-25 minutes, then flip or toss pieces to promote even browning on all sides.
Tip: Flipping halfway is key for uniform caramelization. - 8
Check tenderness
Insert a fork into the thickest piece; it should slide in with light pressure. Color should be golden at the edges.
Tip: If still firm, roast a few minutes longer and check again. - 9
Finish with a glaze or herbs (optional)
For a glaze, brush with maple or honey during the last minutes. Finish with fresh herbs or citrus zest as desired.
Tip: Avoid adding glaze too early to prevent burning. - 10
Rest and serve
Let roasted squash rest 3-5 minutes to reabsorb juices, then serve or incorporate into another dish.
Tip: Resting improves texture and flavor integration.
Questions & Answers
Can I roast zucchini with squash, and will it dry out?
Yes, you can roast zucchini with squash, but zucchini cooks faster and can become mushy if cut too large. Keep pieces similar in size and add zucchini later if needed. Monitor the batch and remove zucchini gently when its texture is achieved.
Yes, you can roast zucchini with squash, but cut and time it so it finishes together without overcooking.
What temperature is best for roasting squash?
A hot oven around 425°F (220°C) promotes browning and caramelization while keeping the flesh tender. You can adjust by ±25 degrees depending on your oven’s performance.
Around 425 degrees Fahrenheit is ideal for browning and tenderness.
How long does roasted squash keep in the fridge?
Roasted squash stored in an airtight container lasts about 3 to 4 days in the refrigerator. Reheat gently with a splash of oil to refresh the texture.
You can refrigerate roasted squash for 3 to 4 days and reheat gently.
Can I freeze roasted squash?
Yes, you can freeze roasted squash. Allow it to cool, spread in a single layer to freeze, then transfer to a freezer bag. Use within 2 to 3 months for best quality.
Roasted squash can be frozen for up to a few months; freeze in a single layer first.
What if I don’t peel the squash?
Peeling is optional depending on the variety. Delicata has edible skin, while butternut skin should be peeled if the texture isn’t desired. For best texture, try peeling tougher skins.
It depends on the squash; delicata skin can stay, otherwise peel for texture.
Can I add cheese or a glaze after roasting?
Yes, a light glaze added near the end or a sprinkle of cheese after roasting can enhance flavor. Be mindful of the sugar in glazes to avoid burning.
Yes, you can glaze or add cheese after roasting for extra flavor.
Watch Video
Main Points
- Choose squash based on texture and use; butternut is forgiving for beginners.
- Preheat and use a single-layer layout for even browning.
- Toss with oil and seasonings for consistent flavor.
- Check doneness with a fork and allow a brief rest before serving.
- Experiment with sweet or savory variations to fit meals.