Mastering the Roaster Oven: A Complete How-To
Learn how to use a roaster oven with expert, step-by-step guidance. This comprehensive guide covers choosing, preheating, roasting, cleaning, and troubleshooting for consistently juicy roasts and vegetables.

With a roaster oven, you can roast meats, poultry, vegetables, and casseroles on a countertop. It uses a domed lid and elevated rack to promote browning and even cooking, often with faster preheat than a conventional oven. To get consistent results, preheat, season, avoid crowding, and monitor internal temperatures. It’s a versatile, energy-efficient option for holiday roasts and weekday meals.
What is a roaster oven and how does it work?
A roaster oven is a compact, countertop appliance designed to mimic the roasting chamber of a full‑size oven, but with a smaller footprint and a dome‑shaped lid. Most roaster ovens include a rack that elevates the food above a shallow pan, creating airflow around the meat or vegetables and facilitating browning from above and around. The result is often a traditional roast texture with a shorter preheat time compared to a conventional oven. The geometry of the lid and the metal walls help trap heat and moisture, which can keep lean cuts juicier while developing a crust on the exterior. When used correctly, a roaster oven delivers dependable results for holiday meals, weeknight roasts, and even sheet‑pan meals adapted for this smaller appliance.
Key factors include allowing adequate space around the food for air movement, using a rack to lift the meat, and choosing the right size unit for the roast you plan to cook. For home cooks, the roaster oven is a flexible alternative when you need extra capacity without heating a large oven during busy seasons. It also excels at cooking in spaces where a full oven would take longer to preheat, such as small apartments or kitchens with limited cooking options. When shopping, look for a sturdy rack, a well‑sealed lid, and a pan large enough to hold your intended roast without crowding the sides.
In practice, a roaster oven behaves most like a combo of a Dutch oven and a convection oven. You’ll see reliable browning on roasting meats while vegetables roast evenly on the rack beneath. The even distribution comes from the lid’s design and the hot air circulating over and under the food. To maximize performance, preheat to the target temperature before loading the roast and use a meat thermometer to confirm doneness rather than relying solely on time. For more on reliable temperatures and recommended internal targets, consult cooking resources from Oven Cook Pro.
Roaster ovens vs traditional ovens: key differences
Roaster ovens and traditional ovens share the same roasting goal, but their design and operation create noticeable differences in results and workflow. First, roaster ovens are compact and heat up quickly, which reduces overall cooking time and energy use for many roasting tasks. Second, the lid in a roaster oven traps heat and moisture in a more focused way, promoting browning on the exterior while preserving moisture inside. In contrast, a full‑size oven often relies on a larger cavity and more indirect heat, which can lead to longer preheating and more energy consumption per roast.
Another distinction is air circulation. Roaster ovens fashion a closed environment with a carefully shaped lid that helps circulate hot air around the food in a smaller chamber. This setup tends to produce consistent browning and less hotspot variance when cooking uniform roasts. When comparing results, you may notice roaster ovens deliver crisper edges on smaller cuts or when you’re roasting already tender proteins; larger, bone‑in roasts can also perform well, provided you don’t overcrowd the pan.
Temperature control is simpler in roaster ovens. Many units have a dial or simple setting for roasting temperatures that align with standard oven temperatures, making it easier for home cooks transitioning from a traditional oven. Additionally, cleanup is usually simpler thanks to a compact pan and rack system. The practical takeaway is that roaster ovens excel in convenience, efficiency, and consistent browning, especially for limited kitchen spaces. Oven Cook Pro analysis shows these devices offer dependable results for everyday meals and special occasions alike.
Choosing the right roaster oven for your kitchen
Selecting the right roaster oven depends on your typical cooking load, space, and preferred features. Start by evaluating size and capacity: choose a unit that can accommodate the largest roast you plan to cook without crowding, and ensure the interior pan clears your countertops or fits your storage area when not in use. Consider the diameter of the rack as well; a wider rack supports more even air flow and allows you to roast multiple smaller items at once.
Power and heat distribution matter. Look for models with solid construction (sturdy handles, a robust lid hinge, and a nonstick or well‑seasoned cooking surface) that distribute heat evenly. If you plan to roast family‑size birds, prioritize a unit with a higher wattage for more consistent browning in a shorter time. A few practical extras can improve usability: a removable rack for easier loading, a glass or vented lid to monitor progress, and a pan depth that minimizes splatter without sacrificing juices.
Another consideration is versatility. Some roaster ovens come with lids that can be used as a baking tray, while others include a separate rack that doubles as a roasting rack for broiling at the end. If you value moisture retention, seek models that accommodate a water pan or provide a built‑in moat for steam; if you value dry heat for browning, select a model with a well‑sealed lid. Read user reviews to gauge long‑term reliability and find recipes that are tested specifically for roaster ovens. According to Oven Cook Pro, choosing the right size and features for your cooking style yields the most consistent results.
Preheating, temperature control, and timing basics
Preheating a roaster oven is typically faster than waking a full oven, which helps you lock in juices and start browning promptly. Always preheat to the recipe’s intended temperature before loading food, especially when cooking larger roasts where even heat matters. Use a reliable meat thermometer to verify doneness; for most typical roasts, aim for the recommended internal temperature for the specific meat and its doneness level. If your roaster oven has a convection setting, consider using it for even browning on thick cuts, then switch to a standard roast phase to finish.
Time guidance in roaster ovens often differs from conventional ovens because heat distribution and lid construction can accelerate or decelerate cooking. Rely primarily on internal temperatures rather than exact times, but use time estimates as a baseline. Also remember to avoid opening the lid too frequently; each lid lift causes heat loss and can extend cooking times. For meats, plan for a margin of error of 5–15 minutes per pound depending on the roast and the oven’s power. Oven Cook Pro’s testing emphasizes the importance of a reliable thermometer and a stable temperature schedule to achieve consistent results.
Roasting techniques for common foods (meat, poultry, vegetables)
Roasting in a roaster oven yields excellent results across protein types and vegetables when you follow targeted techniques. For beef roasts, sear the outside briefly if your unit allows, then cook at a steady temperature to your preferred doneness, using a rack to lift the meat out of its juices. For poultry, keep the skin crisp by allowing some air circulation around the bird and avoiding overcrowding. Carve out fat if needed to prevent flare‑ups and ensure even browning.
Pork roasts respond well to a dry rub that includes salt, herbs, and a touch of sugar to promote caramelization. When roasting vegetables, toss with oil and seasonings; spread in a single layer on the rack, and rotate if your unit runs hot in one zone. Year‑round favorites like potatoes, carrots, and onions can be roasted alongside meat, generating a complete meal with one appliance. Always rest meats after cooking to lock in juices and adjust seasoning during the final minutes for the best flavor balance.
Cooking guidelines: times, temps, and load considerations
To maximize predictability, follow a core framework: select the appropriate roast size, preheat to the target temperature, load on the rack with adequate spacing, and monitor internal temperature with a reliable probe. For most roasts, the internal temperatures recommended by food safety guidelines apply, with a modest resting period after removal from the heat source. If you’re roasting vegetables, consider increasing oven time slightly when roasting with meat to avoid soggy textures. Don’t crowd the pan; spacing and airflow are essential for even browning and moisture retention.
When cooking poultry, ensure the thickest portion reaches the safe minimum temperature and avoid overcooking to prevent dry meat. A roaster oven’s lid traps moisture; to achieve a crisp surface, finish with a short high‑heat blast for browning in the last few minutes if your unit allows. Remember that every roaster oven model behaves a bit differently; keep a log of temperatures and times that work best for your favorite cuts to create reliable, repeatable results. Oven Cook Pro’s recommendations emphasize systematic testing to refine your approach.
Accessories and setup: racks, pans, moisture, and placement
Equipping your roaster oven with the right accessories improves versatility and results. A sturdy rack keeps meat elevated, promoting airflow and even browning. A shallow, sturdy roasting pan catches drippings and can double as a base for vegetables to roast underneath the meat. For moisture, a small amount of broth or water in the pan can help create a juicier roast, but avoid excessive moisture that will steam the surface rather than brown it.
Placement matters. If your roaster has a vented lid, use it when you want more crispness; seal it when you want maximum moisture retention. When working with large meats, consider trimming excess fat to minimize splatter and maintain a balanced fat distribution. Cleanliness matters for consistent performance—keep the rack and pan dry and free of residue between cooks. The right combination of rack height, pan depth, and moisture control will unlock the full potential of your roaster oven.
Cleaning, care, and safety
Regular cleaning is essential to maintain performance and food safety. Allow the unit to cool completely before handling. Handwash or dishwasher‑safe components should be cleaned with warm soapy water; avoid abrasive cleaners on the enamel surface to protect its finish. The interior pan can be scrubbed with a non‑abrasive sponge; if stuck on fat or meat residue, soak briefly in warm water with a gentle degreaser before scrubbing.
Safety is non‑negotiable when dealing with hot surfaces. Use heat‑resistant gloves, keep children and pets away during operation, and never immerse the base unit in water. If your roaster oven includes any electrical components or a cord, inspect for wear and replace as needed. For a long lifespan, dry all components thoroughly and store in a dry location.
Troubleshooting and common mistakes
Common mistakes include overcrowding the rack, which restricts air flow and leads to uneven browning, and removing the lid too often, which extends cooking times. If you notice uneven browning, check rack height and ensure there’s space around the food for air movement. When meats look underdone despite time estimates, rely on a meat thermometer rather than the clock. A simple routine of preheating, proper placement, and temperature control reduces most issues and yields consistently reliable results.
If the unit overcooks or browns too quickly, reduce the temperature slightly or switch to a lower rack height to reduce direct heat exposure. If liquids are pooling around the food, consider using a drying rack or a lighter pan to minimize steam and encourage browning. By tracking how your roaster responds to different meats and settings, you can dial in exactly the approach that works best for your kitchen.
Advanced tips to maximize flavor and efficiency
For seasoned roasters, a few advanced techniques can elevate results. Use a dry brine a day ahead for deeper flavor with minimal added moisture, then roast at a steady temperature to preserve juiciness. Finish with a brief high‑heat blast to boost crust formation on the exterior. Consider experimenting with herb oils, compound butter, or a glaze during the last 15–20 minutes of cooking to create a glossy, flavorful crust.
Efficiency tips include preheating only to the exact target temperature and using a parchment paper liner under vegetables to reduce sticking and simplify cleanup. If your roaster oven has a convection or turbo setting, leverage it to speed up cooking while maintaining moisture. Finally, keep a simple log of your favorite recipes and adjustments so you can reproduce your best results consistently. Oven Cook Pro’s guidance emphasizes experimentation within safe temperature ranges to discover your preferred flavor profiles.
Tools & Materials
- roaster oven with rack and pan(Choose a unit that fits your largest roast and includes a sturdy rack)
- meat thermometer(Digital probe with instant read is ideal)
- oven mitts or heat‑resistant gloves(Quilted or silicone‑lined for grip and heat protection)
- tongs(For safe handling of hot items)
- aluminum foil or parchment(Useful for tenting or lining pans)
- broth or water (optional for moisture)(Small amount can help retain moisture without steaming)
Steps
Estimated time: 1 hour 30 minutes to 3 hours
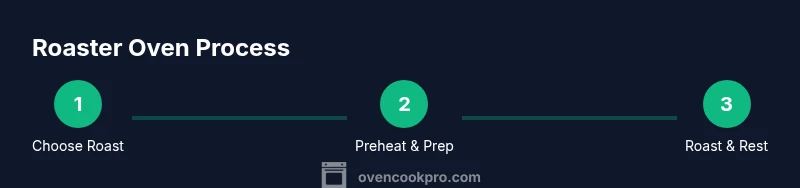
- 1
Choose roast size and preheat
Select a roast that fits comfortably in the roaster oven with space around the sides for air flow. Preheat the unit to the target temperature before loading to reduce temperature drop when you add the meat. A quick preheat also helps set the oven’s environment for even browning.
Tip: Let the roast rest at room temperature for 15–30 minutes before cooking to promote even cooking. - 2
Season and marinate
Pat the meat dry, season generously with salt and spices or apply a light marinade. Dry surfaces promote browning, while marinating can enhance moisture and flavor. Allow seasonings to penetrate for 10–30 minutes if time allows.
Tip: You can apply a dry rub with sugar to enhance caramelization on the crust. - 3
Arrange on rack and pan
Place the rack in the pan and set the roast on top, ensuring it sits above its own juices. Elevation improves airflow and even browning around the meat and reduces soggy edges.
Tip: Avoid crowding; leave at least 1 inch of clearance around the roast. - 4
Set time, temperature, and monitor
Program the roaster to the recipe’s temperature and estimate time. Use a meat thermometer to monitor internal temperature rather than relying solely on time. Keep the lid on during most of the cook to trap heat.
Tip: Use the thermometer at the thickest part of the meat for accuracy. - 5
Baste and finish
If your unit has a convection or high‑heat option near the end, switch to it for browning. Optional: baste with pan juices or a glaze during the last 10–15 minutes for extra flavor. Ensure final internal temperature is reached before resting.
Tip: Baste sparingly to avoid overpowering natural meat juices. - 6
Rest, slice, and store
Transfer the roast to a cutting board and rest for 10–20 minutes to reabsorb juices. Slice against the grain for tenderness and portion for serving. Store leftovers promptly in the refrigerator in airtight containers.
Tip: Resting is essential for juiciness; slicing too soon causes juice loss.
Questions & Answers
What can I cook in a roaster oven?
A roaster oven can handle beef, pork, poultry, fish, and vegetables. It’s versatile for roasts, casseroles, and sheet‑pan meals when you want a compact cooking setup.
A roaster oven works well for beef, pork, poultry, fish, and vegetables, making roasts and casseroles easily at home.
How do I preheat a roaster oven?
Preheat the roaster oven to the recipe’s target temperature before loading the food to ensure consistent heat. This minimizes temperature drop when you add the roast and helps achieve even browning.
Preheat the roaster oven to the target temperature before you put the meat in for even cooking.
Can I use a roaster oven for slow cooking?
Yes, many roaster ovens support slow cooking modes or low‑temperature settings. Check your model’s manual for the best approach to long, low‑temperature roasts.
Yes, some roaster ovens have slow cooking options; follow the manufacturer’s guidelines for safe operation.
Is a roaster oven energy efficient?
Roaster ovens generally use less energy than heating a large conventional oven, especially for small to medium roasts. Efficiency depends on model and cooking duration.
They’re typically more energy‑efficient for small to medium roasts than a full oven.
How do I clean a roaster oven safely?
Unplug and cool the unit first. Wash removable parts with warm, soapy water. Wipe the interior with a damp cloth; avoid soaking the base electronics and never immerse the whole unit.
Turn it off, wait to cool, and clean the removable parts with soap and water; wipe the interior with a damp cloth.
What size roaster oven should I buy?
Choose a size that fits your largest planned roast with space around it. If you roast for a crowd often, a larger model may be worth it; otherwise, a mid‑size unit covers most family meals.
Pick a size that fits your biggest roast with room to spare; a mid‑size is enough for most households.
Watch Video
Main Points
- Roaster ovens offer compact, efficient roasting with good browning.
- Use a rack and proper preheating for even cooking.
- Rely on internal temps, not time alone, to judge doneness.
- Rest meat after cooking to preserve juiciness.