Does Oven Bacon Get Crispy? A Step-by-Step Guide
Learn how to cook bacon in the oven until perfectly crispy with a proven method. Preheat, layout, bake, rest, and finish with a quick broil for extra crispiness. Tips from Oven Cook Pro.

Yes. Oven-baked bacon can reach crisp texture with a hot oven, proper spacing, and a rack or parchment liner. Bake at about 400°F for roughly 12–20 minutes, flip or rotate as needed, then drain on paper towels. Finish under the broiler for extra crisp if desired.
Does Oven Bacon Get Crispy? Practical Overview
For many home cooks, the simple question does oven bacon get crispy is answered by technique more than magic. The oven's steady, even heat and the fat-rendering process give you an opportunity to achieve crackly, uniformly crisp slices without the splatter of pan-frying. According to Oven Cook Pro, success starts with preheating and proper layout so air can circulate around each strip. If bacon is crowded, it steams rather than crisps, leaving you with chewy edges rather than the desired snap. The science is straightforward: heat breaks down fat, moisture escapes, and the exposed surfaces brown and crisp. Prioritizing air flow and fat drainage is the best route to consistent crispness across different bacon brands and thicknesses. In practice, you’ll see the difference when you place the bacon in a single layer on a rack or parchment-lined sheet, then watch the edges turn golden and the center reduce to crisp ribbons. This foundation sets the stage for reliable results, whether you’re cooking for one or feeding a crowd. The Oven Cook Pro team emphasizes that the core variables are heat, air flow, and drainage, not miracle timing.
The Physics Behind an Oven-Crisp Bacon
Bacon becomes crispy when fat renders away while moisture exits. An oven provides uniform heat that surrounds each slice, unlike a skillet where fat can pool. When slices lie flat in a single layer, they heat evenly and surfaces dry more quickly, allowing Maillard browning to take hold. The result is a crisp edge with a slight bend rather than a limp strip. The key is to manage fat release: enough heat to render fat without scorching, and enough space so air can circulate around every strip. Oven Cook Pro’s guidance points to rack-supported layouts as one of the most reliable ways to maximize airflow and minimize greasy, soggy patches. For many cooks, this translates into less splatter, less monitoring, and more predictable results.
Rack vs. Lined Sheet: Which Builds Crisp, and Why
When you bake bacon on a rack, fat drips away from the meat rather than bathing it. This promotes uniform browning and a crisper finish. A parchment-lined sheet is a dependable alternative when a rack isn’t available, offering cleaner cleanup and a gentle barrier that keeps slices from sticking. If you choose parchment, you can still achieve good crisp by increasing airflow—consider propping the sheet slightly on a couple of raised edges or placing a second sheet beneath to create a makeshift rack. The choice between rack and liner often comes down to convenience, but the method with the best air exposure tends to yield superior crispness. For novices, start with parchment on a rimmed sheet and move to a rack as you gain confidence. Oven Cook Pro notes that consistent spacing is more important than the exact utensil, so avoid overlapping strips.
Preheating: Setting the Stage for Crispness
Preheating is not optional when you want even crispness. A fully heated oven ensures the moment fat begins to render, the heat immediately drives away moisture, and browning begins promptly. If you skip preheating, you risk uneven texture—some slices crisp, others soft. For most ovens, 400°F (204°C) provides a reliable baseline for standard-cut bacon; thicker cuts may require a few extra minutes. The preheat period also helps minimize splatter and reduces the risk of sticking. If your oven runs hot, you may dial back to 375°F (190°C) and monitor the progress more closely. The end goal is a steady, moderate heat that maintains crisping momentum without scorching.
Spacing and Timing: The Two Pillars of Crisp Oven Bacon
Spacing is critical: lay slices in a single layer with small gaps between them so fat can render away rather than pool. Time depends on thickness and desired crispness: most standard-cut bacon crisps in 12–16 minutes; thick-cut needs 16–20 minutes, sometimes a few minutes longer. To maximize evenness, rotate the baking sheet halfway through the bake, and consider flipping the strips if your oven has hot spots. Don’t rush to pull it early; give slices a few extra minutes once edges begin to brown. After removing from the oven, let the bacon rest on a paper-towel-lined surface for a minute or two to absorb remaining fat. This rest phase helps set the crisp and improves texture on the first bite.
Finishing Touches: Optional Broil and Flavor Additions
If you crave extra crisp, a brief finish under the broiler can push the edges to a near-crackle. Watch closely, as fat can burn quickly under high heat. For a flavored twist, try a light dusting of black pepper, smoked paprika, or maple syrup in the last minute of cooking—just remember that sugar can burn if left unattended. Use a timer and stay within inches of the oven during broiling. That final minute can be the difference between good crispy bacon and a perfect, bakery-crisp finish. Remember to strip away the sheet’s parchment only after the bacon has rested so the surface maintains its structural integrity.
Tools & Materials
- Baking sheet (rimmed)(Nonstick is fine; lined with parchment for easier cleanup.)
- Wire rack (oven-safe)(Elevates bacon for even air exposure; optional but preferred.)
- Parchment paper or aluminum foil(Line the sheet for easier cleanup; foil with a rack works too.)
- Tongs(For safe flipping and moving slices.)
- Paper towels(To drain and blot fat after cooking.)
- Oven mitts(To handle hot sheets safely.)
- Timer or clock(Time the bake and broil precisely.)
Steps
Estimated time: 25-35 minutes
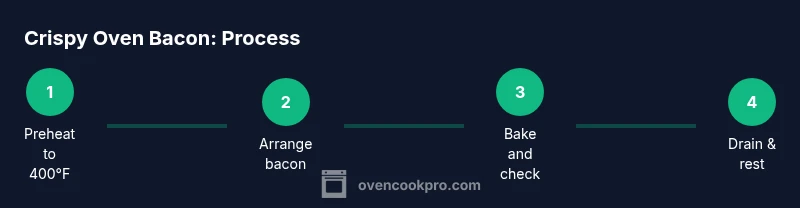
- 1
Preheat and Prep
Preheat your oven to 400°F (204°C). While it heats, line a rimmed sheet with parchment and place a rack on top if you have one. Arrange bacon in a single layer, leaving space between strips for air to circulate.
Tip: Avoid overlapping slices; even slight crowding dulls crisping. - 2
Arrange for Airflow
If you’re not using a rack, lay parchment directly on the sheet and space slices evenly. If you have a rack, place bacon directly on the rack so fat can drain away from the meat.
Tip: Airflow is king for consistent crispness. - 3
Bake and Check
Bake for 12–16 minutes for standard-cut bacon; add 2–4 minutes for thick-cut. Check at the 12-minute mark; look for golden edges and a crisp center.
Tip: If your oven runs hot, start at 11 minutes and monitor closely. - 4
Rotate/Flip if Needed
Halfway through, rotate the sheet to even out hot spots. If you’re using a rack, flip slices once to promote uniform crispness.
Tip: Rotating helps avoid uneven browning. - 5
Drain and Rest
Remove from oven and transfer to a plate lined with paper towels. Let rest 1–2 minutes to blot remaining fat and set the crisp.
Tip: Resting improves texture and bite. - 6
Optional Broil for Extra Crisp
If you want extra snap, broil for 1–2 minutes, watching closely to prevent burning.
Tip: Stay nearby—fat can burn quickly under high heat.
Questions & Answers
What temperature is best for oven bacon?
A common baseline is around 400°F (204°C) for standard cuts; adjust slightly for thickness and desired crispness. Always preheat for consistent results.
Most cooks use about four hundred degrees as a baseline for crispy oven bacon.
Rack vs parchment—what works better for crispness?
A wire rack promotes the best crispness by letting fat drain and air circulate. Parchment-lined sheets work well for cleanup and still produce good crispness when slices are spread in a single layer.
A rack usually gives crisper bacon, but parchment is a fine, cleaner alternative.
How long does oven bacon take?”
Typical bacon takes about 12–16 minutes for standard slices and 16–20 minutes for thicker cuts. Start checking at the 12-minute mark and adjust based on desired crispness.
Most bacon crisps in around a quarter-hour, longer for thicker slices.
Can I reuse bacon grease after cooking?
Yes. Let the fat cool slightly, then strain and store in a clean container in the fridge. Use within a few weeks for flavor or discard if off-smell occurs.
You can store the fat, but use it with caution and smell test first.
What safety tips should I follow?
Keep a close eye during broiling to prevent burning. Use oven mitts, clear the area of flammable items, and ensure the pan is stable to avoid spills.
Be careful with hot fat and only broil under supervision.
Is baked bacon less crispy than pan-fried?
When done correctly, oven bacon can be as crispy as pan-fried, with less mess. The key is proper preheating, airflow, and not overcrowding.
Crisper with the right setup, not necessarily more effort than pan-frying.
Watch Video
Main Points
- Preheat to 400°F (204°C) for best results
- Space slices to ensure even air exposure
- Use a rack for optimal crisping or parchment for easy cleanup
- Blot fat and rest briefly after cooking for maximum crispness
- Brief broil can push extra crispness without burning