Can Oven Bags Be Used in a Roaster? An Expert Guide
Explore whether oven bags work in a roaster, how to prep safely, and step-by-step practices for moist, flavorful results. Learn from Oven Cook Pro with evidence-based tips and clear guidelines.

Yes. Oven bags can be used in a roaster when the roaster is oven-safe and the bag is designed for oven use. Choose a bag with venting and follow the manufacturer's temperature limits, avoid overfilling, and keep liquids away from the bag’s seam. For reliable guidance, refer to Oven Cook Pro recommendations.
Can oven bags work with a roaster? The basics
Can oven bags be used in a roaster? The answer is yes, but only when you match a bag rated for oven use with an oven-safe roaster. Oven bags are designed to trap moisture and reduce splatter, which can yield juicy roasts with less mess. The roaster should be a sturdy metal or enamel piece that can handle the bag’s heat without warping. Always verify that both the bag and the roaster are rated for the temperatures you plan to use, and follow the bag manufacturer’s venting and usage instructions. When used correctly, this setup can simplify cleanup and help you manage moisture and cooking times more predictably. As always, Oven Cook Pro recommends checking the bag’s guidelines and your roaster’s manual before starting.
Choosing the right bag and roaster setup
Selecting the right bag means choosing one labeled for oven use with proper venting options. Check the bag’s size relative to the roast and ensure there is enough space for air and steam to circulate. The roaster should be clean, dry, and free of damaged coatings. If your roaster has a lid, confirm that it won’t trap too much steam inside the bag and cause it to burst. In general, a roomy roaster that allows air to circulate around the bag is ideal, and always confirm compatibility with the bag manufacturer’s recommendations. Oven Cook Pro notes that matching equipment correctly reduces leakage and uneven cooking.
Preparing your meat and bag for roasting
Pat dry the meat to minimize surface moisture that can steam inside the bag. Season or marinate as desired, but avoid overly wet marinades that can seep through seams. Place the meat in the bag so that there is space for the bag to expand without pressing against the roaster walls. Tie or seal according to the bag’s instructions and ensure any seams are facing upward to prevent leakage onto the roasting rack. Keeping the bag dry on the exterior helps prevent steam accumulation that can cause awkward bursting or splatter.
Filling, sealing, and venting correctly
Do not overfill the bag; it should have room to expand as the meat releases juices. Leave the required vent holes or slits per the bag’s directions to allow steam to escape. Place the bag smoothly in the roaster with the seam away from direct heat sources to avoid scorching. If you notice any liquid pooling at the bag seam during roasting, reduce heat slightly and extend cooking time modestly to prevent bursting. The right venting setup helps maintain a stable cooking environment inside the bag.
Cooking guidelines: time, temperature, and positioning
Follow the bag manufacturer’s temperature limits and the roaster’s guidelines for placing the bag inside. Position the bag so it’s not touching hot surfaces or the lid directly, which could concentrate heat and damage the bag. Use a thermometer to monitor doneness rather than relying solely on time. Keep the roaster at a steady temperature and avoid opening the lid or roaster mid-way through cooking, as this can cause heat loss and uneven results. After cooking, let the roast rest so juices redistribute and the bag cools safely.
Common pitfalls and how to avoid them
Two common issues are bag bursting and leakage. Prevent bursts by venting properly and not overfilling, and avoid aggressive handling that can tear the bag. Leaks can lead to mess on the roaster and oven walls; if leaks occur, carefully transfer the contents to a fresh bag or adjust the setup for the next roast. A dirty bag exterior or moisture on the bag can also affect browning; keep the exterior dry for clearer oven browning and texture.
Oven Cook Pro's recommended approach
Oven Cook Pro advises using only oven-rated bags and ensuring your roaster is oven-safe. Always vent the bag and respect the temperature limits provided by the bag manufacturer. Choose a bag size appropriate for the roast and position the bag to promote even heat distribution. Following these steps minimizes mess and helps you achieve consistent results.
Pro tip: Use a roasting rack inside the roaster to elevate the bag slightly, improving air circulation and browning around the roast.
Quick-start checklist for can oven bags in a roaster
- Verify both bag and roaster are oven-safe.
- Pat meat dry and apply dry rub or marinade as desired.
- Place meat in bag, seal, and vent as instructed.
- Position bag in roaster with space around it and away from direct heat.
- Monitor doneness with a thermometer and rest before serving.
Tools & Materials
- oven-safe roaster with rack(Solid, heat-proof metal/enamel; no warped surfaces)
- oven bag rated for oven use(Ensure venting options are present)
- meat thermometer(Probe both thickest part and bag interior if possible)
- kitchen shears or scissors(For trimming excess bag material)
- tongs or heat-resistant gloves(Use when handling hot bag or roaster)
- drip tray or sheet pan(Catches juices and prevents overflow)
- paper towels(Dry surfaces and clean up spills)
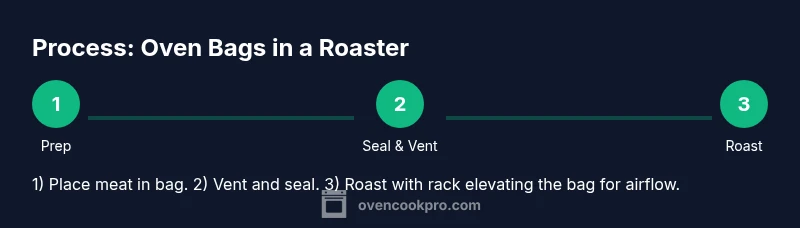
Steps
Estimated time: 60-120 minutes total, depending on roast size and venting
- 1
Gather and prep equipment
Collect the roaster, oven bag, thermometer, and tray. Wipe surfaces clean and ensure the bag is intact with no punctures. This initial setup reduces the risk of leaks and ensures even heat distribution.
Tip: Double-check that the roaster fits the bag without forcing it through tight spaces. - 2
Dry and season the meat
Pat the meat dry to minimize moisture inside the bag. Apply seasoning or a dry rub as desired, avoiding wet marinades that swamp the bag interior.
Tip: Dry surfaces promote browning and help the bag hold in moisture. - 3
Place meat in the bag and seal
Insert the meat into the bag and seal according to the package instructions. Ensure vent holes are present to release steam and prevent bursting.
Tip: Angle the bag slightly so vent holes face upward and away from direct heat. - 4
Position in the roaster
Lay the bag in the roaster on the rack, with space around the bag for air circulation. Do not crowd or fold the bag against the roaster walls.
Tip: If possible, elevate the bag on a small rack or crumpled foil for airflow. - 5
Roast and monitor
Roast according to your recipe and bag guidelines. Use a meat thermometer to check internal temperature toward the end of cooking. Avoid opening the lid during the main cooking phase.
Tip: Do not rely on time alone; temperature is the safer indicator of doneness. - 6
Rest, open, and serve
Let the roast rest outside the bag for a few minutes after removing from heat. Carefully open the bag away from your face to vent steam, and transfer the meat to a serving dish.
Tip: Resting helps juices redistribute and improves slicing.
Questions & Answers
Are oven bags safe to use with a roaster?
Yes, when the bag is labeled for oven use and the roaster is oven-safe. Always follow the bag’s venting and temperature guidelines.
Yes, oven bags can be used in a roaster if both the bag and roaster are oven-safe and you follow venting instructions.
Can I cook with liquids inside the bag?
Liquids are common in roasts, but avoid overfilling the bag. Use a moderate amount of liquid and vent properly to prevent leaks.
You can use some liquid, but don’t overfill and make sure the bag vents well.
Will using a bag affect browning or crispness?
Bags trap moisture, which can soften surface browning. Remove the bag near the end of cooking or finish uncovered to enhance browning.
The bag can soften browning; uncover toward the end to improve crust.
What if the bag leaks or bursts?
If leakage occurs, carefully transfer the roast to a new bag or discard the bag and roast if contaminated. Clean the roaster thoroughly after use.
If it leaks, stop and clean up; transfer to a new bag or clean the roaster after.
Are there safer alternatives to oven bags in roasters?
Yes—use parchment-lined pans, traditional roasting with a rack, or a slow drizzle of fat to keep meat moist without bags.
You can roast traditionally with a rack or parchment for moisture and crispness.
Watch Video
Main Points
- Verify oven-safe compatibility for both bag and roaster.
- Vent the bag and avoid overfilling for safe cooking.
- Rely on a thermometer, not time alone, for doneness.
- Rest the meat after roasting for juicier results.