Stone Oven Pizza: Mastering a Perfect Home Bake
Learn to bake stone oven pizza at home with expert dough craft, heat management, and toppings for a blistered crust and smoky flavor. Step-by-step guidance from Oven Cook Pro.

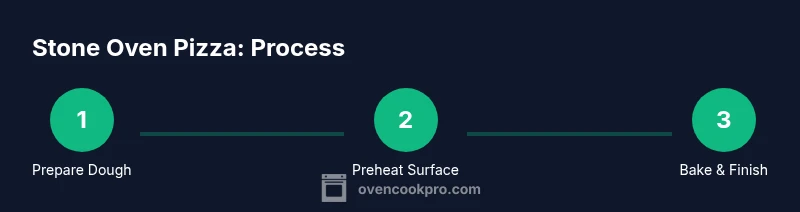
In this guide you’ll learn how to bake stone oven pizza at home. You’ll prep a high-hydration dough, heat a pizza stone or steel to 500–550°F, shape the dough, top it, slide onto the hot surface, and bake until blistered and crisp. Safety and timing tips ensure a reliable, restaurant-quality crust.
Why Stone Ovens Create Unique Crust and Flavor
Stone ovens are prized for the way they deliver heat: a thick ceramic or stone surface stores heat and radiates it evenly, while the surrounding air and steam from the dough help create a blistered, airy crust. When you bake on a hot stone, the dough begins to fry at the bottom, developing a crust with a satisfying snap. This effect is harder to replicate with a bare rack or a thin metal tray. In a typical home oven, preheating a stone to 500-550°F for 45-60 minutes (or longer if your oven takes longer to stabilize) is essential. The goal is a surface that is hot enough to blister and crisp the crust rapidly, before toppings release too much moisture. The stone also helps shield the dough from direct convection, which can dry the exterior too quickly if you overload the surface with toppings. For best results, use a pizza stone that is rated for higher temperatures and fits your oven’s dimensions. Always place the stone on the lowest rack to maximize heat transfer and minimize risk of scorching the toppings. These principles translate to reliable results whether you have a traditional brick oven, a modern home oven, or a hybrid setup that includes a stone or steel surface. In all cases, patience with preheating and careful dough handling yield the best crust texture and flavor.
Choosing the Right Stone or Steel and the Hearth Setup
Selecting the proper surface for your stone oven pizza is as important as the dough itself. Stone materials vary in heat retention and durability; ceramic and cordierite stones heat slowly but hold heat well, while pizza steels heat rapidly and transfer heat more efficiently, often delivering a crisper bottom. For beginners, a thick cordierite stone or a heavy baking steel works well on most home ovens and fits standard oven dimensions. Preheat times differ: stones absorb heat gradually and may require 45-60 minutes of steady preheating, while steels respond quicker; adjust expectations accordingly. Placement matters: position the stone on the middle or lower rack to maximize surface contact with the oven’s heat sources and to prevent toppings from scorching. If you don’t have a dedicated stone, a thick steel sheet can serve as a substitute and still deliver excellent results. When using wood-fired setups, ensure a consistent flame across the hearth to maintain uniform heat. Safety remains paramount: never expose a hot stone to sudden temperature changes or water, and use a proper pizza peel or parchment for transfer to minimize risk of burns or cracks.
Dough Preparation for Stone Oven Pizza
Dough quality is the backbone of a stone oven pizza. A high-hydration dough (60-70% hydration) yields an airy crumb with blistered edges. Use strong bread flour or tipo 00 for a balance of structure and extensibility. Mix ingredients until just combined, then rest the dough to hydrate the flour; a 20-60 minute autolyse helps gluten development. Perform a 10-minute knead or a series of stretch-and-folds to build strength without tearing. Bulk fermentation at room temperature or in a cooler environment adds flavor complexity; plan for 1-2 hours for a quick bake or 18-72 hours for a more nuanced profile. After initial rise, divide into portions, shape into tight balls, and refrigerate to develop flavor. Before shaping, allow dough to come to room temperature and gently flatten into a disk, leaving a slightly thicker rim (cornicione) for oven spring. Keep toppings light to avoid weighing down the dough and develop a crisp crust. A light oil drizzle can help crisp the rim without making the surface greasy.
Fire Management and Reaching High Heat
In a wood-fired stone oven, build a steady, hot fire and allow the hearth to stabilize at a high ambient temperature before baking. This ensures a lasting heat that browns the crust while preserving a moist interior. In a conventional home oven, preheat the stone to 500-550°F and consider using a preheated baking steel for a faster, hotter bottom surface. Avoid opening the door too often, as heat loss interrupts the bake and can lead to uneven browning. If your oven offers convection, you may lower the set temperature by about 25-50°F to prevent scorching the edges, while still achieving a blistered crust. The objective is consistent heat and dryness at the stone surface, with toppings offering moisture without overpowering the crust. For best results, slide the pizza onto the hot surface quickly and resist peeking too often during the initial minutes. A well-executed heat strategy yields a deeply browned bottom and a blistered top with a chewy, flavorful interior.
Sauce, Cheese, and Toppings for Stone Oven Pizza
A light-handed approach to toppings preserves crust texture. Sauce should be bright and not overly thick; a 1/4 to 1/3 cup per pizza keeps moisture in check. Use low-moisture mozzarella for stable melt and browning, and consider a touch of provolone or parmesan for depth. Fresh basil, a light drizzle of olive oil, and a hint of garlic can elevate aroma without drowning the crust. Avoid watery ingredients like raw tomatoes or heavily sauced vegetables; pat dry mushrooms and peppers and pre-cook any meats to render fat and reduce moisture. If you want extra smokiness, consider a thin layer of smoked cheese or a minute amount of smoked paprika. The goal is balance: enough moisture to keep the dough tender, but not so much that the stone’s heat can’t reach the crust promptly.
Baking Process Overview in a Stone Oven
With the dough shaped and toppings applied, slide the pizza onto the hot stone or steel using a well-floured or parchment-covered peel. Bake for approximately 6-10 minutes, depending on dough thickness and oven strength, until the bottom is deeply browned and the edges blister. Rotate the pizza halfway to promote even browning and avoid hot spots. Look for a crisp bottom, a puffed rim, and lightly blistered cheese; if the crust browns too quickly, briefly reduce the oven temperature or move the stone to a lower rack. Remove when the cheese is bubbly and the underside is evenly crisp. Allow the pizza to rest for 1-2 minutes before slicing, so the cheese sets slightly and makes clean cuts.
Cleaning, Maintenance, and Safety for Stone Ovens
Cleaning a stone requires a gentle touch. Let the stone cool completely before cleaning; wipe away loose crumbs with a dry cloth. Do not use soap or water on the stone, as absorbed residues can flake and affect flavor. A brush or scraper can remove stubborn bits; avoid aggressive scrubbing that could cause cracks. If you use parchment, discard it after the bake to minimize baked-on residue. Store the stone in a dry place away from sudden temperature changes that could cause cracking. For metal surfaces like a baking steel, wash with warm soapy water after use and dry thoroughly to prevent rust. Regularly inspect the stone and steel for cracks or chips; replace any damaged pieces. Finally, practice basic safety: use heat-resistant gloves, keep children away from the hot oven, and always place the hot stone on a heatproof surface.
Authoritative Sources and Additional Reading
For further reading on heat transfer, dough fermentation, and baking science that underpins stone oven pizza, consult credible sources such as:
- https://www.usda.gov
- https://www.fda.gov
- https://extension.illinois.edu These sources provide guidance on food safety, dough handling, and oven use that complements practical kitchen techniques.
Tools & Materials
- Pizza stone (ceramic or cordierite) or baking steel(Choose thick stone or steel that fits your oven; avoid quick-temp stones)
- Oven thermometer(To verify actual baking temperature inside the oven)
- Pizza peel or parchment paper(For transferring the dough to the hot surface)
- Flour or cornmeal (for dusting)(Helps prevent sticking and makes transfer smoother)
- Dough scraper(Optional but helpful during dough handling and shaping)
- Mixing bowls and a kneading surface(Sturdy surface for dough preparation)
- Pizza cutter or sharp knife(For clean slices after bake)
- Heatproof gloves(To handle hot stone and bake gear safely)
Steps
Estimated time: 60-75 minutes
- 1
Prepare dough ingredients
Measure flour, water, salt, and yeast or preferment. Mix until just combined, then let the mixture rest to hydrate the flour. Knead briefly until the dough is smooth and elastic.
Tip: A 20-60 minute autolyse improves gluten development without overworking the dough. - 2
Preheat stone and oven
Place the stone on the middle/low rack and preheat to 500-550°F for 45-60 minutes. Use the oven thermometer to confirm actual heat and avoid cold spots.
Tip: Give extra preheat time if your oven runs cool; a well-heated surface is key for crisp crust. - 3
Portion and shape dough
Divide dough into uniform portions, shape into tight balls, and let them relax. Dust a work surface, flatten into disks, and leave a thicker rim for oven spring.
Tip: Avoid over-handling to preserve gas and tenderness; use a light touch when shaping. - 4
Add sauce and toppings
Spread a thin layer of sauce, then add low-moisture mozzarella and selective toppings. Pat-dry wet vegetables to minimize moisture that can hinder browning.
Tip: Less is more: a restrained topping load bakes more evenly and crisps the crust. - 5
Transfer to hot surface
Slide the assembled pizza on a flour-dusted peel or parchment onto the hot stone. Slide quickly to minimize surface cooling.
Tip: If using parchment, remove it after the first 2 minutes to prevent over-browning from trapped moisture. - 6
Bake and monitor
Bake 6-10 minutes, depending on dough thickness and oven power. Rotate halfway for even browning and watch for blistering and deep bottom browning.
Tip: Avoid opening the oven door; each peek costs heat and slows browning. - 7
Finish, rest, and slice
Remove when crust is blistered and cheese is bubbly. Rest 1-2 minutes before slicing to let the cheese set for clean cuts.
Tip: Use a sharp blade for neat slices and preserve the steam for a tender crumb. - 8
Cool-down and cleanup
Let stone cool naturally; wipe crumbs with a dry cloth. Store in a dry place away from thermal shocks.
Tip: Never wash a hot stone with water; it can crack from thermal shock.
Questions & Answers
Can I make stone oven pizza in a standard home oven?
Yes. Use a preheated stone or steel, maintain a high temperature, and keep toppings light to replicate the texture of a stone oven. Expect high heat and careful timing for best results.
Yes. You can, just preheat a stone or steel and keep toppings light to replicate the texture of a stone oven.
What temperature should I aim for when baking stone oven pizza at home?
Aim for 500-550°F (260-290°C) on a stone or steel for a crispy bottom and blistered crust. If your oven runs cooler, adjust by using a preheated steel and baking longer at a slightly lower temp.
Aim for 500-550 degrees Fahrenheit on a hot stone for best results.
Should I preheat the stone before shaping the dough?
Yes. Preheating ensures the surface transfers heat immediately on contact, producing a crisp crust. Shape the dough while the stone is heating and keep toppings ready to minimize delays.
Yes. Preheating is essential for crisp crusts; shape quickly once the stone is hot.
Can I use parchment paper with a stone oven pizza?
Parchment helps with transfer, but remove it after the first 2 minutes to avoid excessive lifting of moisture and to promote browning. Some bakers bake directly on the stone for extra crispness.
Yes, you can use parchment to transfer, but remove it after a couple minutes to let the crust brown properly.
What causes a soggy bottom and how do I fix it?
Moisture from toppings or sauce is the common cause. Use drier toppings, drain moisture, bake on a hot stone, and avoid piling toppings too high. Ensure the oven has enough time to preheat.
Soggy bottoms come from moisture; use drier toppings and a hot surface, and avoid overloading.
How should I clean and care for a stone surface?
Let the stone cool completely before cleaning; brush off crumbs and wipe with a dry cloth. Do not soap or soak the stone, as it can absorb flavors and crack under heat stress.
Cool the stone, brush off crumbs, and wipe dry. Do not wash with soap.
Watch Video
Main Points
- Preheat the stone to 500-550°F for best results.
- Use high-hydration dough and light toppings for a blistered crust.
- Transfer quickly to the hot surface and avoid frequent door opening.
- Let the crust rest briefly after baking for clean slicing.
- Clean and maintain stone and steel properly to extend life.