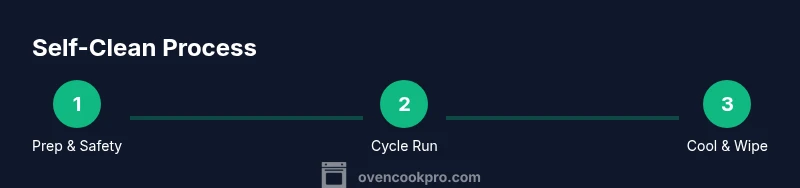
Oven Self Clean: A Complete Step-by-Step Guide
Learn how to safely use your oven's self-clean cycle with step-by-step prep, cycle execution, and post-clean maintenance. Pro tips from Oven Cook Pro help you minimize odors, protect surfaces, and extend oven life.

By the end of this guide you will confidently run the oven self clean cycle, reduce odors, and minimize wear. You’ll learn what to remove, how to prepare racks, and how to handle ashes or residue afterward. This process emphasizes safety, correct temperatures, and post-clean maintenance to keep your oven performing at its best.
What is the oven self clean cycle?
The oven self clean cycle is a dedicated cleaning mode designed to burn away food residues and grease by exposing the interior to extremely high heat for an extended period. This process converts stuck-on grime into ash that is easy to wipe away once the oven cools. It does not scrub the walls with chemicals; instead, it relies on controlled high temperature to break down organic buildup. Understanding this helps you decide when to use it and what to expect during and after the cycle. People often report a distinct odor during the cycle, which is normal but should be minimized through proper prep and ventilation. Remember: self-cleaning is most effective on light to moderate buildup, not on heavy, baked-on grime.
According to Oven Cook Pro, proper use of the self clean function can support consistent performance and reduce manual scrubbing over time. This is not a substitute for routine wiping after cooking, but it is a powerful tool when used correctly.
Safety first: prep before you start
Safety is the foundation of any oven maintenance task. Before initiating the self-clean cycle, ensure the kitchen is well-ventilated and that flammable materials are kept away from the oven. Check the appliance’s manual for model-specific cautions and warnings. Wear heat-resistant gloves and use durable towels to handle hot racks after the cycle completes. If you notice any unusual smoke, off smells, or the oven surfaces are discolored, halt the process and consult a technician. The goal is to minimize risk while maximizing cleaning efficiency.
Pro-tip: If your kitchen often smells strongly during cleaning, consider turning on a vent hood or opening a window a few minutes before starting. This simple step makes post-cleanup much more comfortable and reduces lingering odors.
Pre-clean prep: removing racks and items
Remove all racks, thermometers, and any cookware from the oven cavity. Wipe loose crumbs and grease from the interior with a damp cloth. Racks should be cleaned separately or wiped down so they don’t interfere with the cycle. If your oven has a catalytic converter or enamel coating, consult the manual about any restrictions during self-cleaning. This step minimizes ash buildup on interior surfaces and helps the cycle burn off residues more evenly.
Remember to place racks and any removable parts on a heat-resistant surface nearby, ready for reinsertion after cooling. This small prep step saves time and reduces the risk of warping metal components.
Cleaning options: self-clean vs. alternatives
Most ovens offer a self-clean cycle, but some models also provide a steam-clean option or a “quick clean” setting. Steam-clean cycles use water and lower heat to loosen grime, producing less odor but often requiring more manual wipe-down afterward. Self-cleaning delivers deeper cleaning for heavy deposits but can create stronger odors and higher energy use. Consider your oven’s age, the type of residue, and your tolerance for odor when choosing a method. For light maintenance, a simple wipe with a mild cleaner may be sufficient between self-clean cycles.
Oven Cook Pro analysis shows that alternating between light maintenance and periodic self-clean cycles can extend the interval between intensive cleanings while keeping the interior in good condition.
How to run the self-clean cycle correctly
The exact steps can vary by model, but the general procedure remains consistent:
- Ensure the oven interior is free of debris and flammable items.
- Close the door completely and select the self-clean cycle at the highest setting if you have heavy buildup, or a shorter option for light cleaning.
- Do not touch the door or attempt to interrupt the cycle once it starts; this can damage the seal. Allow the cycle to complete and the oven to cool fully before handling.
- Prepare the exterior and gasket by wiping with a damp cloth after it cools.
Following these guidelines helps protect the oven’s seals and keeps metal components from warping under stress. The cycle length varies by model and soil level.
What to expect during the cycle
During the self-clean phase, expect the interior to heat up dramatically and an odor to accompany the process. Some models emit visible smoke or steam, which is usually normal if the space is ventilated. The interior will turn darkened as residues burn off into ash. Do not be alarmed by these changes; they are indicators that the cycle is doing its job. The door often locks automatically for safety and will remain closed until the oven cools to a safe temperature.
Keep pets and kids away from the kitchen during the cycle and avoid using the oven for cooking until the cleaning is finished and the interior has cooled down.
Post-cleanup: cooling and residue removal
Once the cycle ends, leave the oven door closed until it is completely cool. Then use heat-resistant gloves to wipe out the ash with a damp cloth. A dry brush can help remove stubborn ash from corners and crevices. Rinse and wipe the interior again to ensure a clean surface before reinserting racks. Check the door gasket and seals for any signs of wear and replace if necessary according to the manufacturer’s guidance.
Ventilate the kitchen for several minutes after cleaning to disperse any lingering odors. Reinsert the racks and wipe them down before use. This helps ensure the next cooking session starts with a clean, residue-free interior.
Troubleshooting common issues after a cycle
If you notice residual ash after wiping, run a brief second wipe with a damp cloth. A lingering odor can often be mitigated by leaving the oven vent open for a while with the door slightly ajar after cleaning, but never leave it open during active cycles. If the door remains locked after cooling or if you smell burning plastics or unusual electrical smells, contact a professional promptly.
Common issues include uneven cleaning on heavily soiled areas and management of heavy smoke. Adjust the cycle length on future cleanings or consider alternate methods for problem areas. Always refer to your model’s manual for troubleshooting steps tailored to your oven.
Maintenance tips to keep the oven fresh and efficient
To reduce the frequency of deep cleans, wipe spills as soon as the oven cools and perform routine light cleanings after heavy cooking. Use a non-abrasive cleaner on the exterior and a gentle enamel-safe cleaner on the interior when not using a self-clean cycle. Regularly check door gaskets and hinges for wear and lubricate only as specified by the manufacturer. A routine schedule of light cleaning preserves enamel integrity and reduces the heavy buildup that necessitates a full self-clean.
Oven Cook Pro recommends keeping a regular maintenance log and scheduling a self-clean cycle at intervals that align with your cooking volume and soil level. This proactive approach helps maintain performance and energy efficiency over time.
Alternatives for odor control without a full self-clean
If odors are a concern or if your oven has limitations, consider a steam-clean or a heavy-wipe maintenance session. A quick wipe with a damp cloth after each use can dramatically reduce the amount of baked-on grease. Equally effective is leaving a tray of water with a splash of vinegar in the oven for a short period after cooking to absorb odors. These lightweight options keep the oven fresh without the intensity of a full self-clean cycle.
These alternatives are not a replacement for periodic deep cleans, but they provide practical options between cycles and help maintain a pleasant kitchen environment.
Safety myths vs. reality
Common myths claim the self-clean cycle can be used daily or that it will fix all interior staining. In reality, frequent use can wear seals and components and is unnecessary for light soil. The cycle is most effective for baked-on residues and should be employed judiciously. Never interrupt the cycle or open the door during cleaning unless there is an emergency or the oven is overheating.
Rely on the manual and trusted guidance from Oven Cook Pro to differentiate between legitimate maintenance steps and unnecessary risks. A measured approach yields the safest and most effective results.
Quick reference cheat sheet: do’s and don’ts
- Do remove racks and cookware before starting.
- Do ventilate the kitchen during the cycle.
- Don’t interrupt the cycle once it starts.
- Don’t use harsh chemical cleaners inside during self-clean.
- Do wipe the interior after it cools to remove ash.
- Don’t rely solely on self-clean for heavy grime; consider alternative methods for stubborn soils.
Tools & Materials
- Oven owner's manual(Keep for model-specific cautions and cycle options)
- Heat-resistant gloves(ANSI-rated, long cuffs for protection)
- Soft cloth or microfiber towel(For wiping ash and residue after cooling)
- Racks and removable parts(Remove and clean separately; prepare a safe surface nearby)
- Mild cleaner or vinegar spray(Optional for exterior wipe-down or glass door after cycle)
Steps
Estimated time: Total time: 2-4 hours
- 1
Read the manual and assess risk
Review your oven’s manual to confirm that the self-clean cycle is appropriate for your model and soil level. Check for any cautions about overheating, gaskets, or material compatibility. This step prevents damage and sets clear expectations for cycle length and odor.
Tip: If you’re unsure, call customer support or consult the brand’s online guide before proceeding. - 2
Remove racks and cookware
Take out all racks, thermometer probes, and any metal pans from the oven cavity. These items can discolor or warp if left in during self-clean. Place racks on a heat-resistant surface nearby so they’re ready after the cycle.
Tip: Separate racks by metal type (chrome, stainless) to avoid sticking during reassembly. - 3
Wipe loose debris
Wipe the interior with a damp cloth to remove crumb buildup and splatters. Large deposits should be gently scraped with a non-abrasive tool and then wiped away. This reduces ash volume and improves cleaning efficiency.
Tip: Avoid using abrasive pads that could scratch enamel. - 4
Close door and select cycle
Close the door firmly and select the self-clean cycle at the appropriate intensity for your soil level. Do not adjust settings mid-cycle and ensure the kitchen is well-ventilated.
Tip: If your model offers a shorter or gentler option, start with that for light soils. - 5
Start cycle and monitor safely
Begin the cycle and keep a safe distance. Do not open the door or interfere during heating. The oven will reach extreme temperatures and may emit a noticeable odor.
Tip: Turn on a vent hood or open a window to help manage odors. - 6
Cool down and wipe ash
After the cycle ends, allow the oven to cool completely before opening. Wear gloves and wipe out the ash with a damp cloth. Rinse and wipe again to ensure no residue remains.
Tip: Use a brush to reach corners and seams if ash lingers. - 7
Reinsert racks and inspect seals
Place racks back and inspect door seals for wear. If you notice cracks or gaps, replace seals per the manual to maintain efficiency for future cycles.
Tip: A good seal improves cleaning effectiveness and prevents ash leakage. - 8
Ventilate and finalize
Ventilate the kitchen for several minutes after cleaning to remove odors. If needed, wipe exterior surfaces and glass door to restore shine before using the oven for cooking again.
Tip: Keep a log of cleaning dates to establish a routine.
Questions & Answers
What should I remove before starting the self-clean cycle?
Remove all racks, pans, and cookware. Wipe loose debris and ensure nothing flammable is inside. This preparation helps the cycle burn off residue more evenly and reduces ash buildup.
Remove racks and cookware, then wipe loose debris before starting the self-clean cycle.
Is the self-clean cycle safe for gas ovens?
Most gas ovens support self-cleaning, but consult your manual for model-specific guidance. If in doubt, skip this cycle and use an alternative cleaning method.
Yes, many gas ovens are compatible, but check your manual first.
How long does the self-clean cycle take?
Cycle duration varies by model and soil level. Expect the process to take several hours, including cool-down time after the cycle ends.
It usually takes a few hours in total, depending on how dirty your oven is.
What if I smell strong odors or see smoke?
Ventilate the area immediately and monitor for smoke. If the odor persists or smoke intensifies, cancel the cycle and seek professional advice.
Ventilate the kitchen and monitor for smoke; if it gets worse, stop and contact support.
Can I open the door during the cycle?
No. The door is designed to stay locked during cleaning for safety. Opening it can disrupt the cycle and cause damage.
Don’t touch the door once the cycle starts.
What maintenance after a cycle is recommended?
Wipe the interior to remove ash, inspect seals, and reinsert racks. Keep a light cleaning schedule to reduce buildup and the need for deep cleaning later.
Wipe ash after it cools and check seals for wear.
Watch Video
Main Points
- Run the self-clean cycle only after pre-clean prep.
- Ventilate and never interrupt the cycle.
- Wipe ash thoroughly after cooling for best results.
- Check door seals regularly to maintain cleaning effectiveness.
- Maintain a routine to reduce the need for heavy cleanings.