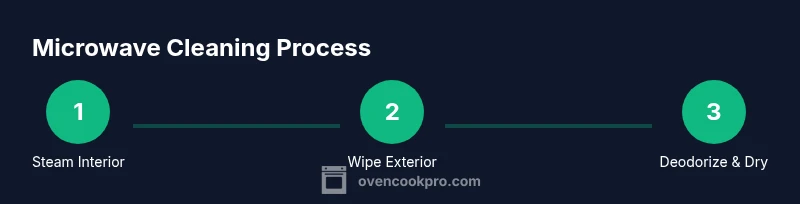
How to Clean Microwave Oven: Step-by-Step Guide
Learn how to safely clean your microwave oven with a gentle steam-clean method, exterior care, odor removal, and smart maintenance tips. This guide uses common household items for a thorough, stain-free result.

By following this guide, you will safely clean your microwave oven, remove stuck-on grime, and eliminate lingering odors without damaging the interior. You’ll learn a steam-clean method using common household items, plus exterior care and simple maintenance tips. Gather a microwave-safe bowl, water, white vinegar, dish soap, a non-abrasive sponge, and microfiber cloth, then follow the steps below.
Why Regular Microwave Cleaning Matters
Regularly cleaning the microwave is not just about aesthetics; it's a safety and performance issue. Splattered sauces, oils, and food particles can bake onto the interior, creating unpleasant odors, staining the cavity, and making uneven heating more likely. When residues build up, the microwave fan and vents can struggle to circulate air, which can reduce efficiency and potentially stress the magnetron over time. According to Oven Cook Pro analysis in 2026, a routine cleaning plan keeps the appliance hygienic, extends its life, and helps your meals taste better because reheating is more even. A simple, gentle approach—steam cleaning with water and vinegar or lemon—can loosen grime without harsh scrubbing. The following sections cover interior and exterior care, odor control, and smart maintenance so you can keep your microwave in peak condition with minimal effort.
Tip: Pair this routine with a light wipe-down after cooking to prevent splatters from drying on the surface.
Safety First: What Not To Do
Cleaning a microwave is safe when you follow basic rules and avoid risky shortcuts. Never put metal objects inside, including utensils with metal rims, foil, or grates, as this can cause arcing and damage the magnetron. Do not spray cleaner directly into the interior; it can reach electrical components or vents and create fumes. Avoid abrasive pads, scouring powders, or bleach, which can scratch surfaces or leave harmful residues. Always unplug the unit before starting and remove the glass turntable and roller ring so you can reach every area. If your microwave has a sensor or special finishes, check the manual for any cautions, and limit moisture around the control panel. Finally, if you smell burning plastic or notice unusual heat, stop cleaning and consult a professional.
Preparing Your Workspace and Materials
Before you start, clear the countertop and ensure good ventilation. Remove the glass turntable and roller ring, setting them on a clean towel. Place a bowl of cleaning solution in the center of the cavity and have a damp sponge, microfiber cloths, and a dry towel ready. This prep minimizes moisture over electrical components and keeps the work area tidy. If you prefer fragrance, lemon juice is a gentler alternative to vinegar, though it may leave a subtle citrus scent. The goal is to generate a light steam that loosens grime without flooding the electronics.
Steam-Clean Method: A Gentle, Effective Approach
Fill a microwave-safe bowl with 1 cup water and 2 tablespoons white vinegar (or lemon juice for fragrance). Place the bowl in the center and run the microwave on high for 4-6 minutes, until a heavy steam fills the cavity. The steam loosens dried splatters and makes them easy to wipe away with a damp sponge. After the cycle, leave the door closed for another minute to let condensation soften grime. Carefully remove the hot bowl with oven mitts; wipe the interior from top to bottom with a damp sponge, focusing on corners and the door gasket. For stubborn spots, apply a small amount of dish soap on the sponge and scrub gently in circular motions. If vents are dusty, wipe them with a microfiber cloth.
Tip: If your model has a light inside, avoid touching the bulb directly while cleaning and avoid splashing water into the light housing.
Exterior Cleaning and Door Seal Care
Return the turntable and roller ring, then wipe the exterior surfaces with a mild soap solution and a soft cloth. Clean the control panel with a lightly damp microfiber cloth, avoiding excess moisture around buttons. Inspect the door seal and gasket for grime and wipe them clean with a small brush or cloth. Dry all surfaces with a clean microfiber towel to prevent streaks. For fingerprints or smudges on glass, use a vinegar-water mix and polish with a dry microfiber cloth.
Note: Do not spray liquid directly onto the control panel or vents. Keep liquids away from the electrical compartment.
Deodorizing and Removing Persistent Stains
To tackle lingering odors, place a bowl of baking soda and water or lemon slices inside the microwave and run on low power for 1-2 minutes, then let it rest for several minutes before wiping. For stubborn stains, mix a tiny amount of baking soda with water to form a paste and apply gently with a soft sponge. Let sit briefly, then scrub and rinse. Rinse the sponge and wipe away any residue, then dry thoroughly. Odor control improves when you complete interior cleaning with a light exterior wipe and proper drying.
Quick Maintenance Routines to Keep It Fresh
Set a simple monthly routine: 1) quick interior wipe-down after spills, 2) steam-clean every 4-6 weeks, 3) wipe the exterior weekly, and 4) check the door seal for any cracks or loose areas. Keeping the interior dry reduces moisture that can promote odor and mold. If you notice persistent residues, adjust your steam duration slightly or repeat the paste scrub on tough spots. Implementing a short maintenance habit will keep your microwave looking and smelling fresh between deeper cleans.
When to Seek Professional Help
If you hear unusual noises, smell burning plastics, or notice continued odors after a thorough cleaning, the issue may be beyond routine maintenance. In these cases, contact the manufacturer’s service line or a qualified appliance technician. Do not attempt internal repairs yourself, as improper handling can compromise safety and void warranties.
Tools & Materials
- Microwave-safe bowl(Glass or ceramic, 2–4 cup capacity)
- White vinegar(Dilute 1:1 with water for steam cleaning)
- Water(For steam solution)
- Dish soap(Mild, non-abrasive)
- Non-abrasive sponge(Soft, non-scratch cleaning)
- Microfiber cloths(For drying and polishing)
- Baking soda(For paste on stubborn stains)
- Soft-bristled brush(Reach door seal crevices)
- Oven mitts(Handles hot bowl safely)
Steps
Estimated time: 20-30 minutes
- 1
Unplug and Remove the Turntable
Unplug the microwave from the wall outlet. Remove the glass turntable and roller ring, and set them on a clean towel so you can access the cavity fully. This prevents any accidental contact with electricity and makes interior cleaning easier.
Tip: Keep the turntable and ring in a separate area to avoid tipping over during cleaning. - 2
Mix Cleaning Solution
In the microwave-safe bowl, combine equal parts water and white vinegar (or lemon juice) so you have enough to generate steady steam. This creates a gentle, effective cleanser without harsh chemicals.
Tip: If you’re sensitive to vinegar scent, lemon juice offers a milder fragrance. - 3
Heat Solution to Create Steam
Place the bowl in the center and microwave on high for 4-6 minutes until a heavy steam fills the cavity. Steam loosens dried grime and makes it easy to wipe away.
Tip: Stand back a safe distance when opening the door to avoid steam burns. - 4
Wipe Interior While Steam Is Fresh
Carefully remove the hot bowl with oven mitts and wipe the interior from top to bottom with a damp sponge. Focus on corners, the ceiling, and the door gasket; use a small amount of dish soap on the sponge for stubborn spots.
Tip: Use a microfiber cloth for tight corners and the gasket to avoid scratching. - 5
Clean the Door, Seal and Exterior
Wipe the door, handle, and the outer surfaces with a mild soap solution. Inspect the door seal and gasket; wipe clean with a dry microfiber cloth. Dry all surfaces to prevent streaks.
Tip: Avoid spraying liquid directly onto the control panel or vents. - 6
Rinse, Dry and Reassemble
Rinse the sponge, wipe away any soap residue, then dry the interior with a fresh cloth. Reinsert the turntable and roller ring, and plug the unit back in. Allow a minute for everything to dry before use.
Tip: A quick air-dry helps prevent moisture buildup on electrical components. - 7
Optional Quick Steam Refresh
If you want extra deodorizing, run a fresh bowl of water with lemon slices for 1 minute, then wipe again. This step is optional but enhances fragrance and removes trace odors.
Tip: Use this after heavy cooking sessions or when odors linger.
Questions & Answers
Is it safe to use vinegar in a microwave for cleaning?
Yes, when diluted with water in a microwave-safe bowl and heated to generate steam. It helps loosen grime and neutralize odors without leaving harmful residues.
Yes—diluted vinegar used as steam cleaning is safe for most microwaves and helps remove stuck-on grime.
Can I use bleach or ammonia to clean a microwave?
No. Bleach and ammonia vapors can be dangerous around electrical appliances and should be avoided. Stick to mild cleaners and water-based solutions.
No, avoid bleach or ammonia. They can create hazardous fumes near electrical parts.
How often should I clean my microwave?
Clean the interior after noticeable spills and do a steam-clean every 1-2 weeks if you use the microwave regularly. Wipe the exterior weekly.
Clean spills right away and do a steam clean every couple of weeks for best results.
What if stains won’t come off?
Apply a small baking soda paste to the stain, let sit briefly, then scrub gently with a soft sponge. Rinse and dry thoroughly; repeat if needed.
Try a baking soda paste, let it sit, then gently scrub and rinse. Repeat as needed.
Can I deodorize with lemon in a microwave?
Yes. Lemon slices or juice can deodorize the cavity and leave a fresh scent. Avoid prolonged contact with metal parts or seals.
Lemon can deodorize and freshen, just avoid metal parts.
Is it safe to clean a microwave while it’s plugged in?
It’s best to unplug first. While you can wipe exterior surfaces with the unit unplugged, never spray liquids into the electrical components.
Unplug first for safety; wipe exterior surfaces after disconnecting power.
Watch Video
Main Points
- Unplug before you begin cleaning.
- Steam loosens grime without harsh scrubbing.
- Avoid direct sprays toward the control panel and vents.
- Dry surfaces thoroughly to prevent moisture damage.
- Create a simple routine to keep the microwave fresh.