How to Clean an Oven: The Best Step-by-Step Guide
Learn the best way to clean an oven with safe, proven methods from Oven Cook Pro. This step-by-step guide covers manual cleaning and self-cleaning, plus racks, doors, and odor control.

How is the best way to clean an oven explained
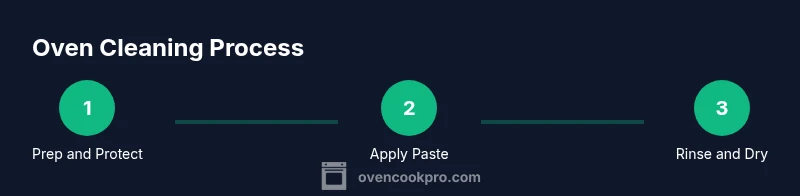
If you’ve asked yourself how is the best way to clean an oven, the core idea is straightforward: prep the interior, select a cleaning method suited to your oven type, and finish with a thorough rinse and dry. According to Oven Cook Pro, the most reliable approach blends safe, tested methods with proper ventilation and controlled time. This article lays out a practical framework that works for most home ovens, from compact countertop models to full-size ranges. You’ll learn how to balance DIY pastes with factory self-cleaning cycles, how to protect delicate enamel, and how to avoid common mistakes that leave residues or fumes. By following these steps, you’ll minimize odor and maximize appliance longevity while keeping the kitchen safer for you and your family.
Safety First: Prep, Ventilation, and PPE
Safety is the foundation of any oven-cleaning routine. Before you begin, unplug the unit if it’s safe to do so and ensure the room is well-ventilated by opening windows or turning on the range hood. Wear heat-resistant gloves and protective eyewear if splashes are possible. Remove the racks to prevent interference and set them in a sink or tub with warm soapy water. Lay down old towels or a disposable sheet to protect countertops and floors. Clear the area from pets and children. These prep steps reduce risk and create a clear workspace for effective cleaning.
Quick Assessment: What to Clean First
Start with a quick inspection of the interior to distinguish between light splatters and heavy grime. Light spills around the doors and shelves respond well to a baking soda paste, while stubborn, baked-on grease may require longer sit times or a self-clean cycle if your model supports it. Note any delicate enamel areas, knobs, and the glass door. Planning the order of operations—walls, door, racks—helps prevent backtracking and keeps the work efficient. If you’re unsure, begin with the gentlest method and escalate only where needed.
Choosing Your Method: Self-Cleaning vs Manual
There isn’t one universal right answer for every oven. A self-cleaning cycle is convenient on many modern units, but it isn’t suitable for all enamel finishes or older models, and it can produce smoke if the oven is heavily soiled. Manual cleaning with a baking soda paste offers strong grease-cutting power without extreme heat, but it requires more effort and time. Your decision should consider model compatibility, the level of grime, and your tolerance for odor and heat. The goal is to remove residue safely while preserving the oven’s interior.
Deep Clean with a Baking Soda Paste
A baking soda paste is a reliable DIY method for interior walls and the door’s inner surface. Mix enough baking soda with water to form a thick paste, then apply to greasy areas with a non-scratch sponge. Let it sit for 15–30 minutes for light buildup or longer (up to an hour) for tougher grime. After sitting, scrub with gentle circular motions, rinse with a spray of white vinegar and water, and wipe clean with microfiber cloths. This approach minimizes chemical exposure while delivering solid grease removal and a fresh odor.
Self-Cleaning Cycle: Pros, Cons, and Prep
If your oven offers a self-cleaning cycle, read the manual before running it. Remove racks and any aluminum foil, close the door, and start a short cycle if you’re unsure about the grime level. The self-cleaning process heats the interior to very high temperatures to burn off residue, creating ash you can wipe away later. Ensure good ventilation and keep children and pets away during the cycle. After it completes, cool the oven before opening and wiping away any ash with a damp cloth. If you hear unusual noises or notice smoke, stop the cycle immediately and air out the space.
Cleaning the Oven Racks and Racks Supports
Racks accumulate grease in between bars and on the underside. Soak them in warm, soapy water for at least 20–30 minutes; use a nylon brush or non-scratch sponge to scrub between the rungs. For stubborn stains, sprinkle baking soda and scrub again. Rinse thoroughly and dry completely before reinstalling. This step prevents grime from transferring back to the interior when you reinsert the racks and helps maintain even heat distribution during future cooking.
Cleaning the Oven Door and Glass Panels
A spotless door glass improves visibility and reduces the temptation to over-clean other areas. Apply the baking soda paste to the glass and let it sit briefly, then scrub with a non-scratch pad. For the exterior, a mild soap solution with a microfiber cloth can remove fingerprints and splatters without damaging coatings. Dry with a lint-free cloth to prevent streaks. If residue remains, a gentle glass cleaner suitable for oven doors can be used, but avoid harsh abrasives that could scratch or haze the glass.
Handling Spills, Grease, and Odors
Grease and spilled sauces can create stubborn odors if left untreated. After cleaning, wipe with a vinegar-water spray to neutralize smells and sanitize surfaces. For lingering odors, you can place a small bowl of water with a splash of lemon juice in the oven and heat at a low temperature for a short period, ensuring you ventilate. Regularly ventilating during and after cleaning reduces the risk of residual fumes. A clean oven not only looks better but also cooks more evenly.
Final Rinse, Dry, and Reassembly
Finish by giving every surface a final wipe with a damp microfiber cloth to remove any remaining paste or residue. Dry thoroughly to prevent moisture from seeping into seams. Reinstall the racks and wipe them again to remove any dust or cleaner residues. If you notice streaks on glass after drying, a quick buff with a dry microfiber cloth will restore clarity. A thorough final rinse and proper drying help prevent future buildup and prepare the oven for its next use.
Maintenance to Keep Your Oven Cleaner Longer
Consistency is key to long-term oven cleanliness. Perform a quick weekly wipe-down of splatters after cooking and run a light, short cycle or manual wipe as needed. Use parchment paper or a baking sheet to catch drips during roasting to minimize cleanup. Keep oven cleaners and aerosols away from heating elements and enamel surfaces. A small routine—quick wipe after meals and a monthly deeper clean—significantly reduces stubborn buildup and preserves oven performance.
Maintenance recap and next steps
By combining prep, the right cleaning method, and thorough rinsing, you can keep your oven in peak condition with less effort over time. If you’re new to cleaning, start with the baking soda paste method and attempt a short self-clean cycle only after you’re comfortable with manual cleaning outcomes. With proper ventilation, safety gear, and routine care, your oven will stay cleaner between deep cleans, producing better cooking results and a more enjoyable kitchen environment.