Can You Use Oven Cleaner on a Self-Cleaning Oven? A Safe Guide
Discover whether you can use oven cleaner on a self-cleaning oven, why it’s unsafe, and safe, proven alternatives. This step-by-step guide from Oven Cook Pro helps homeowners clean effectively without risking damage.

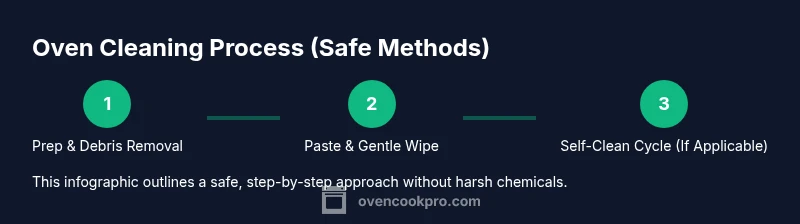
Definition: It is not recommended to use oven cleaner on a self-cleaning oven. The extreme heat of the self-clean cycle is designed to burn away residue, while caustic cleaners can damage enamel, seals, and internal sensors. Instead, use manufacturer-approved methods: remove racks, wipe loose debris, apply a baking soda paste for stubborn stains, and rely on the self-clean cycle or gentle manual cleaning as needed. This protects performance and safety.
What is a self-cleaning oven and how it works
A self-cleaning oven relies on a built-in, high-temperature cycle to burn away food residue and grease. The interior walls, racks, and door gasket are subjected to temperatures high enough to incinerate most soils, leaving a thin ash residue that’s easy to wipe away once the cycle finishes. Because this process operates at extreme heat, it’s carefully sealed to minimize fumes and prevent damage to nearby cabinets. According to Oven Cook Pro, understanding how this technology works helps homeowners avoid interfering with the process and protects the oven’s enamel and sensors from cleaners that aren’t designed for high heat. This knowledge also frames why safer cleaning approaches are recommended for routine maintenance and occasional stubborn spots.
Tip: Always consult your model’s manual before attempting any cleaning method, even if you’re tempted to shortcut with household products.
Can you use oven cleaner on a self-cleaning oven? What the rules say
If you’re asking can you use oven cleaner on a self cleaning oven, the answer is generally no. Chemical oven cleaners, especially caustic or corrosive formulas, can damage the enamel lining, degrade the door gasket, and leave harmful residues that the self-clean cycle cannot fully neutralize. These cleaners can also produce strong fumes that are difficult to vent when the oven is hot, and they may interfere with sensors that monitor the self-clean process. Manufacturers typically advise avoiding non-specified cleaners altogether and rely on the self-clean feature or mild manual cleaning when needed. Oven Cook Pro notes that adhering to the manufacturer’s guidance reduces the risk of costly repairs and preserves oven performance over time.
Practical takeaway: if you’re unsure, play it safe and stick to approved methods rather than testing cleaners in a high-heat environment.
Safer alternatives to chemical cleaners
There are effective, low-risk ways to tackle residue in a self-cleaning oven without resorting to harsh chemical cleaners. A simple baking soda paste (baking soda mixed with a small amount of water) applied to stubborn spots can help lift burnt-on grease when left for 15–20 minutes. A warm water rinse with a microfiber cloth removes loosened grime, and a splash of white vinegar in a spray bottle can help dissolve mineral deposits or streaks. For routine maintenance, wipe down the interior with a damp cloth after the self-clean cycle has cooled, and always dry surfaces to prevent streaks and streaky enamel. Oven Cook Pro supports these approaches as safe, accessible options for homeowners with basic kitchen tools. Remember: never spray cleaners directly on heating elements or into the vent system.
Pro tip: test any paste on a small, inconspicuous area first to ensure it does not dull the finish.
Step-by-step: preparing your oven for cleaning without cleaners
- Remove all oven racks and set them aside for separate cleaning. This allows full access to the interior. 2) Wipe loose debris with a dry cloth to reduce ash generation during the cycle. 3) Mix a mild baking soda paste, then apply it sparingly to areas with burnt-on residue. 4) Dampen a soft cloth and wipe down the interior, avoiding the heating elements and door gasket. 5) If your model supports it, run a quick test clean with the door open to observe any emissions before a full cycle. 6) After the interior cools, wipe away any remaining paste and residues with a clean, damp cloth. 7) Clean racks separately with warm, soapy water, rinse, and dry before re-installing. Continuous maintenance with light wipes between cycles keeps buildup manageable.
Note: Always follow the appliance’s manual for rack handling and cycle settings. Oven Cook Pro emphasizes keeping steps simple and non-abrasive for longevity.
Step-by-step: running the self-clean cycle correctly
- Ensure the interior is free of loose debris to minimize smoke and odor. 2) Close the door securely and select the self-clean cycle per the manual. 3) Do not open the oven during the cycle; allow it to complete and cool naturally. 4) After cooling, wipe away ash with a damp cloth. 5) Return racks to their original positions with care. 6) Inspect door seals and gaskets for any signs of wear before the next cycle. 7) If you notice excessive smoke or unusual smells, stop the cycle and consult the manual or a technician. Cleaner usage is not part of this process and is discouraged by manufacturers.
Pro tip: If you smell strong fumes, turn on kitchen ventilation and run a brief cycle test with the door ajar (only if the manual permits it).
Post-cleaning care and maintenance
Once the interior is clean, replace the racks and wipe the exterior with a damp microfiber cloth. Regular light cleaning after each cooking session prevents heavy buildup, reducing the need for harsh methods later. Keep in mind the self-cleaning cycle isn’t a substitute for routine cleaning; it handles what burns off during normal cooking. Over time, light debris can still bake onto the walls, so a proactive wipe-down after the oven cools is a best practice. For stubborn stains, reapply a baking soda paste to the affected area and repeat the gentle wipe process. Consistent care helps preserve enamel integrity and door seals, ensuring the self-clean function continues to work as intended. Oven Cook Pro reiterates that patience and gentle methods yield the best long-term results.
When to call a professional
If your oven’s interior shows deep scorching, glazing, or enamel chipping, a professional technician may be required. Do not attempt invasive repair work or aggressive chemical treatments; these can void warranties and create safety hazards. If you notice persistent odors, smoke during cycles, or inconsistent self-clean performance, schedule an inspection to rule out faulty seals, sensors, or a damaged insulation board. Oven Cook Pro advises homeowners to err on the side of caution and rely on manufacturer guidance before attempting any repair.
Maintenance tips to keep your oven clean between cycles
- Wipe the interior after cooking, once the oven has cooled. This prevents baked-on residues from hardening.
- Place a shallow tray of water at the bottom when cooking particularly greasy meals to reduce splatter.
- Use parchment paper or aluminum foil on the bottom tray when appropriate, but never cover the oven floor or vent openings.
- Schedule periodic manual cleanups if you notice new stains, and always re-check seals and gaskets for wear.
- Review your user manual for any model-specific instructions on rack removal and cleaning. These habits minimize buildup and keep the self-clean cycle efficient. The Oven Cook Pro team emphasizes consistency over intensity for the best results.
Final notes from Oven Cook Pro
In summary, can you use oven cleaner on a self-cleaning oven? The prudent answer is no; opt for baking soda pastes, warm water, and the self-clean cycle when appropriate. This approach preserves enamel and seals, minimizes fumes, and aligns with manufacturer guidance. Regular light cleaning reduces the need for heavy scrubbing and ensures your oven remains reliable for years. The Oven Cook Pro team recommends following your model’s specific instructions and staying within safe, non-caustic cleaning practices for ongoing maintenance.
Tools & Materials
- Microfiber cloths(Soft, lint-free for wiping interior and racks)
- Soft sponge or non-scratch scrubber(For light residue; avoid abrasive pads)
- Baking soda(Create a gentle paste with water)
- Water(For paste and rinsing)
- White vinegar(Optional for mineral deposits)
- Spray bottle(Mist for vinegar or water if needed)
- Old towels or towels(Protect surfaces and catch drips)
- Oven-safe gloves(Protection when handling hot racks)
- Mild dish soap(For rack cleaning outside the oven)
Steps
Estimated time: 60-180 minutes
- 1
Remove racks and loose debris
Take out all racks and racks' supports. Wipe away loose crumbs with a dry microfiber cloth to reduce ash during the cleaning process.
Tip: Rinse racks separately with warm, soapy water to remove baked-on grease before reassembling. - 2
Cool and prepare interior
Turn off power or set to off and allow the oven to cool completely. Wipe the interior walls with a damp cloth to remove light grime before applying any paste.
Tip: Never spray water directly onto heating elements; use a damp cloth instead. - 3
Apply baking soda paste to stubborn spots
Mix baking soda with a small amount of water until you reach a spreadable paste. Apply to areas with heavy buildup and let sit for 15–20 minutes.
Tip: Avoid applying paste to the door seal to prevent residue from migrating to seals. - 4
Wipe interior with damp cloth
Gently wipe away paste and loosened grime with a damp microfiber cloth. Rinse the cloth frequently to prevent re-depositing grime.
Tip: Follow with a dry cloth to remove any moisture quickly and prevent streaking. - 5
Avoid cleaners on self-cleaning cycle
Do not use chemical oven cleaners or abrasive sprays. Rely on the self-clean cycle or gentle manual cleaning for the interior.
Tip: If an area seems unusually difficult, repeat the paste treatment rather than applying chemicals. - 6
Run the self-clean cycle if appropriate
If your model supports it, start the self-clean cycle per the manual. Do not interrupt the cycle and allow it to complete before cooling.
Tip: Ventilate the area; keep children and pets away during the cycle. - 7
Reinstall racks and final wipe-down
Once cooled, wipe the interior again to remove any ash. Reinsert racks and give them a quick wipe before using the oven again.
Tip: Inspect door seal for wear during reassembly; replace if necessary.
Questions & Answers
Can I use oven cleaner on a self-cleaning oven?
No. Most oven cleaners are not compatible with self-cleaning ovens and can damage enamel, seals, and sensors. Stick to manufacturer's guidance and gentler cleaning methods.
No. Oven cleaners are generally not safe for self-cleaning ovens and can damage parts. Use manufacturer-approved methods instead.
Is it safe to run the self-clean cycle after using baking soda?
Yes, if the application was limited to a gentle paste, the self-clean cycle should still be safe. Do not use any chemical cleaners before or during the cycle.
Yes, as long as you didn’t apply chemicals; the cycle should still be safe.
What if my oven still looks dirty after cleaning?
Repeat the safe cleaning steps focusing on stubborn spots, avoiding cleaners. If the buildup persists, consult the manual or a technician.
If stubborn spots remain, repeat the gentle cleaning steps or seek professional help.
Can vinegar be used in the interior of a self-cleaning oven?
Vinegar can be used in small amounts for mineral deposits, but avoid direct application to hot surfaces and do not mix with other cleaners.
Small amounts are usually okay, but avoid spraying on hot parts and never mix cleaners.
How long does the self-clean cycle take?
Cycle duration varies by model but typically lasts one to three hours. Always monitor the cycle and follow the manual for timing.
Cycle times differ by model; check your manual for specifics.
When should I call a professional?
If you observe persistent smoke, unusual smells, or signs of damaged seals, a professional should inspect the unit. Do not attempt risky repairs yourself.
If you notice persistent issues, contact a technician.
Watch Video
Main Points
- Avoid chemical cleaners on self-cleaning ovens.
- Use baking soda paste for tough spots.
- Rely on the self-clean cycle and gentler manual cleaning.
- Follow manufacturer guidance to protect enamel and seals.