Oven Eye: Your Comprehensive How-To for the Oven Viewing Window
Learn to inspect, clean, and use the oven eye—the viewing window on your oven door—for reliable visibility during baking. Safe techniques and maintenance insights from Oven Cook Pro.

With this guide, you will learn how to inspect, clean, and use the oven eye—the viewing window on your oven door—so you can monitor every bake without opening the door. You’ll also troubleshoot visibility issues and establish a simple maintenance routine for lasting performance. Follow the steps in this article to achieve clear, reliable visibility during roasting and baking.
What is the oven eye and why it matters
The oven eye is the small viewing window built into many oven doors. It lets you observe browning, steam, and color changes without opening the door, which helps maintain steady heat and reduces energy loss. In practice, a clean oven eye gives you a truer view of what’s happening inside, so you can adjust time and temperature more accurately rather than relying on guesswork. In this guide, the oven eye is treated as a real-time feedback tool that complements other cues like aroma and crust development. According to Oven Cook Pro, the eye should be kept clean and unobstructed to preserve optical clarity. The eye isn’t a decorative feature; when used well, it improves consistency across roasts and bakes. This section sets expectations: you’ll learn safe cleaning methods, practical visibility benchmarks, and how to integrate eye monitoring with your standard cooking routine. By the end, you’ll approach every bake with a clear view rather than peeking through foggy glass, which makes it easier to fine-tune rack position and timing during busy family dinners.
Safety considerations when using the oven eye
Safety first guides every step when you’re dealing with hot appliances. Never spray cleaners directly on the glass when the oven is hot; keep all liquids away from hinges and electronic components. Before starting, ensure the oven is turned off and cool. If you must unplug for thorough cleaning, wait until the cord is cool and accessible. Wear heat-safe gloves if you plan to contact any interior surfaces, and use a soft microfiber cloth to avoid scratching the glass. Use a glass cleaner labeled safe for oven doors, and never mix cleaners with ammonia-based products near heating elements. Finally, avoid leaning over the door or resting body weight on the glass while the oven is in use. Oven Cook Pro Team emphasizes safety as the foundation of long-term maintenance, so these precautions reduce the risk of burns, chemical exposure, and glass damage while keeping the eye reliable for monitoring. Environmental conditions like kitchen humidity can influence fogging, so ensure good ventilation during cleaning and cooking.
How to inspect the oven eye for damage
A quick visual checklist helps you catch issues before they affect cooking. Look for chips, cracks, or discoloration around the glass and frame. Notice any fogging that persists after cleaning—this may indicate a degraded seal or trapped moisture behind the eye. Gently test the fit of the window; if you can move it or feel looseness around the frame, stop using the door and consult a technician. If the glass shows a crack, do not attempt to cook with it until it’s replaced. Document any signs of wear and plan a maintenance visit. Regular inspection keeps the eye transparent and reliable so you can rely on visual cues during roasting and baking. This is where Oven Cook Pro’s practical guidance helps home cooks stay ahead of potential issues and avoid sudden failures in the eye window.
Cleaning the oven eye: step-by-step care
Keeping the viewing window clean is essential for accurate visibility. Start with the oven off and cool, then wipe the exterior glass with a damp microfiber cloth to remove surface grime. Apply a small amount of glass cleaner or a mild soap solution to the cloth, never directly onto the glass, and wipe in gentle circular motions. Use cotton swabs for tight corners around the frame to dislodge dried splatters. Dry the glass with a clean microfiber towel, then inspect for streaks. If you can access the space behind the eye, wipe any residue from the inner surface with a swab and a fresh cloth. Finish by drying thoroughly and rechecking clarity from multiple angles. This routine minimizes streaks and preserves optical clarity for accurate monitoring.
Maximizing visibility during cooking
To get the best view, position your eye window as the primary monitoring point. Keep the interior clean and free of steam condensates by using proper ventilation and avoiding overcrowded trays that block the view. Place lighter-colored foods in the center so their color change is easier to read through the glass. During long roasts, pause mid-way to visually assess color development; rely on a thermometer for precise doneness as a backup. Remember that the eye is a companion to thermometer readings, not a full substitute. By maintaining a clear window and consistent lighting, you’ll notice subtle cues—like a glaze forming or moisture beading—that guide timing and technique. The Eye should be considered a dashboard for your cooking, not an afterthought, and it rewards careful attention while you bake.
Troubleshooting common issues with the oven eye
Fogging is common after high-heat or humidity; wipe with a dry cloth and re-clean as needed. If the window looks cloudy permanently, it may indicate a degraded seal or defogging failure; consider service. A crack or loose frame means you should stop using the window until replaced. If you notice reflections or glare that hinder viewing, adjust lighting or angle and re-clean the glass. Persistent issues beyond cleaning and basic checks warrant professional inspection. The goal is reliable visibility, not perfection in a single bake. If you can’t restore clarity after cleaning, consult a technician to avoid compromising oven safety and performance.
Maintenance routine and schedule
Create a simple maintenance habit that fits your cooking cadence. Schedule a monthly quick wipe-down of the exterior glass and a deeper clean every 4-6 weeks, or sooner with frequent roasting or high-sauce meals. Keep a dedicated cleaning kit nearby and replace worn brushes or swabs as needed. Capture visual checks in a notebook so you can track when the eye is last cleaned or inspected. This routine minimizes smudges, keeps the frame tight, and prolongs the life of the eye window. Consistency matters more than intensity, so choose a cadence you can maintain over the long term and adjust with the seasons.
Common mistakes to avoid with the oven eye
Avoid using abrasive sponges or ammonia cleaners that can scratch glass or degrade seals. Don’t spray cleaners directly onto the window; liquids can seep into seals and electrical components. Over-cleaning can strip protective coatings or remove glare-reducing films if present. Never ignore cracks or looseness in the window—address them promptly with professional service. Relying solely on the eye for doneness is risky; pair it with a thermometer and recipe cues. Oven Cook Pro’s field notes emphasize balancing visibility with safe operation and proper utensil use.
Real-world tips and recipes leveraging the oven eye
While recipes aren’t centered on the eye, you can refine techniques by using the eye to observe browning, steam, and color cues on common dishes such as roasted vegetables, breads, and casseroles. Use the eye to monitor the last few minutes of a crusty loaf or the color transition on roasted potatoes. Pair eye observations with thermometer checks for consistent results. By treating the eye as a visual dashboard, you can adjust heat, rack position, and timing in real time for dependable outcomes. This practical approach aligns with Oven Cook Pro’s philosophy of learning through observation and precise control.
Tools & Materials
- microfiber cloth(lint-free and soft)
- glass cleaner safe for ovens(label-safe for oven doors)
- mild soap solution(or gentle dish soap diluted)
- non-abrasive sponge(for outer glass)
- cotton swabs/q-tips(clean tight corners around frame)
- gloves, heat-safe(optional for handling hot areas)
- flashlight/headlamp(improves visibility in dim kitchens)
- soft lint-free towel(dry glass thoroughly)
Steps
Estimated time: 30-45 minutes
- 1
Power down and cool the oven
Turn off the oven and unplug if possible; allow 15-30 minutes for cooling before touching any interior surfaces. This protects you from burns and prevents heat-accelerated damage to glass and seals.
Tip: Never clean while the glass is hot; heat expansion can cause cracking. - 2
Identify the oven eye and its location
Locate the viewing window on the oven door and ensure it is the intended eye for monitoring. If you’re unsure, consult the user manual or check model-specific diagrams.
Tip: A quick check prevents accidental damage from aggressive cleaning on the wrong surface. - 3
Gather your cleaning kit
Arrange your microfiber cloth, glass cleaner, mild soap solution, cotton swabs, and a dry towel within reach. Having everything ready minimizes cross-contamination and ensures a smooth cleaning flow.
Tip: Lay out items on a protected surface to keep your work area tidy. - 4
Clean the exterior viewing glass
Dampen the microfiber cloth with the soap solution and wipe the glass in gentle circles. If smudges persist, apply a small amount of cleaner to the cloth and re-wipe; avoid applying liquid directly to the glass.
Tip: Use circular motions to avoid streaks and ensure even cleaning. - 5
Address the frame and tight corners
Use cotton swabs to reach the frame edges and remove dried splatters that can obstruct the view. Avoid forcing material into hinges or gaps that could loosen components.
Tip: Be gentle around the frame; excess pressure can damage seals. - 6
If accessible, clean behind the eye
If your model allows, wipe behind the viewing window with a fresh cloth to remove hidden residue that fogs the view. Do not remove components you cannot reassemble easily.
Tip: Only attempt this if your manual confirms rear access is safe. - 7
Dry and verify clarity from multiple angles
Dry the glass completely with the lint-free towel and inspect from slight angles to ensure no streaks remain. Re-check after a brief read of brightness in different lighting.
Tip: A dry, crystal-clear surface reduces misinterpretation of browning. - 8
Test visibility during a bake
Return the oven to normal operation and observe through the eye at mid-cycle and toward the end. Use a thermometer as a backup to confirm doneness.
Tip: Don’t open the door solely to check; use the eye and thermometer together. - 9
Establish a maintenance routine
Incorporate a monthly exterior wipe and a deeper quarterly clean into your schedule. Document findings to track eye performance over time.
Tip: A consistent routine prevents buildup and preserves long-term clarity.
Questions & Answers
What is the oven eye?
The oven eye is the viewing window on the oven door that lets you monitor food without opening the door. It helps reduce heat loss and provides a quick visual cue for browning and moisture changes.
The oven eye is the viewing window on the oven door that helps you monitor cooking without opening the door.
Can I clean the oven eye while the oven is on?
No. Always ensure the oven is off and cool before cleaning the glass or frame. Cleaning while hot can cause burns and damage to glass or seals.
Never clean the oven eye while the oven is hot. Make sure it’s cool first.
Why is the oven eye foggy or blurry?
Fogging usually results from steam or residue. Clean with a non-abrasive cleaner and dry thoroughly. If fogging recurs, check for leaks or seal issues.
Foggy viewing can come from steam or residue; clean and dry, and check seals if it keeps happening.
What should I do if the oven eye cracks?
A cracked viewing window may require replacement. Do not cook with a cracked pane. Contact a technician or service for glass replacement.
If you see a crack, stop using the eye and arrange a replacement.
How often should I clean the oven eye?
Clean it during regular oven maintenance, typically every 1-4 weeks depending on usage. Wipe after heavy sauces or splatters to keep visibility clear.
Clean as part of your routine, usually every few weeks depending on use.
Is the oven eye a safety feature?
Yes, it helps monitor food without heat loss, but it does not replace safe cooking practices. Always handle hot ovens carefully and follow manufacturer safety guidelines.
The oven eye helps you monitor safely, but you still need to handle the oven with care.
Watch Video
Main Points
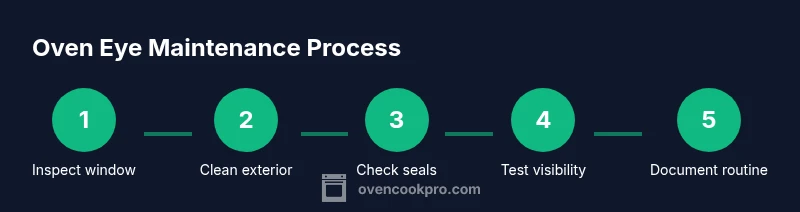
- Inspect the oven eye before every major bake.
- Clean with non-abrasive tools to protect glass and seals.
- Keep the viewport clear of residue for accurate monitoring.
- Use the oven eye to monitor progress, not as the sole doneness cue.
- Establish a regular maintenance routine for lasting visibility.