How to Tell When Oven Bake Clay Is Done
Learn reliable signs to tell when oven-baked polymer clay is fully cured. This expert guide from Oven Cook Pro covers color, texture, scent, and safe testing methods.

In polymer clay, you tell when it’s done by following the manufacturer’s bake times, testing with a small scrap, and inspecting the surface. A fully cured piece should be firm to the touch, not tacky, and have a consistent color. Allow cooling before handling, and avoid underbaking which causes brittleness or overbaking which can scorch.
Understanding the doneness indicators
Curing polymer clay is a chemical change that goes beyond a simple color shift. To tell when oven bake clay is done, you rely on multiple cues rather than a single signal. Start with the clay brand guidelines, then verify with a test bake piece. According to Oven Cook Pro, consistent results come from following brand directions and validating with tactile checks. The most reliable indicators include surface hardness, lack of tackiness, and uniform color across the piece. Environmental factors, such as oven accuracy and piece thickness, influence timing, so expect small variations between pieces and ovens. In practice, establish a baseline with a small test piece for every new batch and note how your oven behaves. That baseline becomes your reference for future projects, saving both time and material costs.
Visual cues: color, shine, and texture
Polymer clay changes color slightly as it cures, often deepening or evening out hue. Look for a consistent, even color across all surfaces and edges; blotchy or translucent patches can indicate underbaking. The surface should feel smooth and slightly firm to the touch, not tacky or sticky. If you see a glossy sheen that remains after cooling, that's usually a sign of incomplete cure or an overly long bake; the exact interpretation depends on the brand. For natural light, compare with a scrap piece baked at the same time to gauge whether your piece has achieved uniform color and finish. Also, watch for any visible deformation when you press a finger gently; a well-cured piece resists denting while still retaining some flex in flexible parts.
Texture tests: scratch, flex, and surface hardness
Perform a controlled scratch test using a clean pin to see if the surface resists digging. If scratching reveals a white base or rough texture, you may be undercured or have a binder issue; stop and re-bake in short increments rather than risking overbaking. For flexible pieces, gently bend a test area; a fully cured piece should resist cracking but still have a slight give rather than snapping. Use the back of a knife to test a small edge; reliable doneness typically results in a uniform, non-springy feel when you press. Lastly, slide your fingernail along a seam to check for smoothness; cured clay should feel even with the surrounding surface and not catch.
Thickness and bake time: planning for different piece sizes
Don’t assume thicker pieces take longer only because of size. The goal is uniform heat penetration; thicker areas may require additional time, while thin parts can overbake quickly. Establish your baseline using a test piece that matches the maximum thickness of your project, then scale up cautiously. If your design includes raised elements, bake separately or in stages to prevent underbaked recesses or overcooked highlights. Always space pieces so air can circulate; crowded bakes can lead to uneven doneness. Remember to confirm oven temperature accuracy with an external thermometer because oven readings can drift over time.
Scent and edge cues: what to smell and see at the edge
Many crafters notice a faint polymer scent when polymer clay begins to cure, especially in unvented ovens. A fully cured piece should not retain a strong odor; if you can detect a burning or chemical smell, stop the bake and assess. Edges near the seam should harden evenly; pale edges may indicate underbaking, while darkened edges can signal scorching. When you remove the piece from the sheet, it should lift cleanly without sticking; if it clings or stays soft, that is a sign to re-bake. Use a cooling rack to reduce surface heat concentration; this helps prevent warping as the piece cools.
Common mistakes and how to fix underbaked or overbaked pieces
A common error is underbaking a thick piece while thinner areas overbake. To fix this, apply short additional bake intervals to the whole piece rather than continuing to bake a portion only. If your piece remains tacky after cooling, re-bake in short bursts on a test scrap until it reaches the desired hardness. Overbaking can cause discoloration or a brittle texture; if this happens, rework by reinforcing with fresh clay or begin anew with a smaller test batch. Always let pieces cool completely before assessing hardness, since heat retention can disguise cure status.
Brand-specific tips and safety: aligning with your clay and oven
Different brands have slightly different cure cues; always start with the package directions and perform a small test bake to build your reference. Oven Cook Pro emphasizes safety: bake in a well-ventilated area, use a dedicated craft oven if possible, and avoid using cookware for food afterward if it has been used for crafts. If you rely on a toaster oven for small pieces, monitor temperature closely and keep the bake times conservative. For sensitive pieces with colors that bleed, space colors or bake separately and then assemble. This approach reduces guesswork and preserves the integrity of your final piece.
Finishing touches after baking: cooling, sanding, and sealing
Allow your piece to cool completely on a rack before finishing; heat trapped under the surface can cause micro-cracks when sanded. Lightly sand with fine-grit paper to smooth rough areas, then wipe away dust. If sealing is desired, choose sealants compatible with polymer clay and test on a scrap area first. Avoid coatings that yellow with UV exposure; apply thin coats and allow ample cure time between layers. Proper finishing not only improves appearance but also enhances durability.
Tools & Materials
- Polymer clay pieces (various colors)(Have enough color and thickness to test cure and complete your project)
- Dedicated craft oven or oven thermometer(Use the oven thermometer to verify temperature)
- Baking sheet lined with parchment paper(Prevents sticking and scorching)
- Cooling rack(Allow air flow during cooling)
- Test pieces (scrap clay)(Use scraps to dial in bake times)
- Safety gloves(Handles hot pieces after baking)
Steps
Estimated time: 60-120 minutes
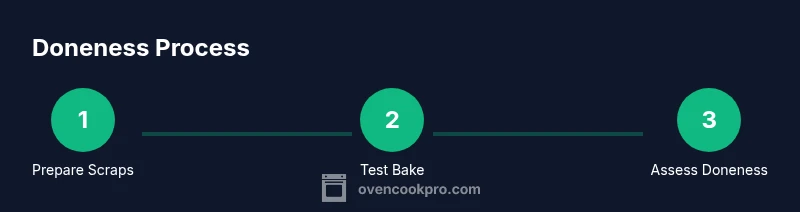
- 1
Prepare a test piece matching your project thickness
Cut a scrap piece to the same thickness, shape, and color approach as your final piece. This test piece will help you gauge curing without risking the main project.
Tip: Use scrap clay of the same brand and thickness to mirror bake behavior. - 2
Preheat according to brand guidelines
Set the oven to the recommended temperature per the clay’s package, then verify actual temperature with your oven thermometer.
Tip: Do not rely solely on the oven dial; a separate thermometer gives accuracy. - 3
Bake the test piece for the recommended time
Place the scrap on parchment and bake for the time stated. If unsure, start with a shorter interval and extend in small increments.
Tip: Bake on the lowest suggested time first to gauge doneness safely. - 4
Cool and inspect the test piece
Allow the test scrap to cool completely before evaluating hardness, color, and surface. Cooling can reveal true cure status that heat hides.
Tip: Compare cooled scrap to a known-cured piece to calibrate your judgment. - 5
Compare test result to your project
If the scrap is underbaked, add bake time in small increments for the full piece. If overbaked, adjust by shortening future bakes and consider smaller test batches.
Tip: Document the successful bake time for future projects. - 6
Proceed with final bake using the tested doneness
Bake the final piece at the confirmed temperature for the validated duration, watching last minutes carefully for even doneness.
Tip: Space pieces to ensure even air circulation and consistent heat.
Questions & Answers
How long should I bake polymer clay to avoid underbaking?
Always follow the clay brand's bake instructions and perform a test bake with a scrap piece to gauge timing for your oven and thickness.
Follow the brand's bake times and test with scrap pieces to gauge doneness.
What are visible signs that clay is fully cured?
Hard, non-tacky surface with uniform color and no soft spots. A slight resistance to denting often indicates proper cure.
Hard and non-tacky, with uniform color and no soft spots.
Can I bake multiple colors together in polymer clay?
Yes, but consider baking colors separately if they have different translucencies or cure cues, and align with brand directions for each color.
Yes, but bake colors separately if needed and follow brand cues.
What safety precautions should I take when baking polymer clay?
Bake in a well-ventilated area using a dedicated craft oven if possible. Avoid using cookware that has been contaminated with craft materials for food.
Bake in a well-ventilated area and use a dedicated oven if possible.
Why does my clay feel sticky after cooling?
It may still be underbaked or not fully cured. Re-bake in short increments using a scrap piece to test doneness.
If sticky after cooling, re-bake in short increments with scrap.
How do I finish polymer clay after baking?
Cool completely, sand as needed, and apply compatible sealants in thin coats. Avoid coatings that yellow under UV light.
Cool, sand lightly, and seal with a compatible finish in thin coats.
Is it safe to reuse scrap clay for new projects?
Yes, after proper re-conditioning and ensuring it has cured fully; avoid mixing underbaked scraps with new pieces.
You can reuse scraps if fully cured and properly conditioned.
Watch Video
Main Points
- Follow brand guidelines and test with scraps before final baking.
- Rely on multiple cues: hardness, tackiness, and color uniformity.
- Bake with accurate temperature using an oven thermometer.
- Cool completely before judging doneness and finishing.
- Document successful times for repeat projects.