Fried Pork Chops in the Oven: A Step-by-Step Guide
Learn to make crispy, oven-fried pork chops with a juicy center. This comprehensive guide covers selection, coatings, oven setup, searing, baking, safety, and serving ideas for reliable weeknight dinners.

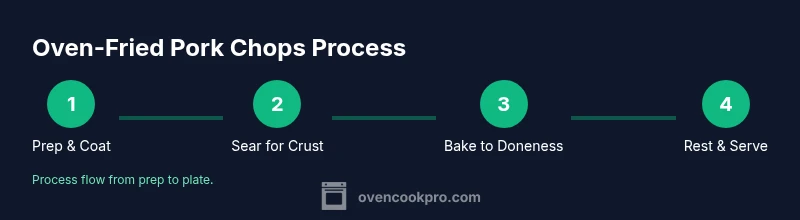
You will learn how to make fried pork chops in the oven that are crispy on the outside and juicy inside. The method covers preheating, coating, searing for crust, then baking to finish, and a brief rest before serving. Essential gear includes a sheet pan with parchment, a cast-iron skillet, a thermometer, tongs, and a simple breading or dry rub.
Why the Oven Method Works for Fried Pork Chops
Cooking fried pork chops in the oven delivers a dish that tastes fried without the splatter and excessive oil of a skillet. The even heat of an oven helps develop a crisp exterior while trapping juices inside, resulting in a tender, juicy center. According to Oven Cook Pro, the oven-fried approach provides reliable browning and less mess for home cooks. The technique also offers a forgiving timeline: you can start with a quick sear for crust, then finish with a gentle bake to hit the target internal temperature. In this guide, you will learn how to choose chops, coat them for crunch, and bake them to perfection, all while keeping the process simple and repeatable. fried pork chops oven
Selecting the Right Pork Chops and Seasonings
The foundation of great oven-fried pork chops starts with choosing the right cut. Look for 1-inch to 1.25-inch thickness, bone-in or boneless depending on preference. Bone-in chops stay juicier, but boneless are quicker to cook. Trim excess fat and pat dry to promote even browning. Season generously with salt, pepper, and a light spice rub or paprika for color. Fresh herbs or a pinch of garlic powder can elevate flavor without adding moisture that undermines crust formation. The goal is flavor on the crust and a tender interior, matchable with a crisp outside.
Coating Options: Dry Rub, Breading, and Crunch
There are multiple routes to a satisfying crust. A simple dry rub with salt, pepper, and paprika can yield a flavorful crust with minimal mess. For a more pronounced crunch, use a breading or breadcrumb coating—panko breadcrumbs work especially well because they stay crisp after baking. If you prefer a lighter bite, dab the chops with beaten egg to help the crumbs adhere, or use a two-step dip (egg wash followed by crumbs) for extra adhesion. The key is to layer flavor on the crust while allowing the meat to shine inside.
Preheating, Pans, and Layering for Best Browning
Preheat your oven to 425°F (218°C) and place a rack in the middle position. Prepare a sheet pan lined with parchment paper to minimize sticking and cleanup. Heat a cast-iron skillet with a thin layer of oil on the stovetop; a hot pan creates an immediate crust that sears and seals juices. If you don’t have a cast-iron pan, an oven-safe sauté pan works too. The goal is to achieve a crusty surface before the final bake, without drying out the meat.
Searing Then Baking: The Core Cooking Sequence
Begin by searing the coated chops in the hot pan for 2–3 minutes per side to form a crust. Transfer the chops to the prepared sheet pan or keep them in the oven-safe pan and bake until they reach an internal temperature of 145°F (63°C). The total bake time will vary with thickness, generally in the 8–12 minute range after searing. Rely on a thermometer for accuracy rather than eyeballing, as oven temps can vary.
Finishing to Crisp: Optional Broil and Rest
If you crave extra crispness, finish under the broiler for 1–2 minutes, watching closely to prevent burning. Resting is essential: allow the chops to rest 3–5 minutes after removal from the oven. Resting lets carryover cooking finish the job while redistributing juices, resulting in a juicier bite. Serve immediately for the best texture and flavor.
Troubleshooting: Common Pitfalls and Fixes
If the crust isn’t crispy enough, ensure the pan is hot before adding the meat and avoid crowding. Overcrowding traps steam and softens the crust. If the interior is undercooked, extend the bake by a few minutes and verify temperature with a meat thermometer. If the crust flakes, gently re-apply crumbs by patting the surface and returning to the oven for a short period. With the right balance of heat, time, and technique, you’ll consistently achieve a satisfying crust and juicy interior.
Health, Safety, and Storage Considerations
Always handle raw pork with clean hands and sanitized surfaces. Use a meat thermometer to confirm 145°F (63°C) internal temperature, then let rest before serving. Leftovers should be cooled promptly and stored in an airtight container in the fridge for up to 3–4 days. Reheat gently to avoid drying the meat; a quick 5–7 minute reheating in a 350°F (175°C) oven helps retain moisture. This approach aligns with safe cooking practices and minimizes food waste.
Flavor Variations and Serving Ideas
Experiment with different spice blends for the crust, such as Cajun, lemon-pepper, or garlic-herb mixes. Serve the chops with complementary sides like mashed potatoes, sautéed greens, or a bright apple-sauce glaze for contrast. A light drizzle of pan sauce made from the drippings can add a silky finish. These variations make the dish adaptable for weeknights or weekend dinners.
Visual Guide: What to Expect at Each Stage
Throughout the process, you should observe initial browning in the crust, a steady sizzling when placed in the oven, and a final, golden crust after the bake. The center should become opaque with a pale blush of pink close to the bone (for bone-in) and a uniform color for boneless chops. Using a thermometer ensures precision and reduces guesses, delivering consistent results.
Tools & Materials
- Pork chops (1 inch thick, bone-in or boneless)(Pat dry and trim excess fat)
- Salt and pepper(For the initial seasoning)
- Eggs (optional for dredge)(Egg wash helps crumbs adhere if using breading)
- All-purpose flour or breadcrumbs (panko)(For crust adherence)
- Olive oil or vegetable oil(Light coating for searing)
- Cast-iron skillet or oven-safe pan(For searing and oven finish)
- Sheet pan and parchment paper(Prevents sticking and simplifies cleanup)
- Meat thermometer(Target 145°F (63°C) for doneness)
- Tongs and a spatula(For turning and handling hot chops)
- Cooling rack (optional)(Air-cool after resting)
Steps
Estimated time: 40-50 minutes
- 1
Pat dry and season chops
Pat the pork chops dry with paper towels, then season evenly with salt, pepper, and your preferred dry rub. The dryness helps the crust adhere and promotes browning. Keep seasoning light on the surface to avoid soggy crust.
Tip: Dry surfaces promote even browning and crust formation. - 2
Prepare the coating
Set up a breading line: flour or breadcrumbs in one bowl, eggs in another (optional), and seasonings in a third. If using breadcrumbs, mix in a pinch of garlic powder or paprika for color and aroma. Dip each chop in the egg wash (if using) and coat thoroughly.
Tip: Keep a shallow depth in each bowl to ensure even coating. - 3
Preheat and prep pans
Preheat the oven to 425°F (218°C) and place parchment on a sheet pan. Heat a cast-iron skillet on the stove with a thin coat of oil until shimmering. The hot pan is key for a crust that stays crisp after baking.
Tip: A hot pan stabilizes crust formation. - 4
Sear the chops
Sear each chop in the hot skillet for 2–3 minutes per side until a crust forms. This step seals juices and builds texture. Do not crowd the pan; work in batches if needed.
Tip: Keep the crust undisturbed for a clean, even sear. - 5
Bake to finish
Transfer the seared chops to the parchment-lined sheet pan or keep in the oven-safe pan. Bake for 8–12 minutes, checking internal temperature with a thermometer. Remove once they reach 145°F (63°C).
Tip: Use thermometer for precise doneness. - 6
Optional crisp finish
If you want extra crust, broil on high for 1–2 minutes, watching closely to prevent burning. This step adds crunch without drying the meat.
Tip: Watch closely; crust can burn quickly under broil. - 7
Rest before serving
Let chops rest for 3–5 minutes on a rack or plate. Resting redistributes juices and improves juiciness when cut.
Tip: Rest is essential for a juicy bite. - 8
Serve and store
Serve hot with sides of your choice. Store leftovers in a sealed container in the fridge for up to 3–4 days and reheat gently to preserve moisture.
Tip: Reheat slowly to avoid drying.
Questions & Answers
Can I use bone-in pork chops with the oven-fried method?
Yes. Bone-in chops stay juicier but require slightly longer cooking. Use a thermometer to ensure the center reaches 145°F (63°C).
Yes, bone-in works fine; just expect a bit more time and use a thermometer to hit 145 degrees.
What temperature should I preheat the oven to for best results?
Preheat to 425°F (218°C). This high heat helps develop a crust while the chops finish cooking inside.
Preheat to four twenty-five degrees for a crisp crust and juicy center.
How can I tell when the pork is fully cooked?
Aim for an internal temperature of 145°F (63°C) and let the meat rest for 3–5 minutes before serving.
Check that the inside hits 145 degrees and rest briefly before serving.
Can I prepare this in advance and reheat later?
Chops can be prepared with coatings ahead, but best results come from baking and serving fresh. Store leftovers refrigerated and reheat gently.
Yes, you can prep ahead and reheat, but finish cooking close to serving time for best texture.
Is it possible to use an air fryer instead of the oven?
An air fryer can yield a similar crust with less time, but the oven method described here emphasizes browning with pan searing and a gentle bake.
You can use an air fryer, but this guide focuses on the oven method with sear-and-bake.
Should I oil the crust or the pan?
Lightly oil the crust or the pan so the coating adheres and browns evenly without steaming the meat.
Light oil on the crust helps browning without steaming.
Watch Video
Main Points
- Choose 1-inch chops for best balance of crust and juiciness
- Preheat oven and pan for consistent browning
- Seared then baked yields a crisp crust and juicy interior
- Internal temp of 145°F with a brief rest ensures safety and moisture
- Broil briefly for extra crunch if desired